Free Ohio Star Barn Quilt Pattern
Looking for a fun and easy DIY project to add a little farmhouse charm to your home? This 12 x 12 inch free Ohio Star barn quilt pattern is a beautiful way to bring traditional quilt designs to life using paint and wood!
You don’t need to know how to sew or piece together fabric to make this project. Instead, you’ll use a small wooden square, acrylic paint, a ruler, and painter’s tape to create a pretty geometric star design.
For this free Ohio Star barn quilt pattern, I’m using shades of purple and lavender with a creamy white background. You can easily change the colors to match your home or seasonal decor. It’s super fun to make these for holiday gifts using the colors that match your recipients home.
This small barn quilt is perfect for displaying on a shelf, hanging on a wall, or giving as a handmade gift.
Get a Free Pattern Every Friday

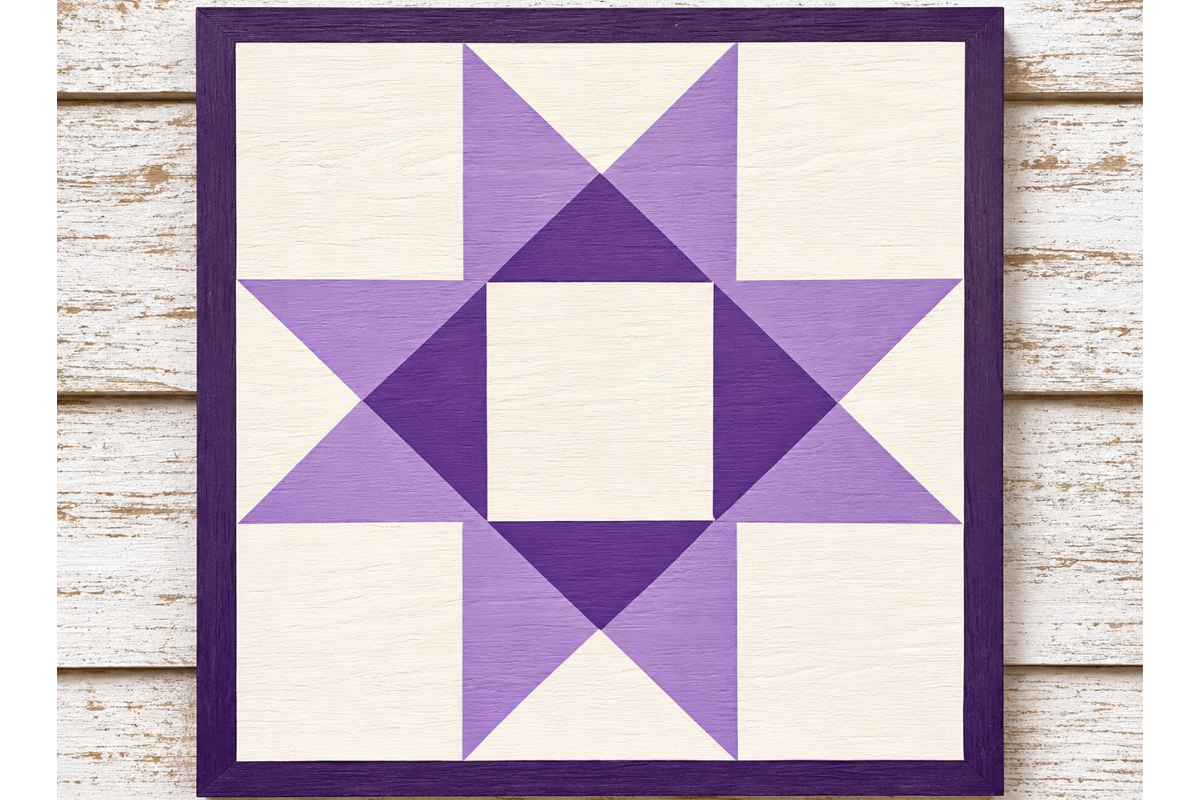
Finished Free Ohio Star Barn Quilt Pattern
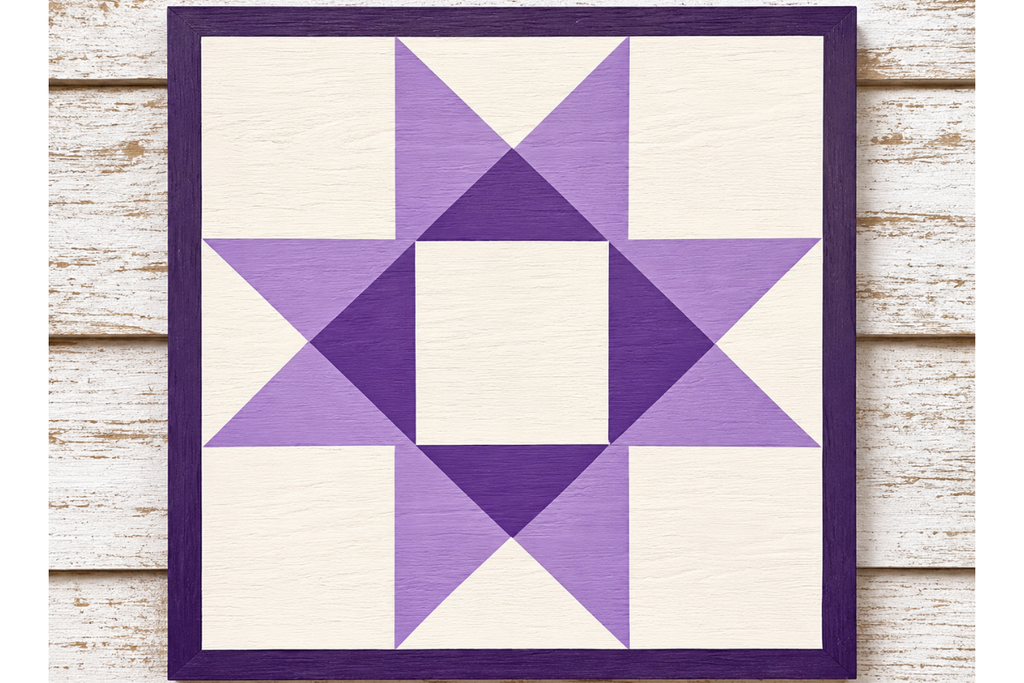
The finished free Ohio Star barn quilt pattern measures 12 x 12 inches.
The design features:
- A traditional-inspired star pattern.
- Light lavender and dark purple triangles.
- A cream-colored background.
- A deep purple outside border.
You can use the same layout with any combination of paint colors.
Supplies You’ll Need
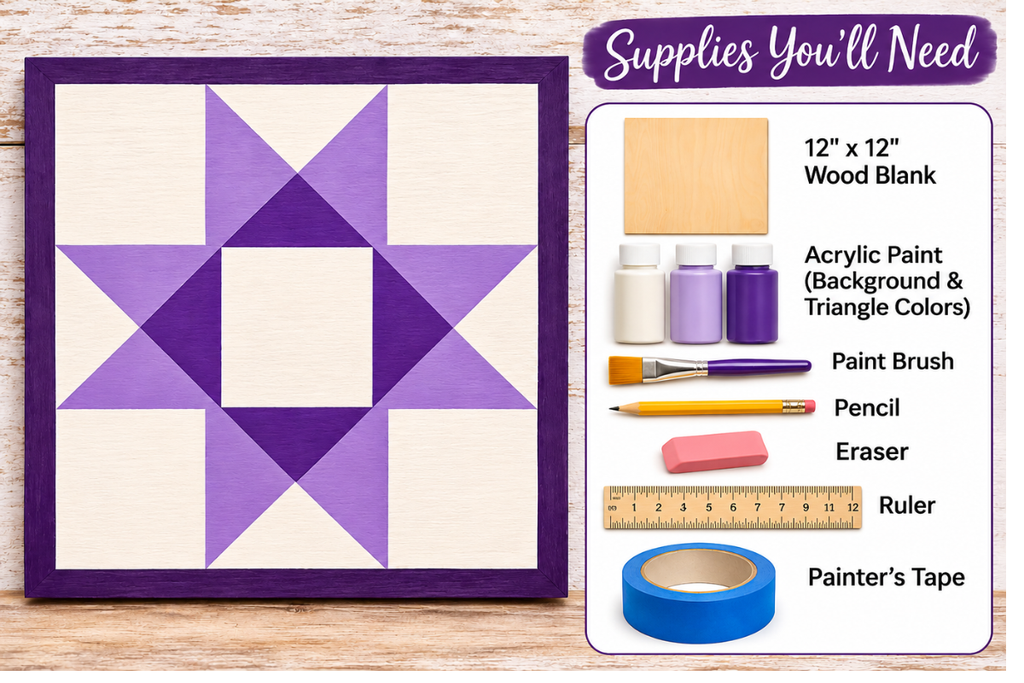
Here is what you’ll need to make this free Ohio Star barn quilt pattern:
- 12 x 12 inch wood blank
- Acrylic paint for the background and triangles
- Paintbrush
- Pencil
- Eraser
- Ruler
- Painter’s tape or artists tape
Paint Colors I used for my free Ohio Star barn quilt pattern:
For my example, I’m using:
- Cream or off-white for the background.
- Light lavender for the lighter star sections.
- Medium or dark purple for the darker star sections.
- Deep purple for the outside border.
You can use craft acrylic paint from your local craft store or you can find them on Amazon.
Step 1: Prepare Your Wood
Start with a smooth 12 x 12 inch wooden square.
If your wood has any rough areas, lightly sand the surface with fine-grit sandpaper.
Apply a coat of cream or off-white acrylic paint to the entire front of the board. This will be the background color for your barn quilt.
Allow the paint to dry completely before moving to the next step.
Step 2: Draw Your Quilt Grid
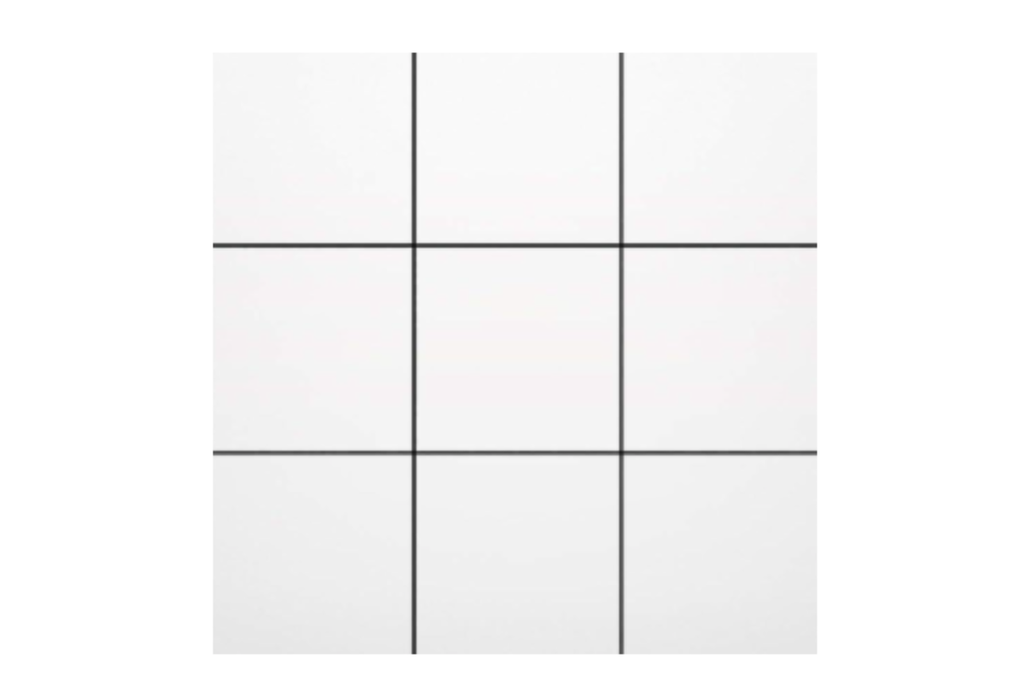
Using a ruler and pencil, lightly mark your design.
The pattern is arranged in a three-by-three grid, with four cream-colored corner sections, a cream-colored center square, and four star sections surrounding the center.
For this example, use a narrow border around the outside of the design.
If you use a 1/2-inch border, your inside painting area will measure 11 x 11 inches.
Divide this area into three equal sections in each direction. Each section will measure approximately 3 2/3 inches.
Draw your horizontal and vertical guidelines lightly with a pencil.
Tip: Don’t press hard with your pencil. You want the lines to be light enough to erase if necessary.
Step 3: Create the Star Pattern
Now it’s time to create the star!
The star is made up of geometric triangles in the four sections surrounding the center square.
Use your ruler to mark diagonal lines from corner to corner in each of these four sections.
These diagonal lines will help you create the triangle shapes.
Follow your color layout:
- Use light lavender for the outer star sections.
- Use dark purple for the inner triangles that point toward the center.
- Keep the four corner sections cream.
- Leave the center square cream.
Make sure the colors are arranged symmetrically so the star looks balanced.
Step 4: Use Painter’s Tape
Painter’s tape makes it much easier to create straight, clean lines.
Place the tape along the pencil guidelines to protect the areas you don’t want to paint.
Work on one color section at a time.
Press the tape down firmly, especially along the edges where two colors meet.
You may want to use smaller pieces of tape for the diagonal lines.
Step 5: Paint the Triangles
Start with the light lavender paint.
Use a small paintbrush to fill in the designated triangles. Try to keep the paint inside the taped areas.
Allow the paint to dry before removing the tape.
Next, repeat the process with your darker purple paint.
Work slowly and allow each color to dry before moving on to another section.
If you notice any uneven edges, you can touch them up with a small paintbrush.
Step 6: Paint the Outside Border
Once the star pattern is finished, paint the outside border deep purple.
Use painter’s tape to protect the cream background and keep the border edges straight.
Allow the paint to dry completely.
Step 7: Remove the Tape and Finish
Carefully remove all the painter’s tape.
If you notice any pencil marks, use a clean eraser to remove them. Make sure the paint is completely dry before erasing.
Touch up any small areas that need additional paint.
If you plan to display your barn quilt outdoors, apply a clear exterior sealer according to the manufacturer’s directions.
Allow everything to dry before displaying your finished project.
Tips for Making a Beautiful Barn Quilt
Use light pencil marks. Heavy pencil lines can be difficult to cover with lighter paint colors.
Let each color dry. This helps prevent colors from smearing when you remove the painter’s tape.
Use a small brush for corners. A smaller brush makes it easier to paint sharp points and narrow areas.
Choose coordinating colors. Two or three shades of the same color create a pretty dimensional effect without making the design too busy.
Don’t rush the tape removal. Carefully peel the tape away to help keep your painted edges neat.
Frequently Asked Questions
What size wood do I need for this barn quilt?
You’ll need one 12 x 12 inch square wooden board. The finished project measures 12 x 12 inches, including the painted border.
Can I use different paint colors?
Absolutely! You can use any combination of acrylic paint colors. Red, green, and cream would be pretty for Christmas, while blue and white would create a lovely farmhouse look.
Do I need to be an experienced painter?
Not at all! This is a beginner-friendly project. The geometric design is made with straight lines and triangles, so painter’s tape and a ruler will help you create the pattern.
Can I hang my barn quilt outside?
Yes! Use exterior-appropriate paint and a clear outdoor sealer to help protect the wood from moisture and weather. Follow the product instructions for outdoor use.
Enjoy Your Finished Ohio Star Barn Quilt!
I love how a simple piece of wood and a few paint colors can create such a pretty quilt-inspired decoration.
This 12 x 12 inch Ohio Star barn quilt is a fun afternoon project and would look lovely displayed on a shelf, in a craft room, or as part of your farmhouse decor.
Try making another one in different colors to create a collection of small painted barn quilts!
Fabric Giveaway
Enter our monthly fabric giveaway. Simply complete the tasks daily and you will be entered into the drawing. Winner will be randomly drawn on the first day of the month and notified via email