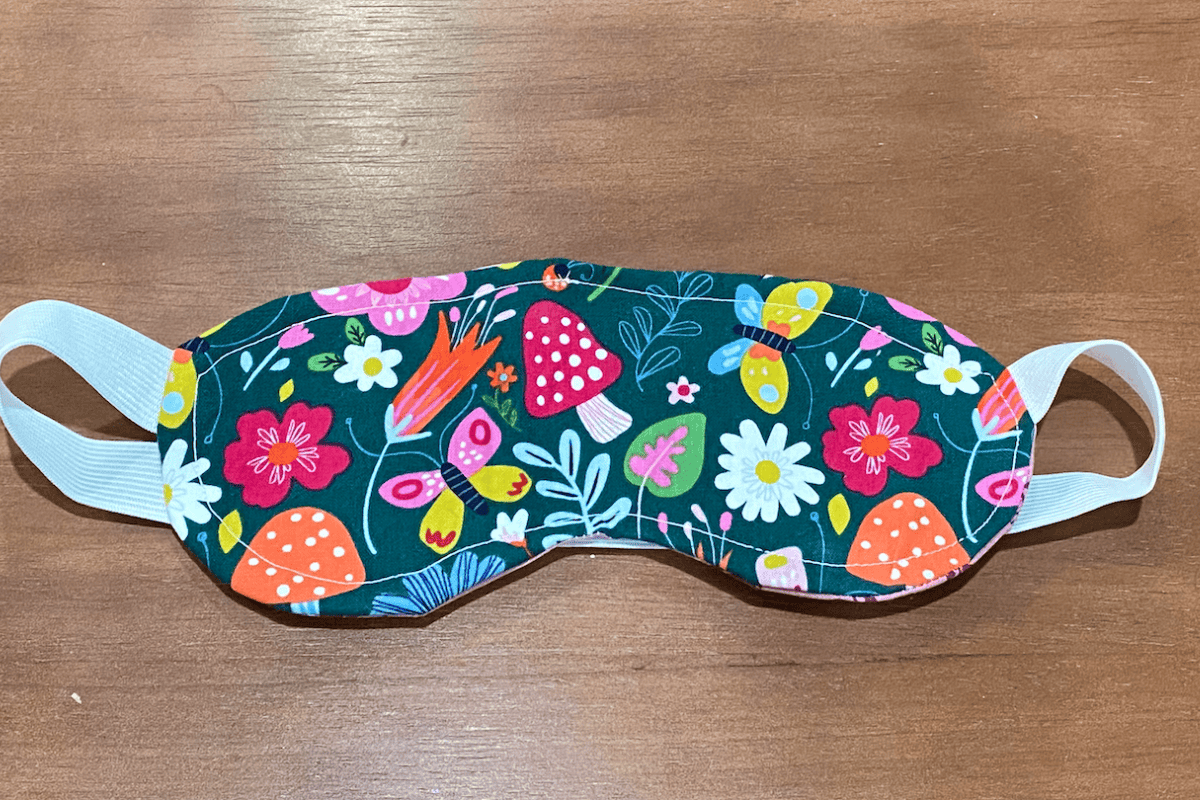
Easy Sleep Mask Pattern
Are you like me and maybe not the best sleeper. Every little light wakes me up. I decided that I would create a sleep mask pattern and see if that would help.
This pattern is so simple, and you will definitely love it, helping you sleep more sound.
So let’s grab your supplies and make this sleep mask pattern. It took me about 30 minutes from start to finish.

Photo Credit: Nanasewing.com
Sleep Mask Pattern Supplies:
- 2 fabrics for mask (Flannel is super soft)
- Fusible fleece interfacing
- Elastic strap
- Free Pattern (in our library)
Sleep Mask Pattern Construction
You can watch the video below. It’s on our YouTube channel for our visual learners.
First, you want to print your free pattern file at 100%. On the outside line, you will cut 2 pieces of fabric. This fabric will go towards your eyes, so make sure it’s soft enough for your tastes.
Next, you will cut your fusible fleece interfacing using the dotted line. Take your outside pattern piece and apply your fusible interfacing following the instructions to the wrong sides.
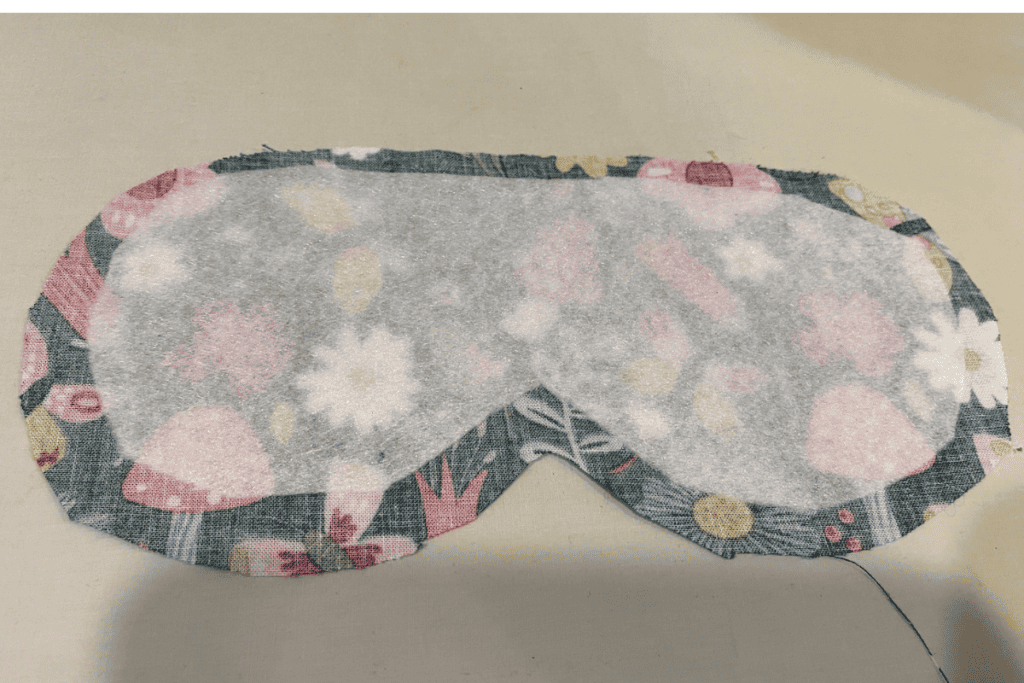
Photo Credit: Nanasewing.com
Next, you want to cut your elastic band. I recommend that you put it around your head and give yourself 1 extra inch.
Assembling your free sleep mask pattern
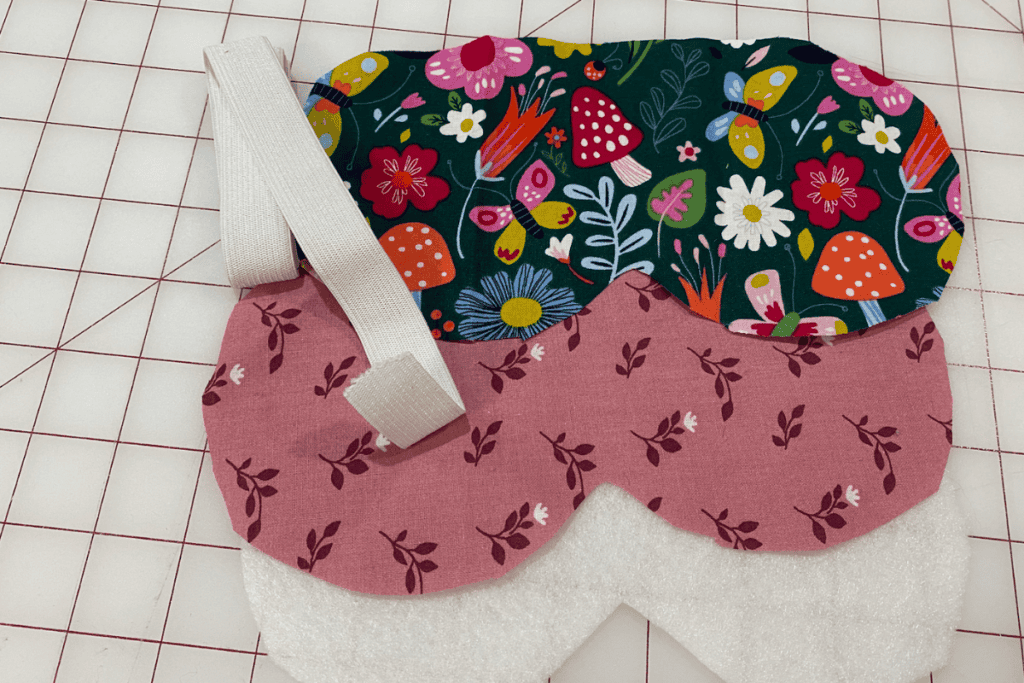
Now it’s time to assemble your homemade sleep mask. Take your main fabric and your inner fabric and put your right sides together.
You also need to put the elastic ends matched up where you see the line on your pattern. I overlapped the end of the elastic slightly to make sure I caught it when I was sewing it. I simply cut off the edges when I was finished sewing before I turned my DIY sleep mask pattern to the right side.
Use your sewing clips or pins to hold everything in place. Make sure that your elastic edge is held in place well before you begin sewing your eye mask pattern.
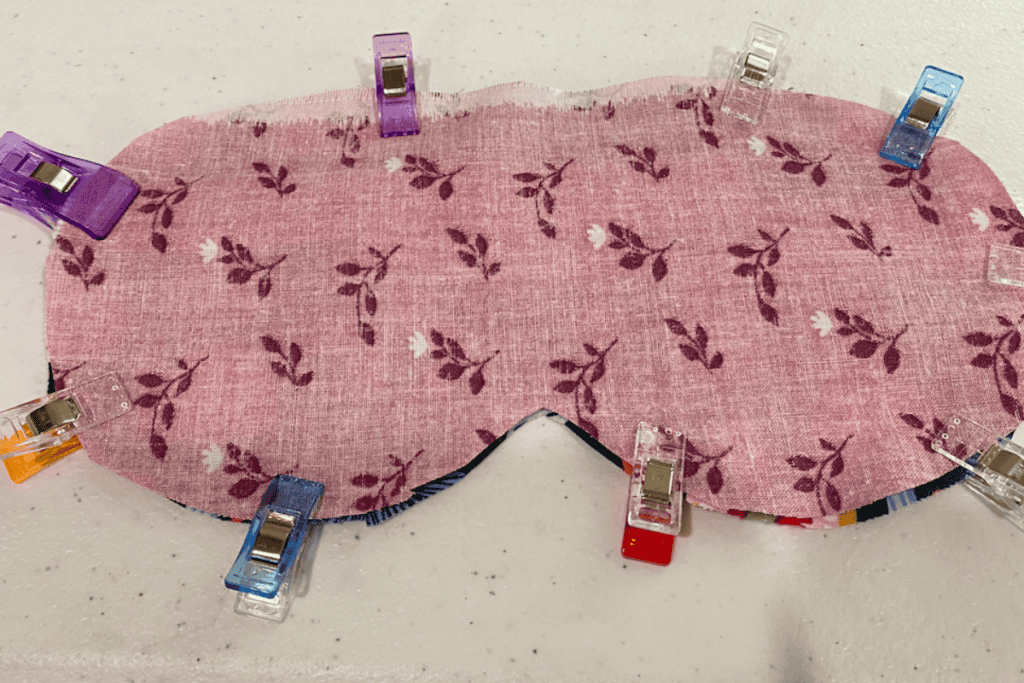
Photo Credit: Nanasewing.com
Now you want to sew around the edges using a 3/8 inch seam allowance on your sewing machine. You want to leave about a 2 inch space open on the top so you can turn your outer fabric after you are finished sewing.
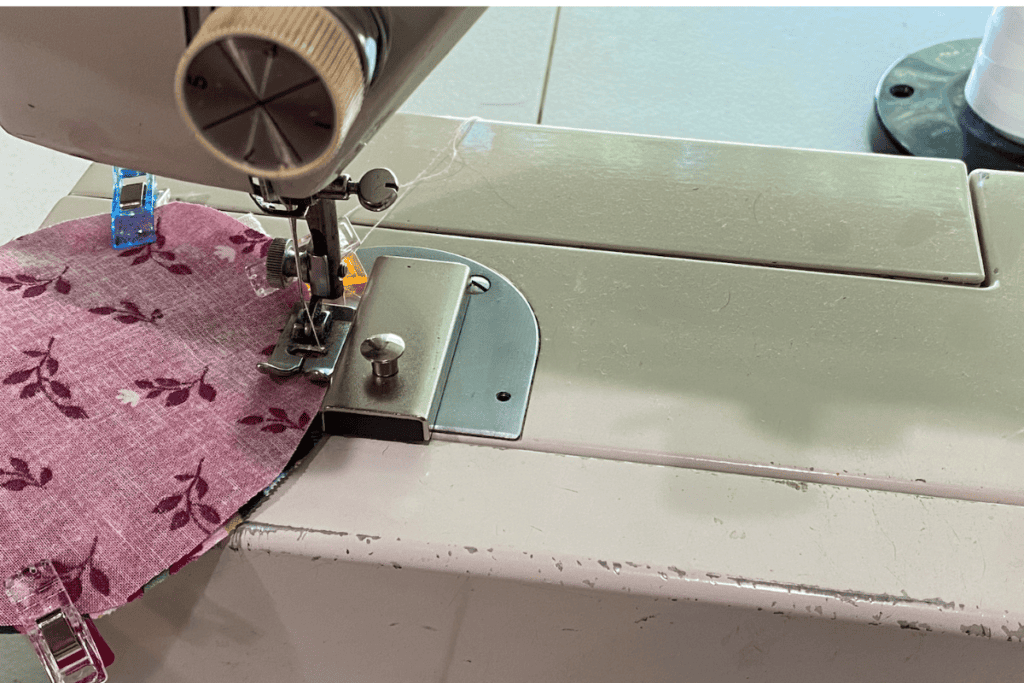
Photo Credit: Nanasewing.com
I did reinforce the elastic by back stitching across the elastic just to make sure it stays in place. Once you are finished sewing it, you want to turn your pieces so that the outside (right sides) are showing.
Now top stitch around the top making sure to close your hole. Congrats, you have made your own sleep mask that you will enjoy for years to come. it’s perfect for light sleepers. If you are feeling really ambitious you could do a silk sleep mask. Just know you will need to use a different needle and the best fabric for that easy project.
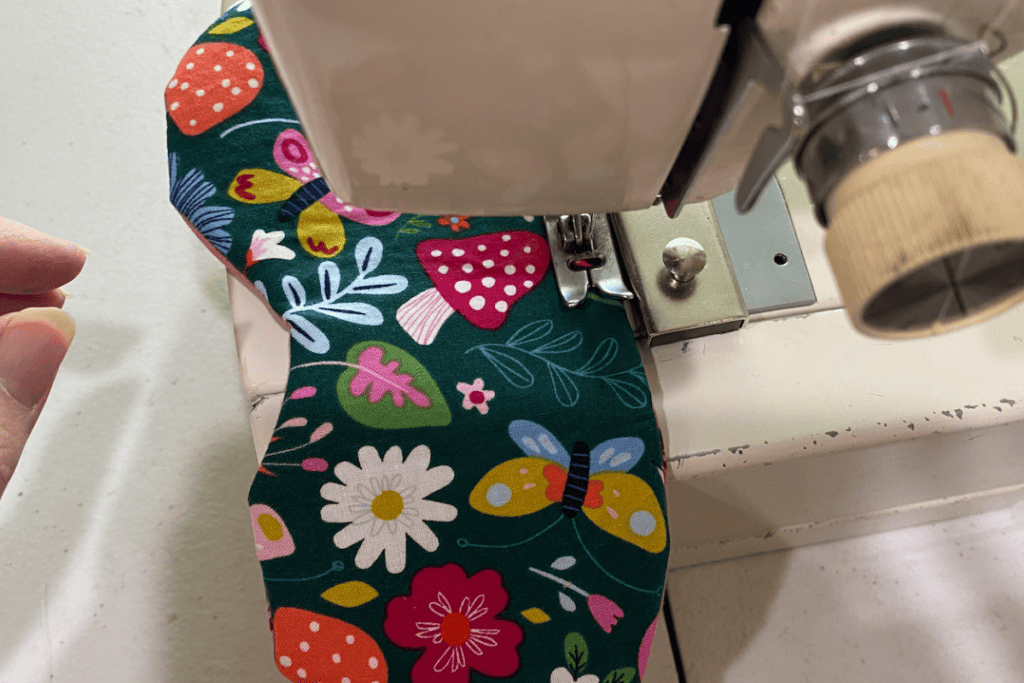
Photo Credit: Nanasewing.com
This is such an easy project because all sewing skills can do this. It makes a great homemade gift. Add in some bath bombs or bath salts.
We hope you enjoyed this sewing pattern. We love creating patterns that are a great way for beginner sewers to create a small project without frustration. This is definitely one of them.
For more beginner sewing projects, check out our library of easy sewing projects.
Fabric Giveaway
Enter our monthly fabric giveaway. Simply complete the tasks daily and you will be entered into the drawing. Winner will be randomly drawn on the first day of the month and notified via email