
Easy Hanging Kitchen Towel Pattern You Can Make In 1 Hour
I was needing new towels for my kitchen and couldn’t find a hanging kitchen towel I loved. I came across this pattern and adapted this hanging kitchen towel pattern to match my kitchen.
I love that you can easily make this in an hour or less. I used kitchen towels and fabric from Amazon. You can easily customize these for your kitchen decor.
PS They also make great gifts. I already have people asking to buy hand towels after seeing it on social media. These would be great if you want to make extra money or do a craft fair.
Sewing Supplies

Here are the sewing supplies you will need
- Cotton fabrics or 1 fat quarter for each piece
- Seam guide
- Hand Towel (Use a new towel)
- Rotary Cutter
- Quilters Ruler
- Self Healing Cutting Mat
Cut Fabric
You need to cut your pattern pieces for your hanging towel. Remember if you have scrap fabric, this is the perfect time to use them.
- 1 strip 5’’ x 42’’ (or WOF) for the ruffle
- 1 strip 3 1/2’’ x 42’’ (or WOF) for the tie
- for FAT QUARTERS: 5″ x 21″ (cut 2) and 3 1/2″ x 21″ (cut 2)
Sew Your Fabric Pieces Together (If you used fat quarters)
You will want to sew your 2 pieces together 1/4″ seam allowance making sure you have right sides together if you used a fat quarter ONLY. With a hot iron, iron your seam one direction.
Cut Your Towel Edge
You need to cut off one edge of your towel. This is where you will be putting your ruffle.
Create Your Ruffle Hem
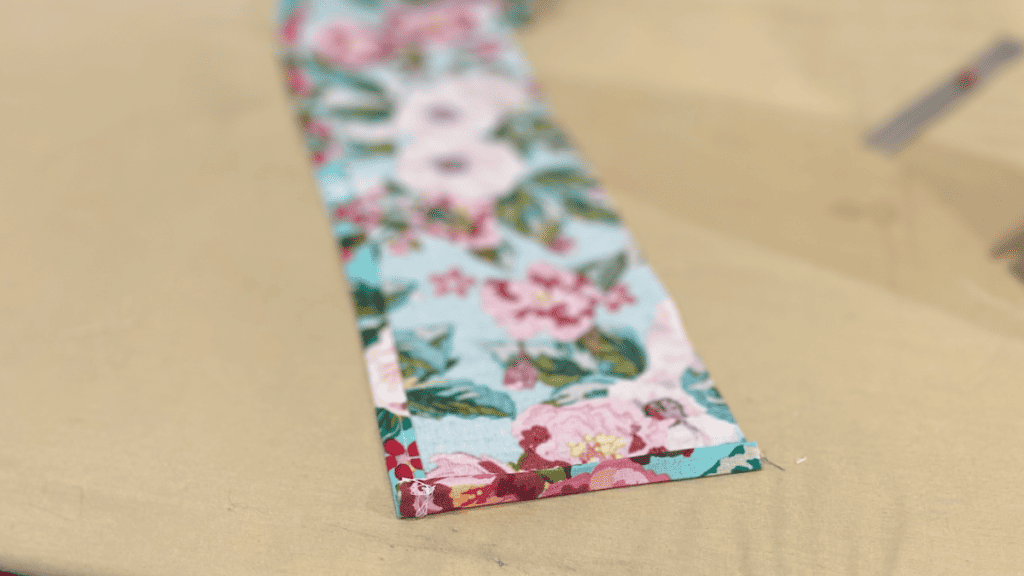
You want to create a hem around 3 edges of your ruffle. 1 long and both short sides. I started with the long side and turned 1/4″ twice and pressed. I sewed that down staying on the edge of the hem.
Next, turn your short sides in again 1/4″ twice creating a hem. You should have 1 long side with no hem. You will use this to gather your fabric.
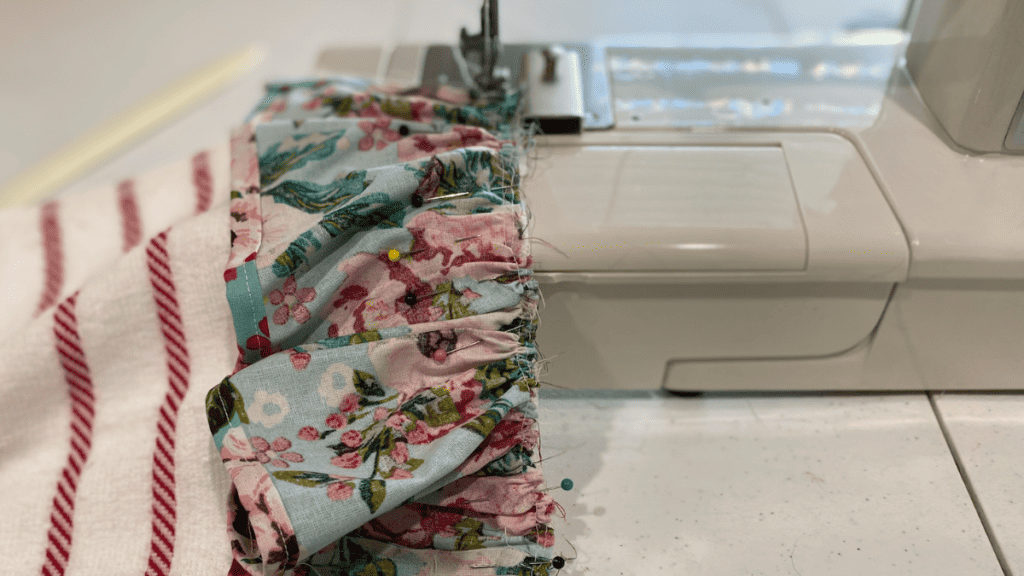
Gathering Stitches
Sew 1 or 2 long rows of basting stitches (long stitches) 1/8’’ – 1/4’’ away from the long raw edge for gathering. Leave really long threads at either end to make them easy to pull.
I found it easier to pull thread until I gather half of it to the middle and then did the other side. This is a great way to gather with confidence. This can be hard, take your time and gather as you go so it doesn’t bunch up all in one place.
You want your gathered ruffle to fit across your hanging dish towel. Simply take your time until you get it where it needs to be.
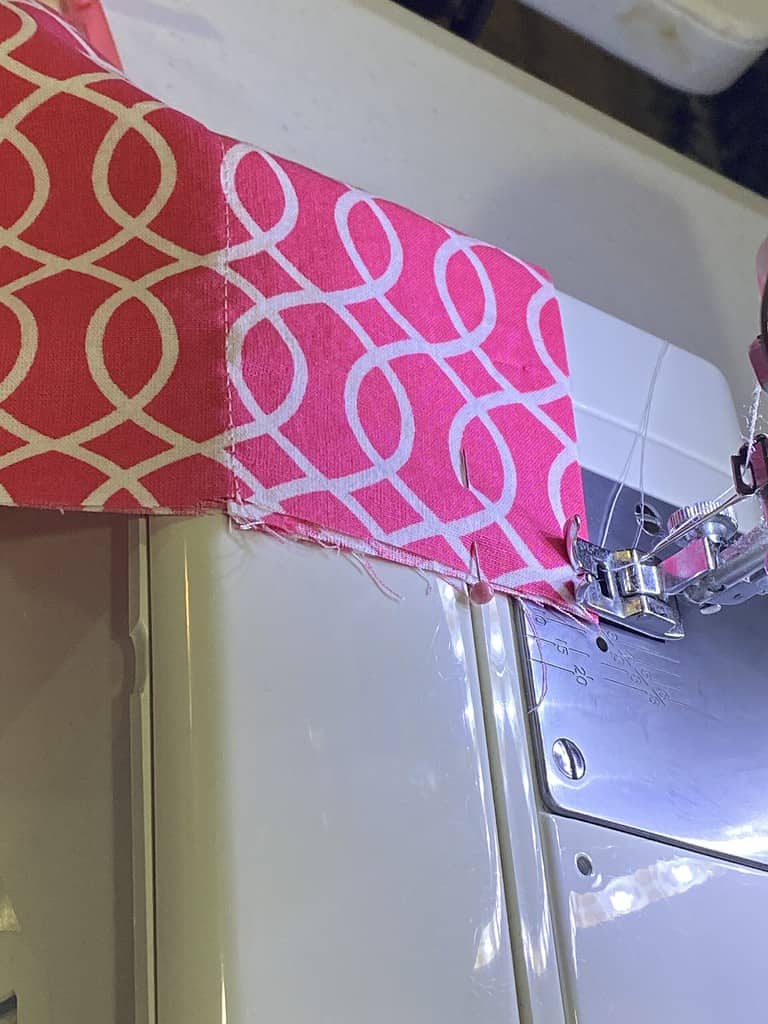
Attach Your Ruffle
Now you want to attach your ruffle to the front of the towel. You want to find the middle of your gathered ruffle making sure you have equal gathering on both sides. Find the middle of your towel and with right sides together, you want to attach your ruffle to your towel.
Make sure and use a lot of pins. This part is tricky when sewing, so it’s a great idea to use lots of pins and to sew slowly.
PS Don’t forget to change your long stitch back to your regular stitch. You want to slowly sew over your gathered stitches making sure to back stitch at the beginning and end.
Take your time and sew a 1/2″ seam allowance.
On the next step, when you finish cut any old thread off cleaning up all the string on your long edge. This will just help with the look of your finished product.
How To Create Tie of Hanging Kitchen Towel Pattern
Now you are on the final steps of your hanging kitchen towel pattern. Grab your tie fabric and let’s get started.
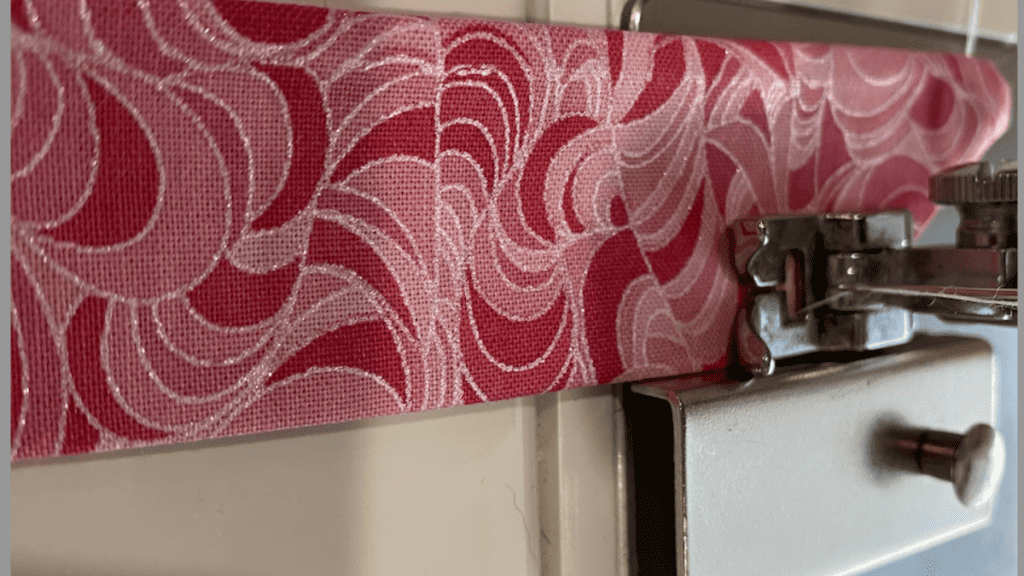
First, you need to fold your piece of fabric length wise with right sides together. I ironed it to hold it in place. You can also use sewing clips or sewing pins.
Second, you want to measure in 1 1/2″ on the raw edges and create a diagonal from that spot to the corner. You will then take your rotary cutter and cut that line on a diagonal.
Third, you will use your sewing machine to sew a 1/4″ seam allowance all the way around, leaving a 2″ opening on one area of your wrong side to pull your fabric through when finished.
Fourth, trim the corner edges near your top edge where your diagonal is. When finished, pull your fabric through and make sure your corner are poked out with a sewing pin.
Now you want to iron your piece, making sure you close up your hole by folding each area in and ironing them closed.
Finally, top stitch all the way around your ribbon, and then you will be ready to attach it. You are nearly done with your hot pad. Just a few more steps.
Attach Your Ribbon
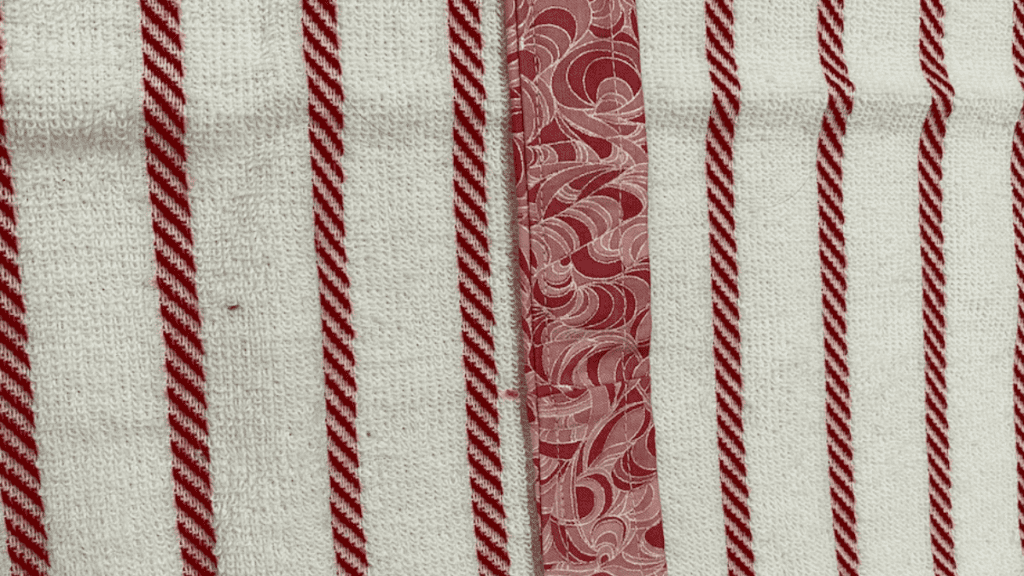
These are the last steps for your towel holder. I can’t wait to see your finished towel.
Place the towel with the ruffle facing upwards onto your workspace. Identify the midpoint of the towel, positioned 11 inches above the bottom hem.
Next, create a line measuring 4 inches in length. This line should be located 11 inches from the hem and should extend 2 inches on either side of the midpoint mark.
Place your ribbon in the center of the width of the towel. Use your sewing pins to mark your 2″ marks on both sides of the center.
You will then top stitch a rectangle on your ribbon from the center to your 2″ mark going around until you reach your starting spot.
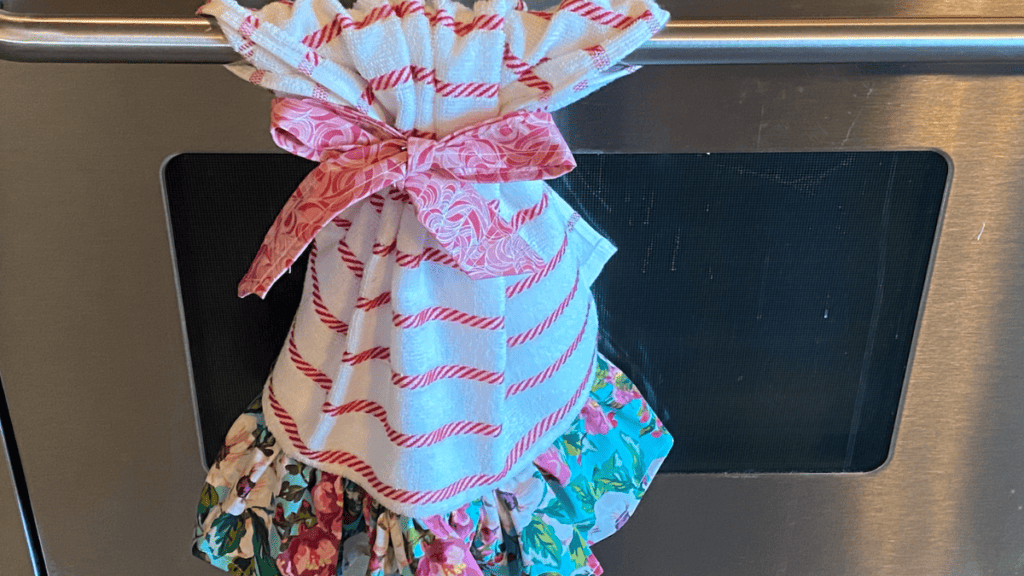
Congrats, you now have a finished hanging kitchen towel pattern. Make sure and share on social media or in email. I would love to see this completed simple project.
Hanging Kitchen Towel Pattern PDF
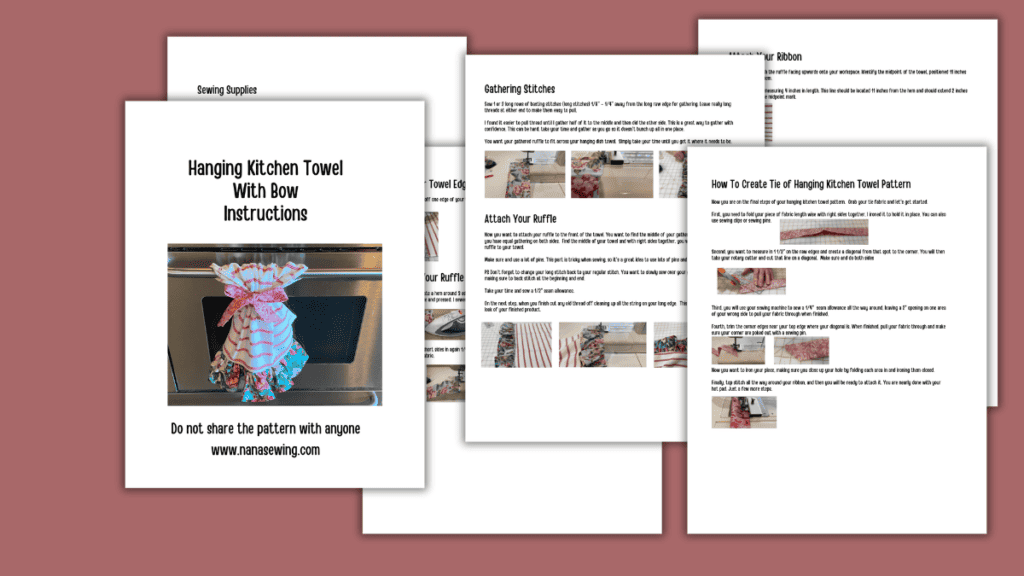
We have a PDF version for you. Each written step has more photos, and you get support if you have questions via Etsy. You will find the link above.
Fabric Giveaway
Enter our monthly fabric giveaway. Simply complete the tasks daily and you will be entered into the drawing. Winner will be randomly drawn on the first day of the month and notified via email


I use the kitchen towels everyday in my kitchen and yes that’s a very good idea. I will definitely use it and make those attachments on the towels. thank you.