How To Sharpen Scissors Easy Home Guide
Keeping your scissors sharp isn’t just about maintaining a clean cut; it’s a fundamental aspect of tool care that extends the life of your scissors and makes cutting tasks easier. Every quilter and sewer needs to learn how to sharpen scissors.
Whether you’re snipping fabric, slicing through paper, or trimming hair, the performance of your scissors can dramatically affect the precision and ease of your work.
Luckily, sharpening scissors is a straightforward process that doesn’t require much time or a broad set of tools.
If you are going to do this DIY, before you start, identifying the right tools is essential. At the very least, you’ll need a sharpening stone or a specialized scissor sharpener, which can be found at most hardware stores.
The best way to sharpen your scissors will depend on the type of scissors you have and the condition of the blades.
For example, sewing scissors might need a different approach compared to general-purpose kitchen shears. Each type of scissor will have its own method, angle, and tools for optimal sharpening.
I recommend checking your local community at a fabric store or even a knife sharpening store and see if they offer professional sharpening services.
I am going to give you DIY options below but honestly if you aren’t careful you will dull the blade of the scissors or even damage them. Somethings the professional needs to do.
Understanding Scissor Sharpening
When your scissors begin to squish rather than slice, it’s time to get them back in shape. Let’s break down how to recognize when those blades are due for a tune-up, dig into the different types and their specific needs, and separate the sharpening facts from fiction.
Identifying Dull Scissors
You’ll know your scissors are dull when the edge fails to make a clean cut, and you may see visible nicks on the blade.
Fabric shears should slice through material smoothly, while dull blades chew or snag the fabric. For kitchen knives and scissors, a clear sign is difficulty in cutting thin materials like paper or plastic.
Types of Scissors and Their Uses
Every pair of scissors has a design tailored for its use. Fabric shears are meant for textiles and should stay in the craft room, while kitchen knives and scissors need to withstand the rigors of food prep.
The distinction between left-handed and right-handed scissors lies in the blade setup; it ensures a clean cut with comfortable handling according to your dominant hand.
- Fabric shears: Textiles only
- Kitchen scissors: Food-related tasks
- Left-handed: Blades set for left-hand use
- Right-handed: Blades set for right-hand use
My husband, kids and grandkids will tell you that nana’s sewing scissors better not be used for cutting paper. They are my essential tools and the sharpness of the scissors matters and paper dulls the blade edges. Using my scissors for paper is a quick way to get on my naughty list.
Sharpening Myths Versus Facts
There’s a pile of misinformation out there. For instance, it’s a myth that you can sharpen scissors by cutting aluminum foil — this can actually damage the blades further. Sharp scissors need proper honing with the correct tools or technique, not home hacks.
An important fact: Regular maintenance keeps a good pair of scissors sharp for longer, ensuring you’re ready to cut at a moment’s notice.
How To Sharpen Scissors
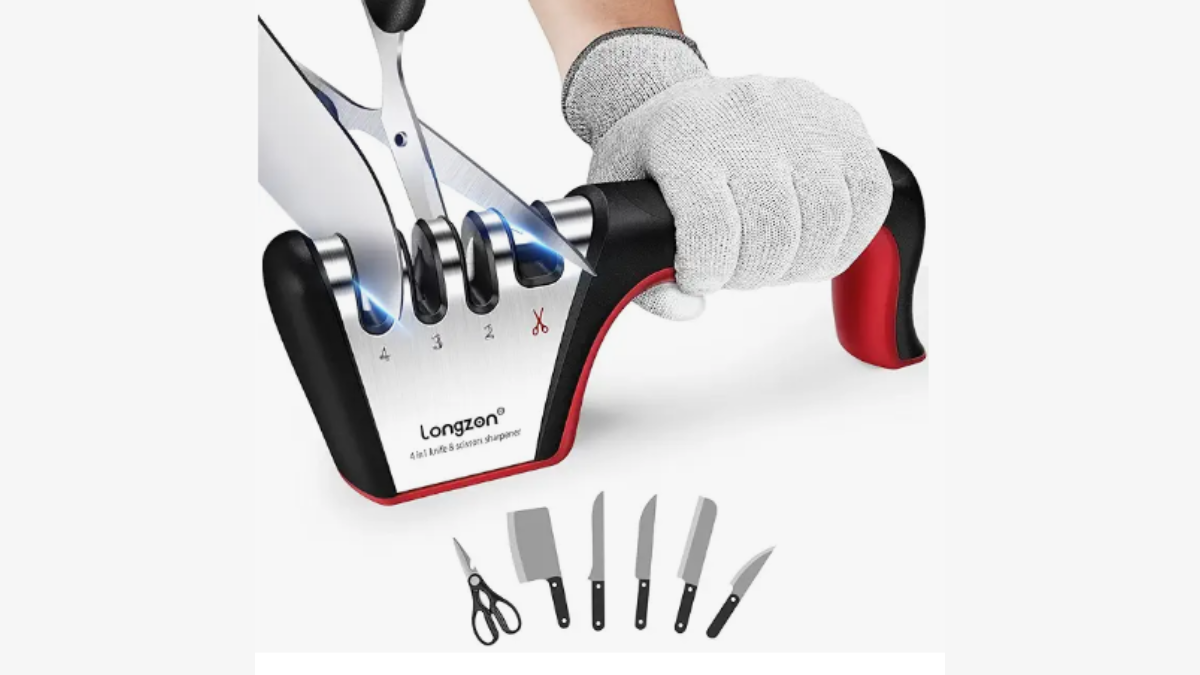
Check Prices: Scissor sharpener
Before diving into sharpening your scissors, it’s crucial to select the right tools and set up your workspace properly. This ensures a safe and effective sharpening process.
Selecting the Appropriate Sharpening Tool
To get those scissors cutting smoothly, you’ll need a sharpening stone, often referred to as a bench stone.
These stones typically have two sides: a coarse side for initial sharpening and a fine grit side for finishing touches. Make sure you’ve got an angle guide handy, too; this tool will help you maintain the correct angle while sharpening the blades.
Setting Up the Workspace
Firstly, clear out a spot preferably near your kitchen drawer or in your sewing room where you normally keep your scissors; it’s good to have a flat and stable surface.
Lay out a paper towel to catch any metal filings. It’s a smart move to have a permanent marker by your side to mark the edge of the scissors’ blade and verify that you’re actually sharpening the entire cutting edge.
Finally, keep a piece of paper to test the sharpness later on, and maybe a piece of aluminum foil as an alternative sharpening material if you’re interested in trying a non-traditional method.
The Sharpening Process
Before you start sharpening those dull scissors, it’s essential to understand the technique and care needed to restore a sharp edge. Proper sharpening will extend the life of your scissors and ensure a clean cut every time.
Traditional Stone Sharpening
First, make sure to clean the scissor blades thoroughly. Then, grab a sharpening stone—preferably a whetstone with a coarse and fine side. Start with the coarse side.
Soak the stone in water as per its instructions; this helps in the sharpening process. Take the scissor blade and place it flat on the stone. Hold it by the handle and maintain a consistent angle—roughly 10 to 20 degrees—tilting it to match the original beveled edge.
Apply light pressure and sweep the blade across the entire length of the stone, from the base of the blade to the tip. This is considered one full stroke. Repeat this around 10 to 15 times for each blade, always sweeping away from your body.
Then, flip the stone to the fine side and give each blade another 10 full-stroke cuts to hone the entire edge.
Alternative Sharpening Methods

Check Prices: Fiskars Scissor Sharpener
If you don’t have a sharpening stone, don’t worry. There are other techniques you can use. Fine-grit sandpaper can be an effective alternative. Lay the sandpaper on a flat surface, grit side up.
Cut through the sandpaper with full-stroke cuts several times as if you are slicing through fabric. This method subtly grinds down rough spots and can sharpen the cutting edge.
Some people even use aluminum foil. Folding several layers into a thick strip and cutting through them with full strokes can improve the blade’s sharpness.
Another method involves using a mason jar or another smooth, cylindrical object. Open the scissors all the way and, holding the jar in one hand, use the other to run the inner edge of the blades against the glass surface in a smooth cutting motion.
You can also find scissors sharpener on Amazon and Joann’s. I personally haven’t tried them, but I was in Hobby Lobby buying fabric and that is what the ladies were using to sharpen their scissors before they cut my fabric and I was super happy with the cut.
Finishing Touches
After sharpening with either method, it’s important to remove any burrs from the back of each blade. This can be gently done with a finer stone or even a piece of fine-grit sandpaper.
Finally, with the scissors closed, draw the inner edge of the blades across the fine-grit sandpaper or stone from the base to the tip to smooth any remaining imperfections. Test the sharpness on scrap material. Your scissors should now glide through with minimal effort and deliver a clean cut.
Maintaining Scissors Post-Sharpening
After sharpening your scissors, it’s crucial to maintain their edge to ensure long-lasting sharpness. Proper care and knowing when to seek a professional touch-up are key.
Regular Care and Storage
You’ve got your scissors cutting smoothly again, nice! To keep it that way, store them properly—dry and safe. For fabric scissors and sewing scissors, dedicate a spot where they’ll only meet fabric, keeping them away from paper or plastic which can dull the blades. Kitchen shears deserve their spot, too, safe from utensils that may nick the blades.
Regular Wipes: After each use, give the blades a quick wipe to remove any residue or moisture that can lead to rust.
- Fabric scissors: Wipe down with a soft, dry cloth.
- Kitchen Shears: Clean with warm soapy water, dry thoroughly.
Proper Storage:
| Scissors Type | Storage Tip |
|---|---|
| Fabric Scissors | Store in a fabric-lined case or pouch. |
| Kitchen Shears | Hang on a magnetic strip or store in a block. |
| Sewing Scissors | Keep them in a sewing kit with protective slots. |
Usage: Only use scissors for their intended purpose to maintain sharpness over time. Resisting the temptation to cut cardboard or prune branches with your sewing scissors helps a lot.
When to Seek Professional Sharpening
Sometimes, you’ve got to admit it’s time for the pro’s. If your scissors are squashing instead of slicing or you’ve had them for a long stretch without maintenance, a professional sharpening service is your next stop.
- Fabric scissors: Consider a pro every few months, especially if you’re slicing through heavy materials regularly.
- Kitchen Shears: Once they struggle with chicken bones or herbs, seek a professional sharpening service.
Remember, a professional service often has the right tools and expertise, like avoiding a pull-through knife sharpener on your prized shears. Investing in professional sharpening can save you from the expense of a new pair and keep your scissors in top shape for a long time.
Sewing Projects:
Now that your scissors are sharp, how about a few fun projects to sew?
Quilt Patterns
See all Quilt Patterns we have currently covered and have free patterns for
Sewing Patterns
Sign up for our sewing library and get PDF patterns for all of the projects on our website we have created.
Fabric Giveaway
Enter our monthly fabric giveaway. Simply complete the tasks daily and you will be entered into the drawing. Winner will be randomly drawn on the first day of the month and notified via email