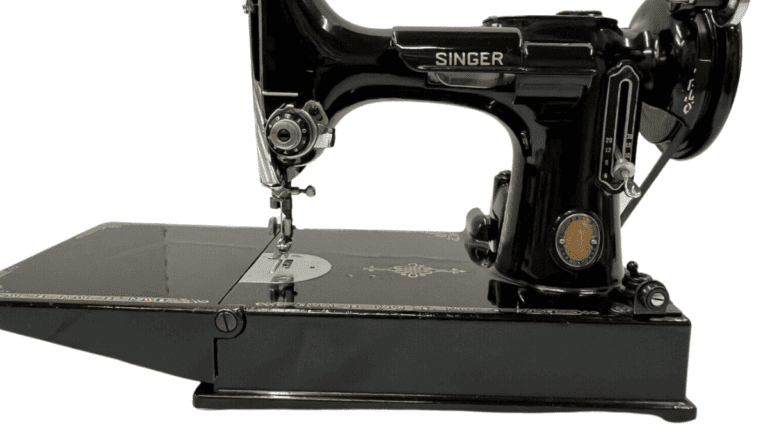
21 Common Singer Sewing Machine Stitch Problems Easy to Fix
If you sew more than one time on your Singer sewing machine, you will experience stitching problems. Today we are covering 21 common singer sewing machine stitch problems. Let’s dive into the common problems.
Table of Contents
Common singer sewing machine stitch problems
The sewing machine doesn’t stitch at all
- first, you need to make sure that the hand wheel is tightened. If you were using the bobbin winder it might have not been tightened again
- Next, you need to make sure you have pulled enough thread to the back of the machine before you start sewing. We have all left our thread short and caused the needle to unthread from the eye of the needle.
- If none of that works, just rethread the machine starting at the beginning. Simply use a needle threader and the right type of needle and re-thread your needle eye.
- Don’t forget to take out your bobbin case and make sure you have the correct bobbin and rethread your sewing machine bobbin
If none of that works but the motor keeps running and the sewing machine is not stitching you will need to have it looked at professionally.
Singer sewing machine stitch problems with stitch length
Typically, sewing machines come with a stitch length adjustment ranging from zero to five. The shortest stitch available is at zero, while the longest stitch is at five.
For most sewing projects, a straight stitch length of 3 to 4 is suitable, but if you require a robust stitch, setting the stitch length to a lower number like zero will do the trick.
For temporary stitching of fabrics, such as basting, longer stitches are preferable. Fewer and longer stitches make it easier to remove the stitching without leaving any noticeable marks. It is worth noting that removing stitches from leather or vinyl may not be possible.
Shorter stitches result in stronger seams. However, stitching a long piece of fabric with really short stitches can take a considerable amount of time. Therefore, for the best results consider how strong you need the stitches to be before selecting the stitch length.
If the sewing machine fails to respond to the stitch length setting, it might require professional servicing.
Before doing so, check a few possible solutions, including verifying that the machine can still stitch buttonholes correctly and perform other advanced stitching techniques. If tension problems still exist, there may be an electronic issue with the machine.
Singer sewing machine stitch problems with tension
The tension of the upper thread can almost always be adjusted with your top thread tension knobs. Check your sewing machine manual for the exact tension settings.
This would be how to do it on the Bernina, Singer, Brother, Kenmore, and most other modern machines. You simply turn the little wheel up or down to change it from between zero to five. Just so you know, the higher number equals, the higher the thread tension will be.
If you have the right thread tension setting, but it still doesn’t work or it is too tight, the first step is to take a moment and rethread your machine.
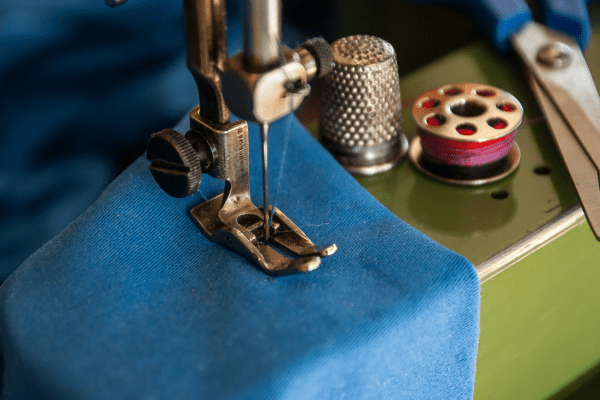
Bobbin issues
Changing the tension in your bobbin area is the last thing you want to do. It should stay the same for almost any sewing project.
You can change the tension by turning that little screw mounted on the bobbin case, but make sure changing the bobbin tension is the last thing you try. Bobbin issues don’t cause common issues
Skipping stitches
If your sewing machine is skipping stitches, the first thing to investigate is the sewing machine needle. Here’s how to do this.
Inspect the needle to see if it is bent, the wrong size, or damaged. It’s possible for the needle to become bent without you noticing it, so ensure it is installed correctly.
Even if you can’t spot any defects on the needle, it’s a good idea to replace it with a new needle before proceeding to the next step.
This issue could be due to the needle hitting the bobbin case or using the wrong needle size. Additionally, if the machine requires cleaning, it could also cause the needle to bend.
It’s a good idea to clean the machine, including making sure your feed dogs don’t have lint, and apply a small amount of sewing machine oil to the bobbin case if it hasn’t been cleaned in a while. Check for any built-up lint
In any case, examining the needle should always be the first step before moving on to further troubleshooting. Once you’ve ruled out the needle as the problem, you can proceed to the next step.
Check to see if you are using the right needle size for your sewing machine or project can cause it to skip stitches and fail to catch the bobbin thread underneath. To check for this issue, lift the presser foot and manually turn the handwheel towards you.
As the needle goes down, it should catch the bottom thread and pull it up to create a clean stitch. If this doesn’t occur, rethread both the top and bottom threads (bobbin) of your machine.

Let your sewing machine guide the fabric
It’s essential to feed your sewing machine at the appropriate speed to avoid skipped stitches.
If you hold the fabric too tightly or try to feed it too quickly, it can cause the machine to skip stitches, causing loose stitches. The machine should be allowed to “eat” the fabric at its own pace, without any force.
Having a table in front of you can make this task easier. It allows you to lay out the fabric flat and adjust the tension to suit the machine’s sewing requirements.
Failing to do so could also lead to frequent needle breaks. If the tension isn’t correct, the two threads might not meet at the proper tension and speed, causing the machine to skip stitches. Therefore, the take-up lever should tighten the stitches at its own speed.
Let the table catch the fabric
It’s advisable to use a table behind the sewing machine to prevent the fabric from falling down on the floor.
If you don’t have a table to catch the fabric behind the machine, it may put excessive pull-tension on the fabric, causing it to skip stitches.
This is especially crucial when working with heavy-duty fabrics like canvas, vinyl, denim, and others, where the added weight of the fabric can create too much pull.
Before you proceed with your sewing project, take some time to organize the fabric behind the machine and ensure that you have sufficient table space for your project.
Check the timing of the machine
If you continue to experience issues with your sewing machine, it’s possible that there may be a problem with the timing of the machine.
The needle and bobbin must be in perfect sync for the needle to catch the bobbin thread at the right time. Since the sewing machine is a complex device, this fundamental mechanism must function flawlessly. If it doesn’t, you’ll need to get it repaired.
Singer sewing machine stitch problems with jammed stitches (Thread bunching)
One of the most frequent causes of jammed stitches, also known as birdnesting, is improper threading of the sewing machine. If you’re unsure whether it’s the upper or lower thread causing the issue, try this as these are common Singer sewing machine stitch problems:
Choose a distinct color for the upper thread and a different color for the lower thread. This method allows you to identify the color of the birdnest quickly and locate the problem.
It’s highly likely that the cause of the birdnesting is the upper thread, as it’s a common mistake to forget to thread it through the take-up lever.
When this happens, the machine will not form proper stitches and instead pile up all the thread in one spot, resulting in a messy tangle of stitches known as birdnesting.
Improper threading of the sewing machine needle, particularly around the take-up lever, is a common cause of birdnesting and jammed stitches. Additionally, birdnesting can occur if you thread the machine with the presser foot still down.
To prevent this issue, always make sure to raise the presser foot before threading the machine. This ensures that the thread can properly pass through the tension discs and the take-up lever, which are crucial for forming neat stitches.
Loose stitches on the bottom of the fabric
Loose or skipped stitches on the bottom side of the fabric are often Singer sewing machine stitch problems with tension caused by issues with the bobbin thread, but not always.
If you notice loose stitches or loops forming underneath your fabric, your first step should be to rethread the bobbin thread. However, it’s also possible that the tension of your upper thread is set too low.
If the upper thread tension is set to zero, for example, you’ll likely have loose stitches on the back of the fabric.
It’s important to start with a medium thread tension for optimal results, and then adjust it up or down by one step as needed.
Loose stitches on the back of the fabric can be caused by various factors, but it is often attributed to the tension settings on the bobbin thread.
However, as mentioned earlier, the upper tension can also be the culprit. When the upper tension is set too low, the machine will not be able to tie everything together tightly inside each stitch.
This lack of tension causes the upper thread to not grab the lower thread tightly enough, resulting in loose stitches on the back of the fabric.
To avoid this, it’s important to have enough tension on the upper thread. When the take-up lever reaches its top position, it should tie the stitch tightly.
Setting the upper thread tension to a medium level can often produce good results. From there, you can adjust the tension up or down by one step if necessary.
If adjusting the upper tension doesn’t solve the problem, you can then look at adjusting the tension of the bobbin thread. However, it’s worth noting that adjusting the tension of the bobbin thread is not a common practice, as it is typically set correctly from the factory and rarely needs to be changed.
Singer sewing machine stitch problems with stitches with loops
When dealing with loose stitches on the back of your fabric, it’s easy to assume that the problem lies with the bobbin thread.
However, there are times when the issue is caused by the tension of the needle thread. If the tension is not set correctly, the take-up lever will not be able to tie each stitch correctly, leading to loops on the back of the fabric.
To address this issue, the first thing you should check is the tension of the upper thread. Start with a tension setting of around 3-4 and work up one step if necessary.
It’s essential to have enough tension on the upper thread to allow the machine to tie everything together inside each stitch. When the take-up lever reaches its top position, it will tie the stitch.
If there isn’t enough tension on the upper thread, it won’t be able to grab the lower thread tightly enough to create tight stitches.
If adjusting the upper thread tension doesn’t solve the problem, you might have to consider changing the tension of the bobbin thread. However, keep in mind that adjusting the tension of the bobbin thread is not typically required as the factory setting is usually suitable for most fabrics.
Problems with specific types of stitches
Singer sewing machine stitch problems with Zig Zag stitches
When attempting to do a zigzag stitch on your sewing machine, it’s important to use the correct presser foot. Using the wrong presser foot could cause the needle to break or cause other problems with your machine.
The presser foot for a zigzag stitch should have a wider hole in order for the needle to move freely without breaking.
To change your presser foot, you need to click the release lever for the foot. Once you have removed the incorrect presser foot, be sure to replace it with the correct one before starting your zigzag stitch.
Additionally, you can adjust the width of the zigzag stitch to make it narrower or wider, depending on your needs.
Always be sure to check that the width of the stitch is compatible with the presser foot you are using. The wider the stitch, the wider the hole on the presser foot needs to be to accommodate it. Taking these steps will help ensure a successful and problem-free zigzag stitch.

Decorative stitches not working (common Singer sewing machine Stitch problems)
When it comes to using decorative stitches, it’s important to keep in mind that not all stitches are created equal. Many decorative stitches require specific settings on the sewing machine in order to work properly.
It’s crucial to check the manual before using special stitches to ensure that you have the correct settings as these are common Singer sewing machine Stitch problems.
Different sewing machines and brands have varying options and settings for their decorative stitches, so it’s important to always refer to the manual for specific instructions.
With newer sewing machines, there are often many stitches to choose from, making it even more important to check the manual beforehand.
In addition to setting the correct stitch, you may also need to adjust other settings such as stitch length and width to achieve the desired effect.
So before you start, take the time to review the manual and adjust any necessary settings to ensure that your decorative stitching looks its best.
The machine will only sew backward
Sometimes, mechanical sewing machines can experience issues with reverse stitching. If you find that your machine is only sewing in reverse, there are a few things you should check before panicking.
Firstly, check the buttonhole knob and ensure that it is not stuck in the reverse position. This can sometimes happen if someone, like a child, has been playing with the machine. These are a common Singer sewing machine stitch problems.
It’s always a good idea to keep your sewing machine safely stored away in a closet when not in use to avoid any potential mishaps.
Next, make sure that the buttonhole knob has not been removed and reattached to the machine in the wrong position. It’s also important to check that the knob is not loose or tangled up with anything else.
In some cases, it might appear as though the machine is set to sew forward when, in reality, it is actually set to sew backwards.
If you’ve checked these things and the problem persists, you might need to take your machine in for servicing.
A qualified sewing machine technician at a repair shop will be able to diagnose and fix any issues with your machine’s reverse stitching capabilities.
Stitches for stretchy fabric
When it comes to sewing with stretchy fabrics like jersey, Lycra, and spandex, it’s important to choose the right type of stitch. You will find singer sewing machine stitch problems when you use the wrong type stitches
Straight stitches are not ideal for these fabrics because they don’t allow for the necessary stretch, which can result in popped seams or a garment that doesn’t fit properly.
Instead, it’s recommended to use a zigzag stitch, which provides the necessary flexibility for the fabric to stretch while still maintaining a secure hold. This type of stitch is also useful for other types of knits and stretch fabrics, such as ribbed knits or athletic wear.
Another option for creating strong, durable stitches on stretchy fabrics is a twin needle stitch. This type of stitch is created using a needle with two spools of thread, and is often used for creating hems on visible seams or on underwear. Twin needle stitches are stronger than regular stitches and provide a professional finish.
It’s worth noting that you don’t need a special type of sewing machine to use a twin needle. As long as your machine has the option to use two upper threads (with two spools), you can use a twin needle for your sewing projects. Just be sure to check your machine’s manual to ensure it’s compatible.
Anyone who sews will experience sewing machine problems. Making sure you have the tension dial set correctly, the right size needle for your project, and a good cleaning periodically helps alleviate the cause of the problem in most cases.
For more information on selecting the right needle and thus making sure you don’t have the incorrect needle size download our sewing machine needle guide below.
Fabric Giveaway
Enter our monthly fabric giveaway. Simply complete the tasks daily and you will be entered into the drawing. Winner will be randomly drawn on the first day of the month and notified via email

my Singer Futura 900 won’t fill self filling bobbin. I have bobbin in with slit pointed upward and have the bobbin latch over to right side….and thread around thread retrained. The bobbin won’t fill. Help….
You might need a new bobbin case. I would ask here on this video and see if anyone has answers. https://www.youtube.com/watch?v=qVvU1j-F-Qg