5 Best Serger for Beginners With Reviews
Starting your sewing journey can be exciting, especially when you’re ready to step up your game with a serger.
When I was buying my first serger it was confusing so I created this easy guide to know the best serger for beginners.
You might hear sergers being introduced as overlockers too, which is essentially the same thing.
Sergers are the go-to for creating professional-looking seams and clean edges. The best serger for beginners is one that balances ease of use with functionality, ensuring you don’t get overwhelmed by overly complex features.
As you look for your first serger, you’ll want something user-friendly but capable of growing with you as you enhance your skills.
A perfect serger for a beginner isn’t just about the price; it’s about the machine’s layout, threading mechanisms, and ease of adjusting tensions.
It can feel like a bit of a hunt to find the right match, but once you do, you’re bound to appreciate how much quicker and more polished your projects become.
So, while there are many sergers out there, the key is finding the one that feels like a good fit for your current abilities and future aspirations.
You want a serger that won’t sit unused out of intimidation but one that will be a reliable friend as you tackle new sewing challenges.
I personally use mine all the time especially on knit fabric and even on quilts when I am creating the binding.
Understanding Sergers
When you start sewing, you’ll soon encounter sergers, which are specialized machines that create professionally-finished edges.
Pull out your favorite T-shirt and you will see the encased seam. That was done by a serger.
Difference Between Sergers and Regular Sewing Machines
Regular sewing machines are versatile for a range of sewing tasks, including straight stitching, buttonholes, and decorative stitching.
Sergers, however, are specialized sewing machines designed to produce clean, finished edges. They work by trimming the fabric and encasing the edge with thread to prevent fraying—something you can’t achieve with a traditional sewing machine.
- Regular Sewing Machine:
- Versatile stitching options
- One thread source
- Primarily for constructing garments or quilts
- Serger:
- Overlock stitches for edge finishing
- Multiple thread sources
- Can’t replace a traditional sewing machine for all sewing tasks
What Is an Overlock Machine?
An overlock machine, commonly known as a serger, uses multiple threads to loop around the fabric edges, which creates a sealed edge. This type of machine is essential when you want your garments to have a professional look that is durable and resistant to wear and tear.
- Overlock Machine Features:
- Creates a sealed edg
- Uses 2-8 thread spools
- Ideal for knit fabrics
Types of Sergers and Their Uses
There are several types of sergers, each with particular uses that cater to different aspects of sewing.
- Entry-Level Sergers: Ideal for beginners, simpler to use, often with 3-4 threads.
- Mid-Level Sergers: Offer additional features such as differential feed and coverstitch capabilities.
- High-End Sergers: Include advanced features like automatic thread tension, more thread capabilities, and programmable stitch sequences.
| Type of Sergers | Uses | Thread Capability |
|---|---|---|
| Entry-Level | Basic edging, simple projects | Usually 3-4 threads |
| Mid-Level | More fabric types, coverstitching | 4-5 threads |
| High-End (Professional) | Advanced finishes, complex projects | Up to 8 threads |
Each type of serger is a specialized sewing machine that you choose based on your sewing needs and skill level. They cannot completely take the place of a regular sewing machine but work alongside it to provide a complete sewing toolkit.
Key Features to Consider
When you’re stepping into the world of serging, certain features can make your experience smoother. Look for these specifics when choosing a serger for beginners.
Number of Threads and Stitch Options
Your serger’s capabilities are largely defined by the number of threads it uses. Beginners can benefit from a machine with 2-3-4 thread options, which offers versatility to create different seam finishes without being overwhelming.
- 2-thread sergers are great for finishing lightweight fabrics.
- 3-thread are often used for overlock stitching on a variety of fabrics.
- 4-thread sergers provide extra strength for seams on stretchy or heavier fabrics.
Adjustable Stitch Length and Width
Personalize your stitching with adjustable stitch length and width settings. For beginners, it’s useful to have a machine that can easily toggle these variations:
- Stitch Length: Typically ranging from 1mm to 4mm. Shorter lengths for fine fabrics, longer for heavier.
- Stitch Width: Adjusting from narrow to wide allows for more precise finishes on edges.
Differential Feed for Smooth Sewing
To avoid puckering or stretching, look for a serger with an adjustable differential feed. This feature lets you alter the feed dogs’ speed to handle different fabric types and is essential for producing smooth, professional-quality seams on everything from silk to denim.
- Ratio Range: Usually from about 0.7 to 2.0 to accommodate various textures.
Ease of Use and User-Friendly Design
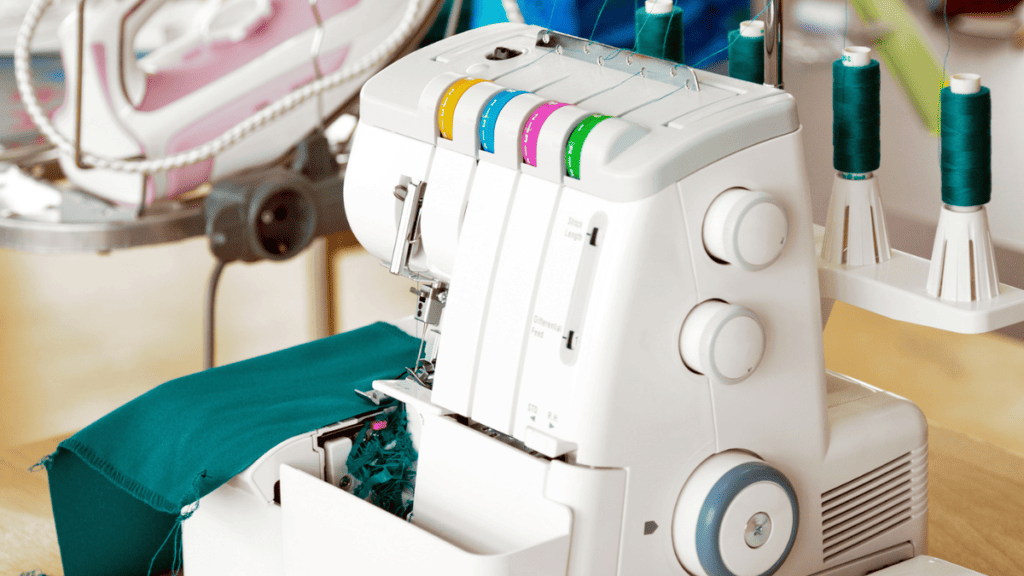
A beginner-friendly serger should prioritize ease of use. This encompasses clear threading guides, color-coded threading paths, and accessible controls. Look for a user-friendly design that simplifies the learning curve:
- Threading: Easy threading with diagrams or automatic systems.
- Controls: Clearly marked dials and levers for adjusting tension and settings.
Extra Features for Advanced Users
Once you’ve mastered the basics, you might want more advanced features. Some sergers offer specialized attachments or capabilities that can expand your creativity, such as:
- Built-in rolled hem: Switching to rolled hems without changing the needle plate.
- Coverstitch option: For a professional-looking hem on your garments.
Selecting the Best Serger for Beginners
When starting your sewing journey, you want a serger that’s simple to use, yet capable of evolving with your skills.
Your ideal pick should be durable, easy to thread, and offer a good set of basic features at a reasonable price.
Top Brands and Models
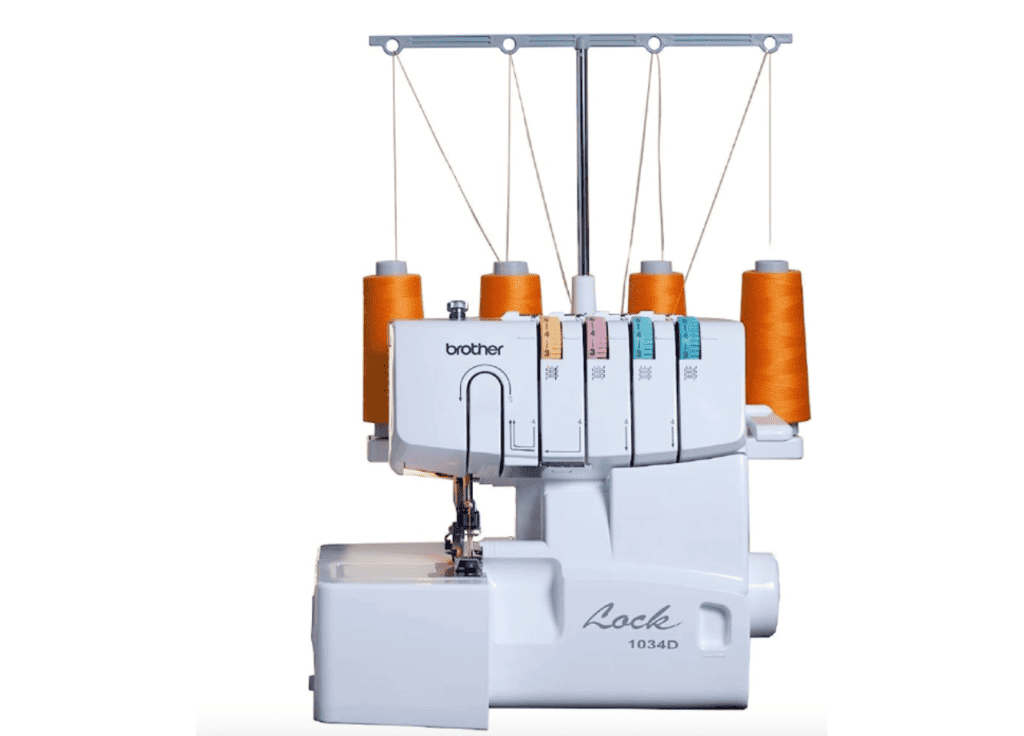
Brother ST sergers are often mentioned as the perfect serger for beginners, with models like the Brother 1034D offering user-friendly features like color-coded thread guides and compact size.
Additionally, Juki MO series, specifically the Juki MO-654DE, is praised for its durability and ease of use, catering to newcomers who intend for heavy use.
I always recommend asking in a Facebook group which we have listed below and looking at reviews. Sewers are super honest about what they love and what they don’t love.
- Brother Sergers: Efficient with beginner-friendly options.
- Brother 1034D: Affordable, color-coded, easy threading.
- Brother ST4041D: Adds style with added stability and extra features.
- Juki Sergers: Known for durability and higher-end options.
- Juki MO-654DE: Robust construction, detailed manual, often called the best serger machine for those looking to invest in long-term use.
- Juki MO-1000: Push-button threading and air-supported threading system.
Comparing Prices and Value
Serger prices can vary dramatically, but as a beginner, you don’t need to break the bank. Here’s a quick price comparison:
| Brand | Model | Price Range | Features |
|---|---|---|---|
| Brother | 1034D | $ | Affordable, User-friendly |
| Brother | ST4041D | $$ | Durable, Advanced features |
| Juki | MO-654DE | $$$ | Heavy-duty, Reliable |
| Juki | MO-1000 | $$$$ | Easy threading, High-end |
Best value? The Brother 1034D often comes out on top for its balance of cost and features.
Considering Machine Durability for Long Term Use
While it’s tempting to go with the most affordable model, durability is key for sergers that see heavy use.
Juki sergers, especially the Juki MO series, are built to last and can be an excellent choice if you don’t want to worry about upgrades or repairs anytime soon.
Keep in mind that a slightly higher initial cost might mean better savings in the long run through less maintenance and longevity.
Getting Started with Your Serger
Entering the world of serging can transform your sewing projects with professional-looking finishes. But before you can whip up that chic blouse or cozy knit, you need to get your serger set up and ready for action. Let’s get you comfortable with the basics.
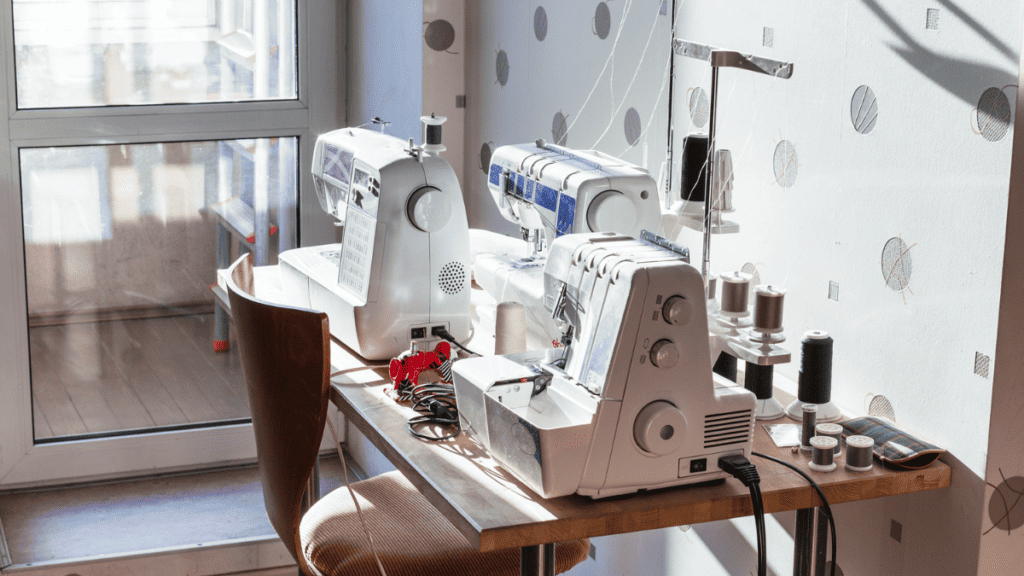
Setting Up Your Serger
Getting your serger ready for use is a straightforward process. Start by placing your serger on a stable table or desk.
Check the instruction manual for specific setup details unique to your model. Ensure you have all the necessary accessories close by for a smooth setup, such as tweezers, needles, and spool caps.
Threading and Color-Coded Guides
Threading a serger can seem daunting, but color-coded threading systems are here to help.
Typically, your serger will come with a color-coded guides mapped out on the machine itself, a detail often highlighted in the user manual for quick look-up. Follow these simple steps:
- Turn off your serger before threading for safety.
- Refer to your serger’s manual for the threading order and color-coded pathway.
- Match the thread colors with the color-coded guides to ensure correct placement.
- Use tweezers for hard-to-reach places if necessary.
Beginner Projects to Try
Once your serger is set up and threaded, start with simple sewing projects to get the hang of it. Here are a couple you can try:
- Simple Scarf: A great first-time project. Serge the edges for a clean finish.
- Pillowcases: Work with straight lines to practice consistent serging.
Dive into your instructional DVD for more ideas and step-by-step guidance as you experiment with your new serger. Many of the best serger sewing machines have suggestions in the DVD or manual for simple projects to start with your Serger.
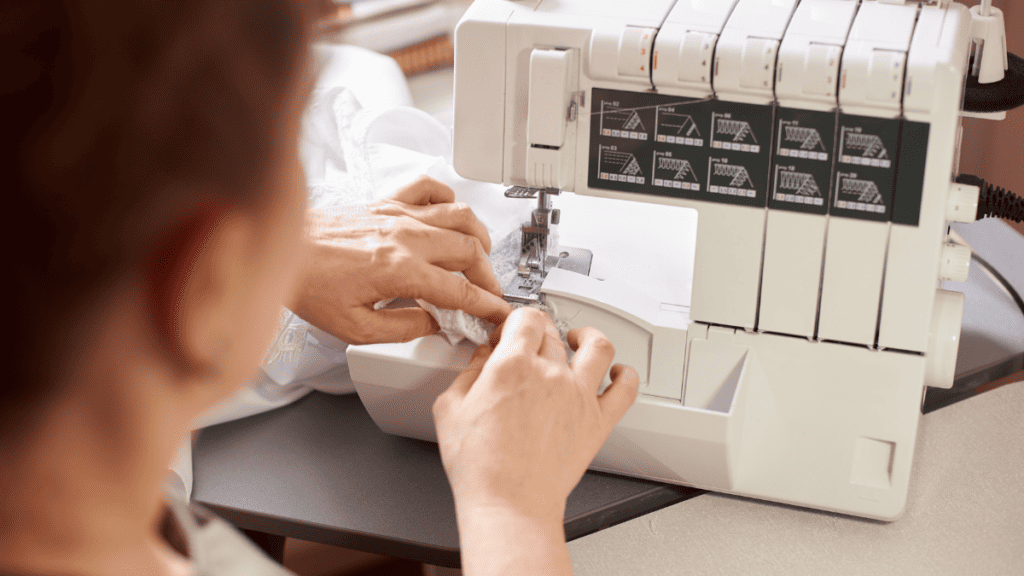
Serging Techniques
Serging can transform your sewing projects by giving them a clean and professional edge. It’s about mastering the control of fabrics as they move beneath the presser foot and knowing which stitch to apply for function and decoration.
Working with Stretchy and Lightweight Fabrics
When serging stretchy fabrics like knits or lightweight fabrics such as chiffon, it’s crucial to prevent puckering or stretching. We have an entire guide on how to sew stretchy fabrics.
Make sure to use a ballpoint serger needle and adjust the differential feed to accommodate the fabric’s elasticity. This helps feed the fabric evenly and sounds easier to handle.
- Set your serger’s differential feed to a higher ratio for stretchy fabrics.
- Use lightweight thread for delicate fabrics to maintain their drape.
- Practice your technique on scraps before moving to your project.
Achieving Professional Finishes on Edges
The edges of fabrics are where your serging skills truly shine, offering that high-quality finish.
Whether you’re working with cotton, denim, or a blend, a rolled hem or an overlock stitch ensures the edges won’t fray and your seams stay secure.
- Always test the tension and stitch length on a scrap piece of the fabric you’re using.
- Trim edges with the blade on your serger for a clean line before stitching.
- Apply a four-thread overlock stitch for strong, professional-looking edges on a variety of fabrics.
Decorative Stitches for Enhanced Design
Beyond the basics, decorative stitches add a creative touch to your work.
This isn’t just about preventing frayed edges; it’s about elevating your piece.
From ruffled edges to adding tape or lace, you can enhance your design with a unique flair.
- Experiment with a two-thread overedge to keep things light and airy.
- Incorporate a flatlock stitch for flat seams that open up, ideal for reversible garments.
- Switch to different serger feet for specific effects, like gathering or piping.
Maintenance and Troubleshooting
Taking care of your serger is crucial to ensure it runs smoothly for a long time, especially if it’s getting some heavy-duty use.
Regular maintenance saves you a lot of time on potential fixes down the line.
Regular Cleaning and Oiling
Cleaning: After every project, you’ll want to get rid of the lint and fabric scraps that build up inside your serger.
Use a small brush or a handheld vacuum to gently clear out these areas.
Oiling: Your machine might need oiling after 15 to 20 hours of use.
Check your serger’s manual to locate the oiling points and apply only serger-specific oil to avoid damage.
Common Issues and Fixes
Thread Breaking:
- Rethread your machine; sometimes the issue is as simple as a threading mistake.
- Check your tension dials; they might be set too tight.
- Uneven Stitches:
- Make sure the fabric type matches your serger’s settings.
- Replace dull or bent needles as they can cause skipped or uneven stitches.
When to Seek Professional Help
Persistent Issues: If you’ve tried all the troubleshooting tips and your serger is still misbehaving, it might be time to consult a professional.
Regular Service: Even with perfect maintenance, a service from a professional every couple of years keeps your serger in top condition, ensuring it stands up to lots of use.
Joining the Serging Community
When you’re new to serging, becoming part of a community can help you navigate the learning curve and turn a daunting task into a manageable one. It’s always great to see what others are making with their serger and having other women who are great at trouble shooting.
Here’s where you can connect with others to share tips, tricks, and project ideas.
Online Resources and Forums
You’ve got a digital world of support at your fingertips.
Start by joining a Facebook group specifically for serging beginners.
It’s a great place to ask questions, find inspiration for your next great project, and learn from the experiences of others.
Websites like Reddit and Craftster also have active communities where you can participate in discussions or read through archived threads for a wealth of information.
- Popular Serging Groups on Facebook:
Local Workshops and Classes
Nothing beats hands-on learning, right?
Check out your local fabric stores or community centers for beginner serging classes.
It’s the perfect way to get face-to-face instruction and makes mastering the basics an easy task. Plus, it’s a chance to meet local crafting enthusiasts and build your network.
- Places to Look for Classes:
- Nearby craft stores
- Community colleges or adult education centers
- Sewing machine shops that offer tutorials
Sharing Tips and Projects
Once you’ve got the hang of things, why not share your experiences?
Platforms like Pinterest or Instagram are ideal for showcasing your creations.
Additionally, you can start a blog to document your journey from a beginner serger to a pro, offering advice along the way and connecting with fellow enthusiasts.
- Sharing Ideas:
- Upload progression photos of a great project.
- Post short tutorial videos or step-by-step guides.
- Offer your unique tips that have made serging an easy task for you.
Final Thoughts and Recommendations
When you’re dipping your toes into the world of serging, picking the right machine makes all the difference. You want one that’s user-friendly, forgiving to beginners, and, of course, offers good value for your hard-earned cash.
The best sergers for beginners should have:
- Easy threading: Color-coded guides, or better yet, an automatic threading feature.
- Differential feed: To handle different types of fabric with ease.
- Adjustable stitch length and width: This lets you tweak the seams for various projects.
- Beyond features, consider reliability and customer support. You want a brand that stands behind its machines with warranties and helpful service.
Here’s a quick recommendation table based on common beginner needs:
| Feature | Why It Matters |
|---|---|
| Color-Coded Threading | Simplifies the learning curve. |
| Adjustable Tension | Allows for flexibility with various fabrics. |
| Free Arm | Facilitates sewing sleeves and cuffs. |
Remember, the best choice doesn’t mean the most features or the highest price. It’s the new machine that fits your unique needs and feels right in your hands. Happy serging!
Fabric Giveaway
Enter our monthly fabric giveaway. Simply complete the tasks daily and you will be entered into the drawing. Winner will be randomly drawn on the first day of the month and notified via email