
Easy DIY Easter Treat Bags in 8 Simple Steps
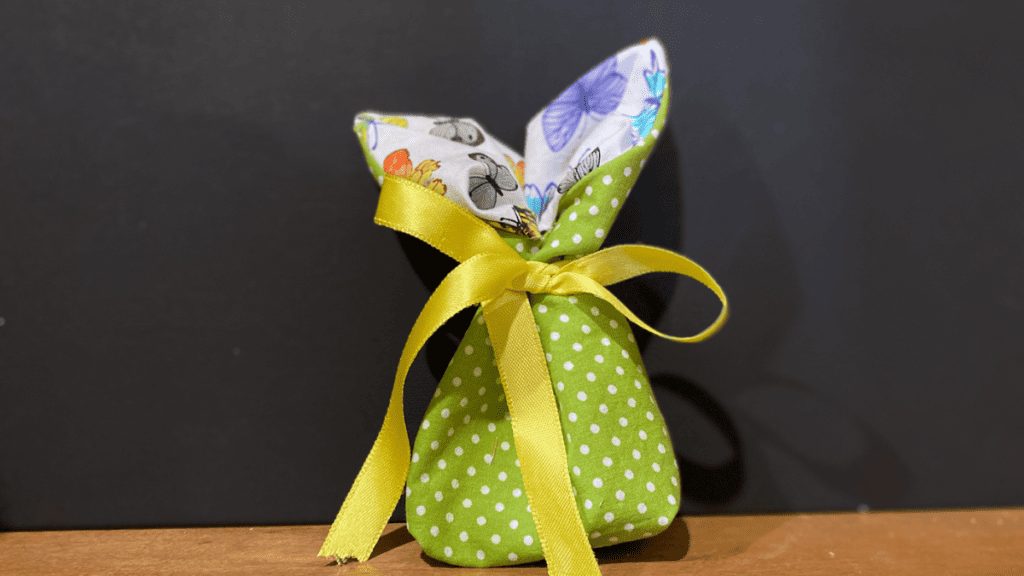
We saw this reversible Easter bunny treat bag on Pinterest and fell in love. I decided to make them for my women’s bible study and my grandbaby. I LOVE how these DIY Easter Treat Bags turned out.
You will find the free tutorial below or you can get the PDF version with all the step-by-step photos in my Etsy store.
I love that you can use fat quarters for these, or check out our favorite Easter fabric we found below. For any fabric you choose, for it to pop, use some contrasting fabrics.
We also love using Fat Quarter bundles as the fabric is already matching. It helps match fabrics but you can find matching fabric or even get help at your local fabric store.
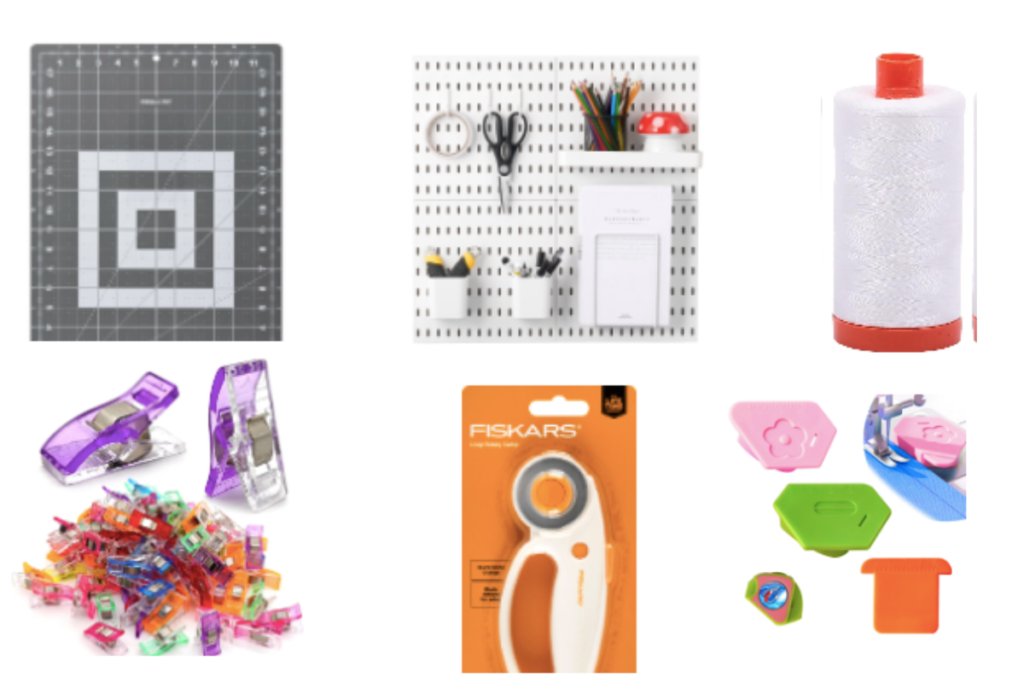
Supplies for DIY Easter Treat Bags
Sewing Supplies:
DIY Easter Treat Bags Directions
The PDF has all the photos and step-by-step directions. The PDF can be purchased on our Etsy store and you get immediate access and help if you get stuck.
Without further ado, here’s how to make these cute Easter bunny treat bag patterns.
Cut Pieces of Fabric
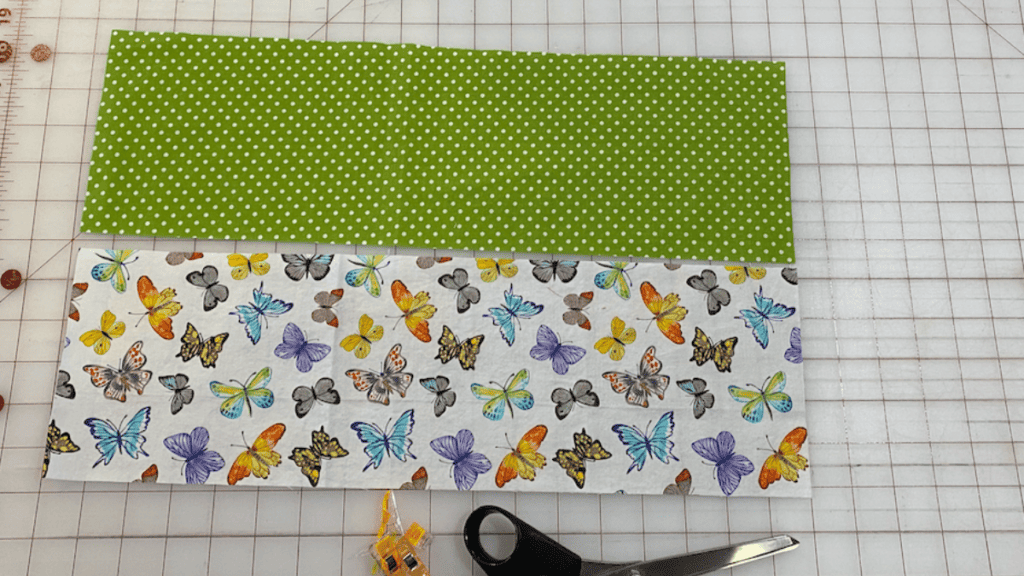
Cute 2 pieces of fabric that are 5.5″ x 18″. You want to use contrasting fabric for the most beautiful DIY treat bags. You can use Easter specific fabric or spring fabric as we did above.
You just want 2 fabrics that will contrast well when placed together. If you aren’t good with matching fabrics, use fat quarter bundles as they have already been matched.
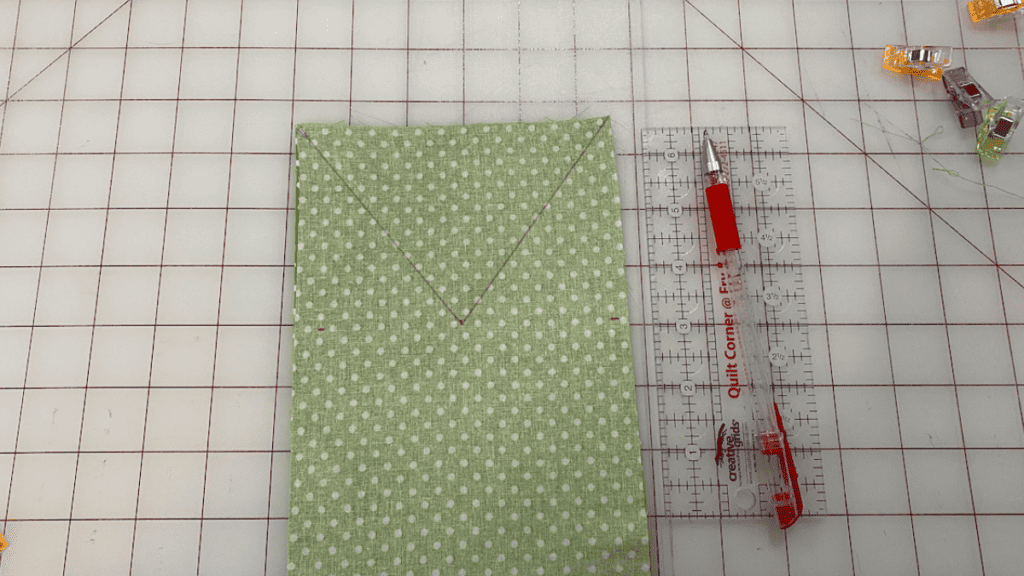
Place your fabrics’ right sides together. You need to mark each side 3.5″ from the top to the bottom and in the middle of those 2 marks, go in 2.75″ and mark using your fabric marker.
Make sure and do both pieces of fabric as this will create the ears of your Easter bunny treat bag. You can see the finished look above.
Remember, you want to do this on both pieces of your fabric. One fabric will be your outside fabric and one your inside fabric and when completed it will be reversible.
Next, draw a line as you see above. If you happen to make a mistake, simply iron your fabric and the fabric mark disappears.
The fabric markers are great to have around for marking patterns or other marks. You can easily erase it with heat.
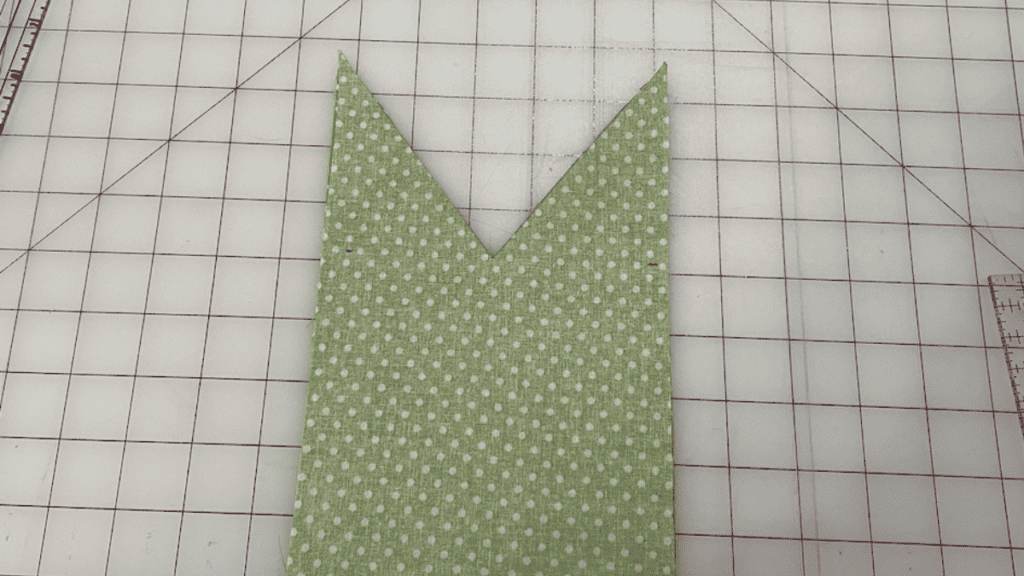
Cut your fabric on both pieces. You can discard the pieces as you won’t be using them.
Sewing Your Project
Next, you will sew down both sides 1/4″ seam allowance on your outside piece. For your inside piece you want to leave a 2″ opening on one side to help you turn your pieces.
I personally use the magnetic seam guide on my machine as it helps me sew a straight line. My vision makes it difficult to see the lines sometimes and honestly I always struggled to sew straight until I got that nifty little piece of equipment.
Additionally, you will want to create a box corner on your outside fabric piece. Do this by making a diamond shape measure 1″ from the tip and drawing a line on both sides
Sew across that and trim by 1/2″ on both sides.
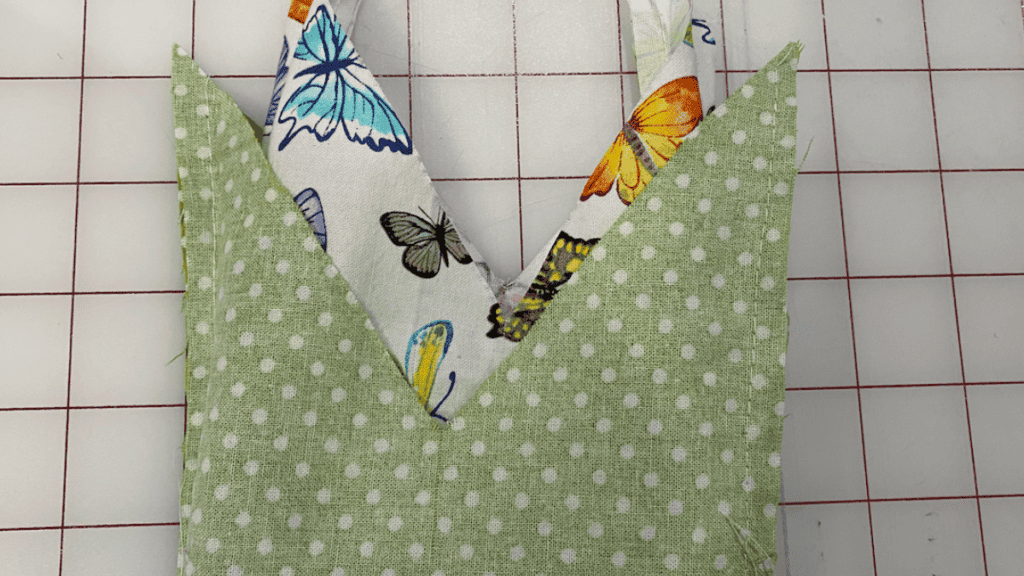
Put the right sides together and sew down the outside seams using 1/4″ seam allowance.
Additionally, to make it easier to turn, clip the excess off the ear tips and clip around the center V.
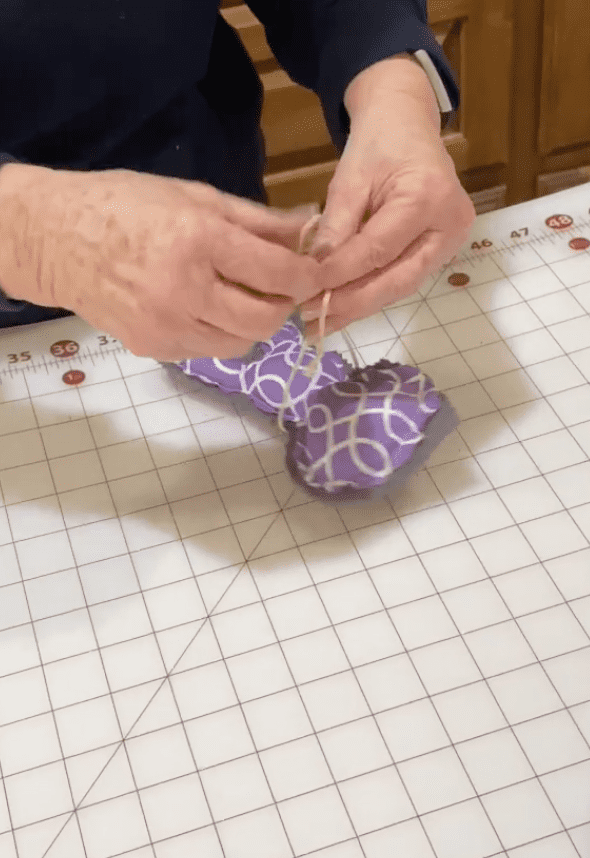
After doing that you will want to turn your pieces and close up your opening either by hand sewing or ironing together the 2 fabrics with a 1/4″ seam allowance and top stitching.
Now you can place your candy or other goodies in your bag and place ribbon or twine around the ears to close it up.
Easter Sewing Projects
We have several other Easter sewing projects available to help you create some fun items for your Easter basket or home decor.
Fabric Giveaway
Enter our monthly fabric giveaway. Simply complete the tasks daily and you will be entered into the drawing. Winner will be randomly drawn on the first day of the month and notified via email

2 Comments