Learn How to Sew a Patch with 13 Easy Methods
Every Boy Scout and Girl Scout mom knows there comes a time they earn their first patch and bring it to mom to sew the patch on the sash.

It could also be that you ripped your favorite shirt or jeans and need to fix it. Either way, you need to learn how to sew a patch and today you will learn a few ways to do it easily.
The optimal approach for sewing on a patch involves either utilizing a sewing machine or using a hand-sewing technique.
When it comes to more decorative patches, methods such as using a set-in patch or an appliquéd patch can also be effective.
For attaching an embroidered patch to a uniform, hat, denim jacket, or backpack, the recommended method is to employ a running stitch or appliqué stitch.
In this comprehensive guide, you’ll discover eleven different ways to sew on a patch. We will explore whether using iron on patches or patches that need sewing are better for your situation.
Table of Contents
How To Sew a Patch on Fabric?
When it comes to sewing patches onto fabric, the options are plentiful, ranging from simple needle and thread techniques to utilizing a sewing machine. Moreover, the variety of patches available allows for customization according to your specific needs and preferences.
Embroidered badges are one of the most common types of patches sewn onto clothes. These badges often require precise placement on military uniform jackets or shirts.
Similarly, if your child is a member of organizations like Girl Scouts or Boy Scouts, where badges are awarded to acknowledge accomplishments, you’ll need to adhere to specific guidelines for their placement as well.
On the other hand, you can opt for more whimsical and decorative patches that add a touch of playfulness to your fabric. Employing applique or reverse applique techniques, along with fancy hand stitches such as the herringbone stitch, allows you to create patchwork that is not only visually appealing but also exudes a sense of fun and intrigue.
Sometimes, the purpose of a patch is to conceal a hole in your clothing. In such cases, you can learn various darning methods that work wonders in making the hole virtually disappear! These techniques enable you to mend the fabric seamlessly, restoring its original integrity and appearance.
Whether you’re striving for precision, aiming to infuse creativity, or seeking to repair and extend the life of your garments, sewing patches offers a myriad of possibilities.
Explore the different methods available, experiment with various patch types, and unleash your imagination. With the right techniques, you can transform fabric into a canvas for self-expression, bringing your personal touch to every stitch.
How To Sew On a Patch: 11 Methods
When it comes to sewing on patches, there are eleven popular techniques that you can choose from. These methods range from utilizing a sewing machine or needle and thread to incorporating specialized applique and darning techniques.
Before delving into any of these methods, it’s crucial to securely position your patch exactly where you want it to be on your clothing or fabric item.
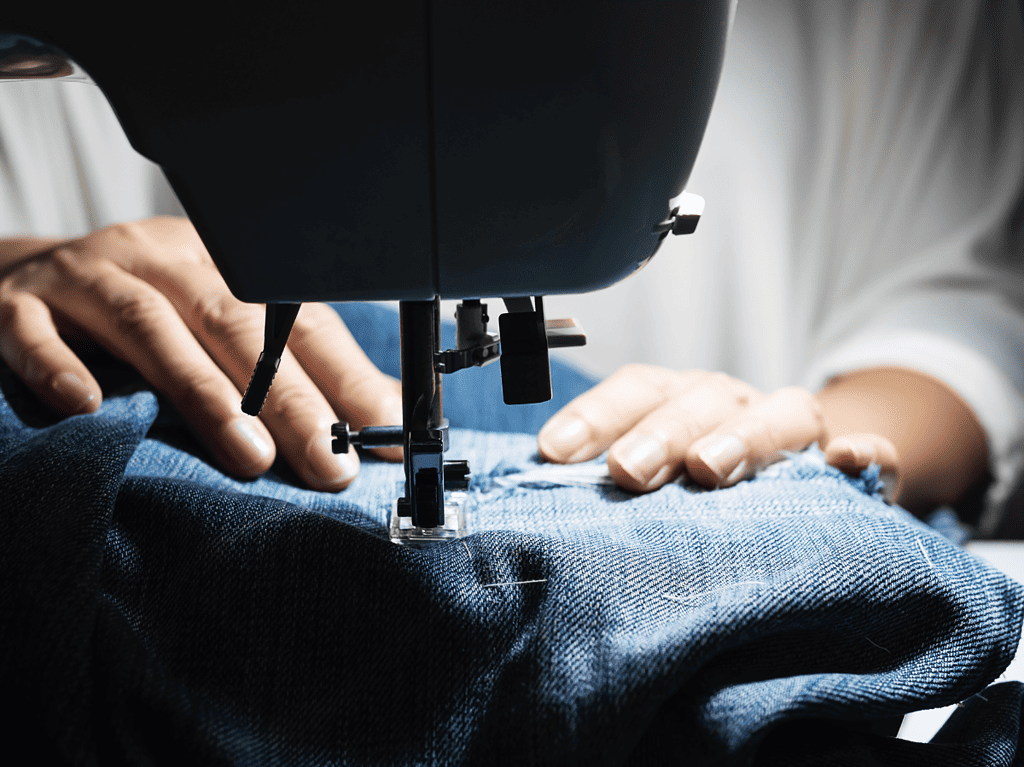
Sewing Machine Method
When it comes to swift patch attachment, using a sewing machine is undoubtedly one of the quickest methods. The added advantage of machine-made stitches is the durability and strength they provide, ensuring a secure attachment that withstands regular use.
However, it’s important to note that a sewing machine may not always be the optimal choice for every patch sewing endeavor. Intricately shaped embroidered patches, for instance, can pose a challenge when it comes to achieving neat and precise machine stitches along the edges of the patch.
In such cases, you might find that the style and aesthetic of a hand-sewn blanket stitch applique better complement the patch’s design, especially for inset or appliqued patches.
Furthermore, it’s worth considering that a sewing machine works best on flat objects that can be easily maneuvered under the needle, such as shirts or jackets. When it comes to sewing a thick patch onto curved surfaces or thick fabric like backpacks or hats, hand-sewing proves to be a more practical and effective approach.
Nevertheless, in many instances, utilizing your sewing machine to quickly sew on a patch can save you significant time and hassle. It offers a streamlined process, particularly for flat fabric items, where you can swiftly insert the material under the needle and secure the patch with ease.
Ultimately, the choice between machine sewing and hand-sewing depends on factors such as patch complexity, desired aesthetics, and the nature of the fabric item you’re working with.
Assessing these aspects will help you determine the most efficient and effective method for attaching patches, ensuring a successful and visually appealing outcome.
How to sew on a patch with a sewing machine:
To ensure a successful patch attachment, follow these step-by-step instructions:
- Pin the Patch in Place:Begin by pinning the patch onto your garment or fabric item using either sewing pins or safety pins. The choice between the two depends on the thickness of the patch. For an embroidered badge or a thicker patch, a sturdy safety pin will provide a secure hold.
- Prepare Your Sewing Machine:If you’re using a sewing machine, the first thing to do is set it up accordingly. For an embroidered badge, opt for a heavy-duty needle, while a universal medium-weight needle is suitable for fabric patches. Additionally, adjust your stitching settings to a narrow zig-zag stitch, which appears almost like a flat line of stitches.
- Thread the Machine:Select a thread that matches the outer edge color of the patch. Thread the machine, ensuring the thread is securely in place.
- Position the Patch:Carefully position the patch over the needle plate, aligning it so that the needle rests over the outer edge of the patch. This way, the narrow zigzag stitch will overlap both the patch’s edge and the fabric surrounding it.
- Begin Stitching:Start sewing by slowly stitching around the edge of the patch. Take your time and ensure the stitching looks neat and precise since it will be visible. This stitching will create a secure and attractive border for your patch.
- Completing the Stitch:Once you’ve sewn around the entire patch, clip the excess thread and remove the garment from the machine.
- Attaining a Clean Finish:For a polished finish, thread the upper thread through a hand-sewing needle. Using the needle, bring the thread to the inside of the garment, hiding any loose thread ends. This simple step ensures that the surface of your garment remains flawless without any protruding thread ends.
By following these steps, you can confidently attach your patch with precision and finesse. Remember to pay attention to the decorative stitches appearance, as it plays a crucial role in showcasing the patch’s beauty and maintaining a clean and professional finish.
Using a Sewing Machine and Iron
In certain situations, incorporating an ironing step before machine sewing a patch or badge onto your clothing can be beneficial. This additional step provides added support and stability to the attachment process.
- Heat-Activated Adhesive Coating:Many embroidered badges feature a heat-activated adhesive coating on their reverse side. To utilize this feature, set your iron to a gentle heat setting and ensure it is free of water or steam. Place the badge in the right position of the fabric and carefully position a thin cotton cloth or pressing sheet on top to protect both the badge and the iron. Apply gentle pressure with the iron, allowing the heat to activate the adhesive and effectively bond the badge to the fabric.
- Pre-Sewing Method:While this method may not offer the most pristine and secure form of badge attachment on its own, it serves as a useful pre-sewing technique. The fabric glue temporarily holds the badge in place, allowing for easier handling during the subsequent sewing process.
- Large Embroidered Badges:For larger embroidered badges, such as decals intended for the back of a jacket, additional measures may be necessary. In such cases, it is recommended to purchase iron-on hem tape. Align several strips of this tape along the middle section of the large badge and the border of the patch. Use your iron to activate the adhesive on the hem tape, ensuring a firm and secure bond. After this pre-sewing step, you can proceed with your chosen sewing method on the inner edge of the patch to further reinforce the attachment.
- Preventing Bowing:By utilizing the hem tape, you effectively prevent the large badges from bowing out in the middle as you wear the jacket over time. This ensures a consistently smooth and pleasing appearance, maintaining the integrity of the badge’s design.
Incorporating the pre-sewing ironing technique offers an additional layer of support and stability to the patch attachment process. It proves particularly useful when dealing with heat-activated adhesive coatings and large badges that require extra reinforcement.
By taking these steps, you can enhance the longevity and visual appeal of your patched garments, ensuring they remain intact and stylish throughout their usage.
How to sew a patch by hand sewing
While hand sewing a patch may require more time and patience compared to using a sewing machine, it offers a range of benefits, including the ability to achieve meticulous stitching and explore decorative techniques. This method is particularly ideal for tiny patches or those adorned with intricate appliques, allowing you to showcase your attention to detail.
However, it’s essential to consider the tradeoffs associated with hand sewing. Firstly, it requires a greater investment of time. Unlike the swiftness of a machine, hand sewing demands a slower and more deliberate approach.
Additionally, even the most precise hand stitches cannot match the sheer strength and durability of machine stitch length.
Moreover, to embark on this method, you may need to familiarize yourself with various decorative hand stitches. These stitches add a touch of artistry and flair to your patchwork. Among the popular options for hand sewing patches are the running stitch, blanket stitch, and catch stitch, each offering unique visual effects.
Before diving into the hand stitching process, it’s crucial to decide on the patch’s placement and secure it in position using pins. This ensures that the patch remains in the desired location as you navigate the hand sewing techniques.
Embrace the beauty of hand sewing as you embark on this intricate journey. While it may require more time and patience, it grants you the freedom to meticulously stitch and explore decorative possibilities. Unlock your creativity as you breathe life into tiny patches or embrace the charm of appliqued designs. Remember to cherish the process, allowing your passion and skill to shine through each delicate stitch.
How to sew a patch using a running stitch
The running stitch stands as one of the easiest and swiftest stitches you can employ when hand sewing patches. Its simplicity lends itself well to patches with uncomplicated shapes, such as rectangles or circles, ensuring a clean and efficient stitching process.
To begin, follow these steps to achieve seamless results:
1. Prepare Your Thread:
Thread the eye of the needle and tie a knot at the end of the thread. Choose from a range of options, such as embroidery floss, cotton, or polyester spool thread or use your bobbin thread. Opt for a thread that matches the patch’s color for a seamless look, or experiment with a contrasting thread to add an eye-catching element to your stitching.
2. Positioning the Needle:
Start sewing from the inside of the fabric, allowing the needle to emerge on the surface. By doing so, the knot will remain hidden on the inside of the patch, ensuring a tidy and professional appearance on the outside.
3. Creating Stitches:
To form a stitch, push the needle back through the fabric, emerging on the reverse side. The size of your stitches can be adjusted according to your preference, allowing you to customize the appearance. Ideally, aim for consistent stitch lengths on both the top and bottom of the fabric, achieving a harmonious and balanced look.
4. Continuous Stitching:
Continue the rhythmic motion of bringing the needle up and down, maintaining a consistent stitch size on both sides of the fabric. This will ensure a uniform and visually pleasing result as you progress along the edges of the back of the patch.
5. Finishing Off:
Once you have sewn all the way around the patch or badge, guide the needle back to the inside of the material. Tie off a knot to secure your stitching in place, ensuring longevity and durability.
By mastering the running stitch, you unlock the key to effortless hand sewing. Its simplicity and versatility make it the perfect choice for patches with straightforward shapes.
Take pride in your stitching as you create a professional finish, highlighting your meticulous craftsmanship. Enjoy the process and embrace the artistry of transforming a simple patch into a captivating detail on your fabric.
How to sew a patch using a blanket stitch
The blanket stitch serves as a remarkable technique to create a polished and decorative edge around your patches. Whether you’re working with small or large, intricate or simple patches or badges, this stitch adds a touch of sophistication to your fabric creations.
It is especially well-suited for appliques or fabric custom patches, elevating their visual appeal.
Follow these steps to master the blanket stitch:
1. Prepare Your Thread:
Thread your needle and secure a knot at the end of the thread. To enhance the decorative nature of the blanket stitch, consider selecting a thread color that contrasts beautifully with the patch. Embroidery floss can be an excellent choice, allowing for vibrant and eye-catching stitches.
2. Positioning the Needle:
Begin by drawing the needle up from the inside of the fabric, about half an inch inside the edge of the patch. Ensure the knot catches on the inside, securing the thread. Let the needle and thread emerge just outside the edge of the patch.
3. Initiating the Stitch:
Place the needle tip on the applique or patch, inside the edge. The size of your desired blanket stitch will determine the distance of this initial stitch, ranging from a quarter-inch to half-inch in length.
4. Creating the Loop:
Draw the needle and thread through the patch and the fabric. As you do so, continue pushing the needle tip until it comes back out beside the original thread, onto the top of the fabric. This creates a loop of thread that extends from the fabric, through the patch, and back out to the top. This forms a small vertical stitch parallel to the patch’s edge.
5. Wrapping the Thread:
Here comes the slightly intricate part of the stitch. Wrap the thread around the needle’s tip and then pull the needle and thread all the way through the loop, tightening it securely. This completes one blanket stitch.
6. Continuing the Stitch:
Continue along the edge of the patch, repeating the stitch by pushing the needle down through the patch and back up through the fabric at consistent intervals. Remember to create the thread loop with each stitch, maintaining a uniform appearance.
7. Admiring the Result:
Upon completion, you will marvel at the neat row of vertical stitches reaching into the patch, accompanied by parallel stitches along the patch’s edge. The blanket stitch elevates the overall aesthetic, adding a touch of elegance and finesse to your creation.
Unleash your creativity as you wield the blanket stitch, infusing your patches with an exquisite decorative edge. Through the artful play of thread and needle, you bring forth a symphony of vertical and parallel stitches, transforming your fabric into a visual masterpiece. Embrace the process and savor the satisfaction of achieving patch perfection.
How to sew a patch using a catch stitch
The catch stitch, also known as the cat stitch, herringbone stitch, or large cross stitch, adds a distinctive zigzag pattern over the edge of your patch, badge, or applique. This decorative stitch allows you to showcase your creativity, as you can create bold and eye-catching designs or delicate and intricate patterns.
Follow these steps to master the catch stitch:
1. Prepare Your Thread:
Begin by knotting the end of your thread. Choose a thread color that complements or contrasts with your patch, allowing your catch stitches to stand out. The thread can be either embroidery floss or a suitable spool thread.
2. Securing the First Stitch:
Bring the needle from the inside of the fabric and pass it through both the fabric and the patch until the thread is taut. This ensures a secure starting point for your catch stitch.
3. Diagonal Stitch:
Moving from right to left, shift the needle approximately a quarter-inch to the right. Scoop up a small amount of fabric just outside the edge of the patch, sliding the needle and thread all the way through. This creates a diagonal stitch from inside the patch to the fabric, leaving a small stitch on the inside of the material. The needle and thread will now be on the outside of the fabric.
4. Inside Edge Stitch:
Move the needle another quarter-inch to the right, this time scooping up a tiny stitch inside the edge of the patch. Continue moving from right to left and draw the needle and thread all the way through. This creates an upside-down V shape over the edge of the patch.
5. Repeat and Weave:
Repeat the process, creating V-shaped stitches along the entire perimeter of the patch. Each stitch should connect the inside of the patch to the fabric, forming a decorative border.
6. Finishing Touch:
Once you have stitched around the entire edge, knot off your thread on the inside of the fabric, securing your catch stitches in place.
If you prefer a more pronounced X shape rather than a V shape, you can increase the size of your parallel stitches. This modification will accentuate the point where the threads cross over each other, creating a captivating effect.
For a whimsical touch, you can vary the lengths of your stitches, alternating between larger and smaller X or V shapes. However, for most cases, using regular stitching around the edge will provide a clean and polished look.
Unleash your imagination and experiment with the catch stitch, infusing your patches with a blend of charm and elegance. Whether you prefer precise patterns or playful variations, the catch stitch allows you to express your unique style while securing your patches with finesse.
Let your needle dance across the fabric, creating a tapestry of stitches that captivate and inspire.
How to sew a patch: applique patch
Discover the artistry of complex, layered applique techniques often favored by quilters and advanced sewers.
However, fear not, as the fundamentals of applique are easily grasped. Once you’ve acquired this skill, you can embellish your clothing, bags, and hats with creative patches wherever your heart desires!
Let’s dive into the process:
1. Choose Your Patch:
Select a vibrant, contrasting color for your patch, setting it apart from the fabric of your garment or bag. Cut out the patch, ensuring a small allowance of approximately a quarter-inch around the outer edge. This additional fabric will be turned under during the sewing process. To begin, opt for a simple design with straight or slightly curved edges, which are easier to sew.
2. Pin or Tack:
If possible, use pins to secure the patch in place. However, if you’re covering a hole or pinning is impractical, employ a rough tacking stitch to temporarily hold the patch in position. Remove the tacking stitches once you finish sewing the patch.
3. Prepare Your Needle and Thread:
Thread your needle and tie a knot at the end of the thread. Select a thread that closely matches the color of the patch fabric to ensure discreet stitches.
4. Commence Stitching:
Draw the needle up from beneath the fabric, leaving the knot on the inside of the garment. Use your thumb to gently turn under the outer edge of the patch, folding it by approximately a quarter-inch. This creates a smooth, finished edge on the patch’s outer surface. As you progress, continue turning under the edge, maintaining its smoothness. You may find it helpful to fold using the edge of your needle or a tiny knitting needle.
5. Secure the Folded Edge:
Bring the needle through the folded edge, ensuring both the needle and thread pull taut on the top surface of the patch. Create a small perpendicular stitch by inserting the needle back into the fabric just beyond the folded edge. This firmly attaches the folded edge to the garment or fabric beneath.
6. Stitching Between the Layers:
Once again, bring the needle back up, sliding it slightly between the garment fabric and the folded edge of the patch. Continue this stitching pattern, making tiny stitches at a rate of ten to twelve per inch along the edge of your patch. Keep the space between stitches small for an intricate and polished look.
7. Repeat and Persevere:
Repeat the process of folding over the edge and applying the stitching pattern throughout the perimeter of the patch. Take your time to ensure precision and neatness, enjoying the journey of creating a beautifully finished applique.
With these steps, you’re equipped to explore the captivating world of layered applique. Unleash your creativity, transforming ordinary garments, bags, and hats into personalized works of art.
Delve into the realm of applique, where fabric and imagination intertwine to make a statement. Let your needle guide you as you breathe life into your patches, one stitch at a time.
Free Monthly Sewing Class
Each month, we also have an online sewing class. Every 3rd Saturday and Sunday, we have a project not found in our library or on YouTube.
Each class is unique and available for 24 hours. We send out the links via email and in our Facebook group. See the upcoming class by going here. VIPs get the PDF of instructions and lifetime access to the free tutorial.
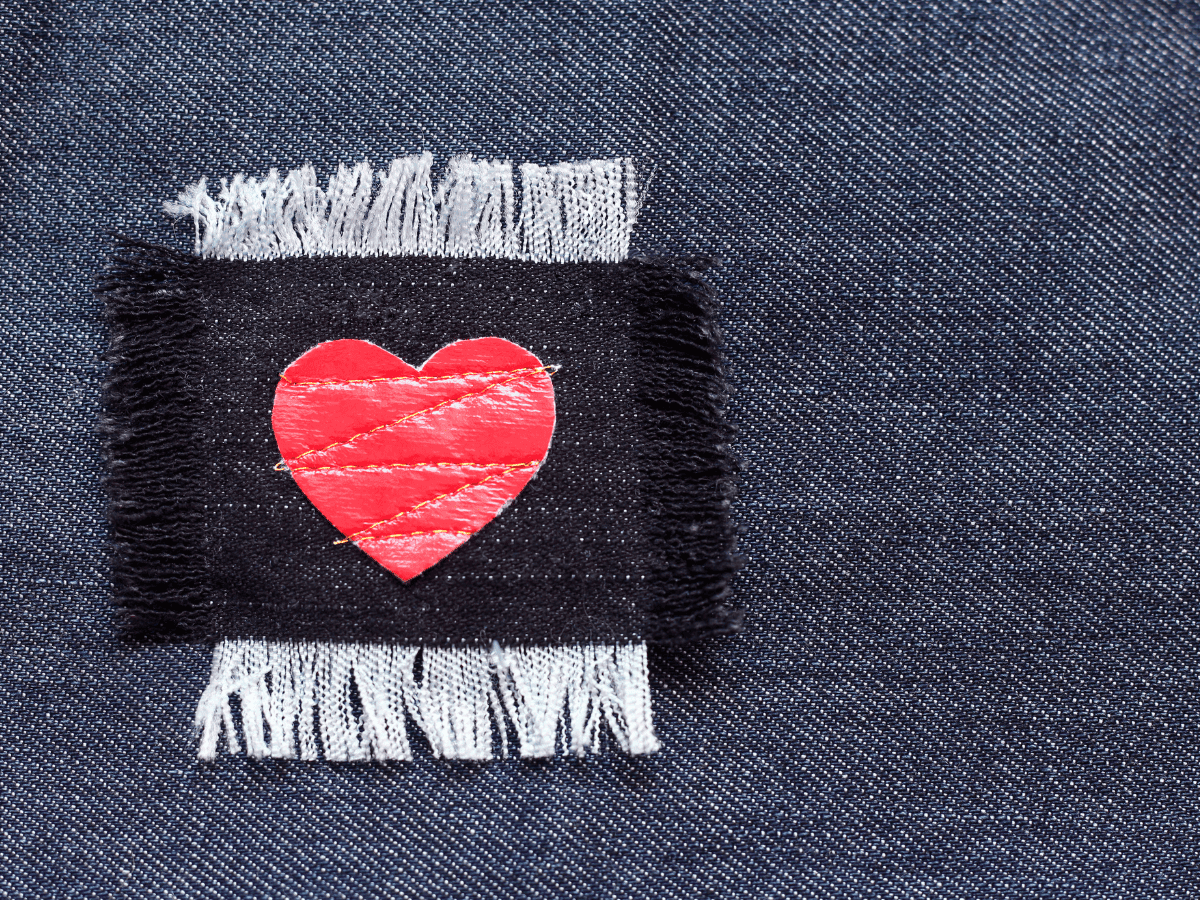
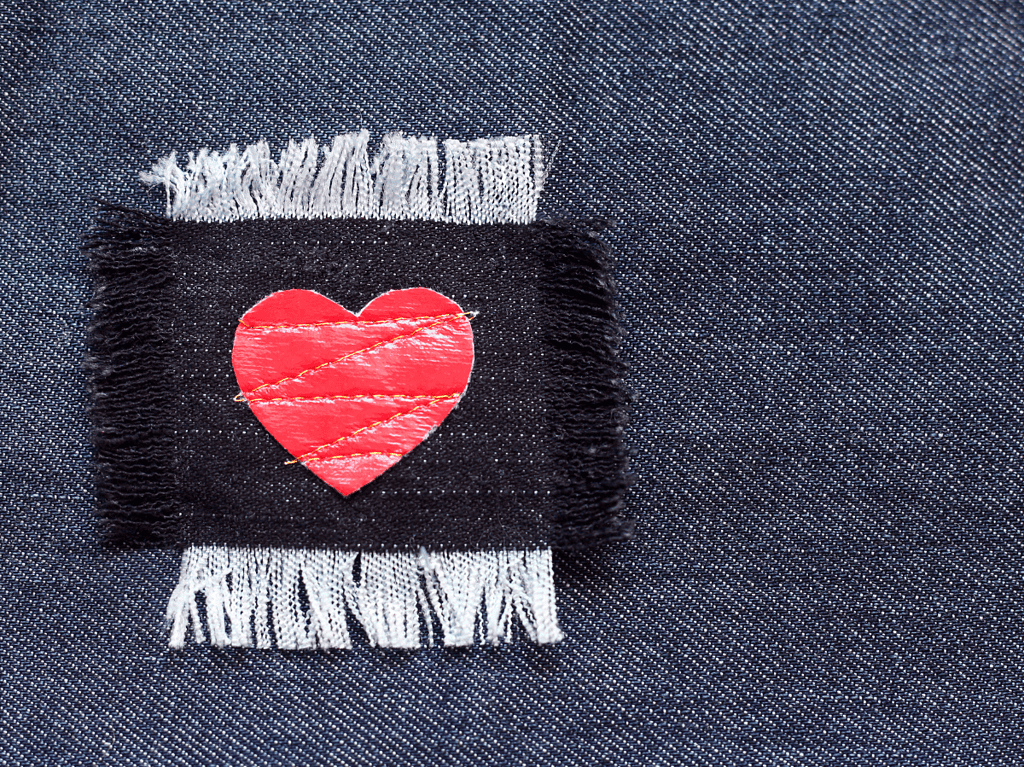
Reverse Applique
Unleash your creativity with this method that allows you to achieve an eye-catching contrast in shape and color. By cutting out a shape from your existing garment and applying a patch to the inside of the fabric behind the cut-out hole, you can add a touch of uniqueness to your jacket, jeans, or any item of your choice.
Here’s how to bring this technique to life:
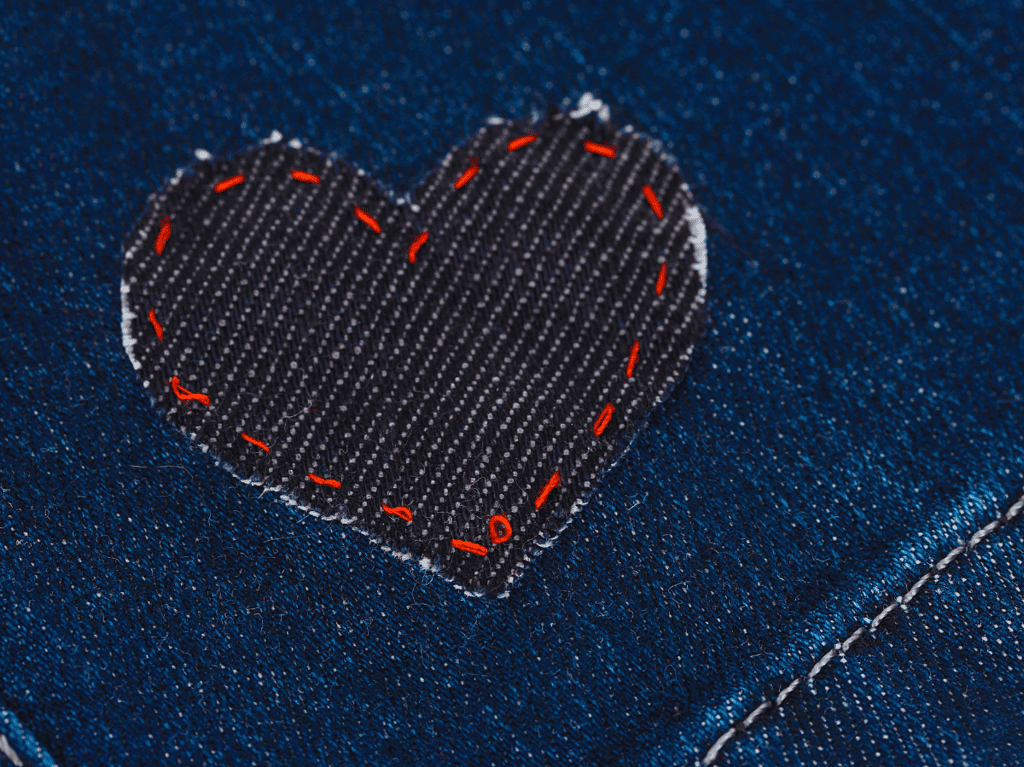
1. Cut Out the Shape:
Select the desired shape you wish to incorporate into your garment, such as a heart. Carefully cut out a neatly-edged heart from the fabric, ensuring precision.
2. Apply the Patching Material:
Attach the patching material to the inside of the hole you created. You can use strips of iron-on hem tape along the edge of the fabric to secure it. Alternatively, use sewing pins to hold the patch in place.
3. Embrace Decorative Stitching:
To enhance the visual appeal of your patch, choose a decorative hand or machine stitch to sew around the edge of the hole. Stitches like the blanket stitch or herringbone stitch work splendidly for this purpose. Ensure that your stitching overlaps the cut edge of the fabric within the garment, preventing unravelling and maintaining a polished appearance.
4. Reinforce with Interfacing (if needed):
In cases where you anticipate the inset area’s fabric to be less sturdy, consider ironing on a square of interfacing on the backside of the patch. This will provide additional support and seal as the interfacing overlaps both the patch and the garment, creating a sturdy backing.
With this method, you can infuse your garments with a captivating contrast, melding shape and color seamlessly. Let your imagination soar as you transform ordinary pieces into unique works of wearable art.
Whether opting for decorative hand stitches or utilizing fancy machine stitches, enjoy the process of bringing your creative vision to life.
How to sew a patch over a hole
When it comes to sewing a patch over a hole in your clothing, you have various techniques at your disposal. The method you choose depends on whether you prefer the patch to be inconspicuous or proudly displayed.
1. Invisible Darning:
For a seamless repair, grab a needle and thread to darn the hole almost invisibly. By sewing horizontal stitches across the width of the hole until you reach the edge, followed by vertical stitches that intersect the horizontal ones, you can expertly mend the hole.
2. Vibrant Applique:
If you want to showcase your repair skills, opt for a colorful applique to conceal the hole. Let your imagination soar as you create a fabric shape in any style that speaks to you, whether it’s a whimsical heart, a delicate flower, or a bold symbol like a skull and crossbones. Attach the applique over the hole using hand stitches, and watch your clothing transform into a unique expression of your personal style.
3. Matching Patch:
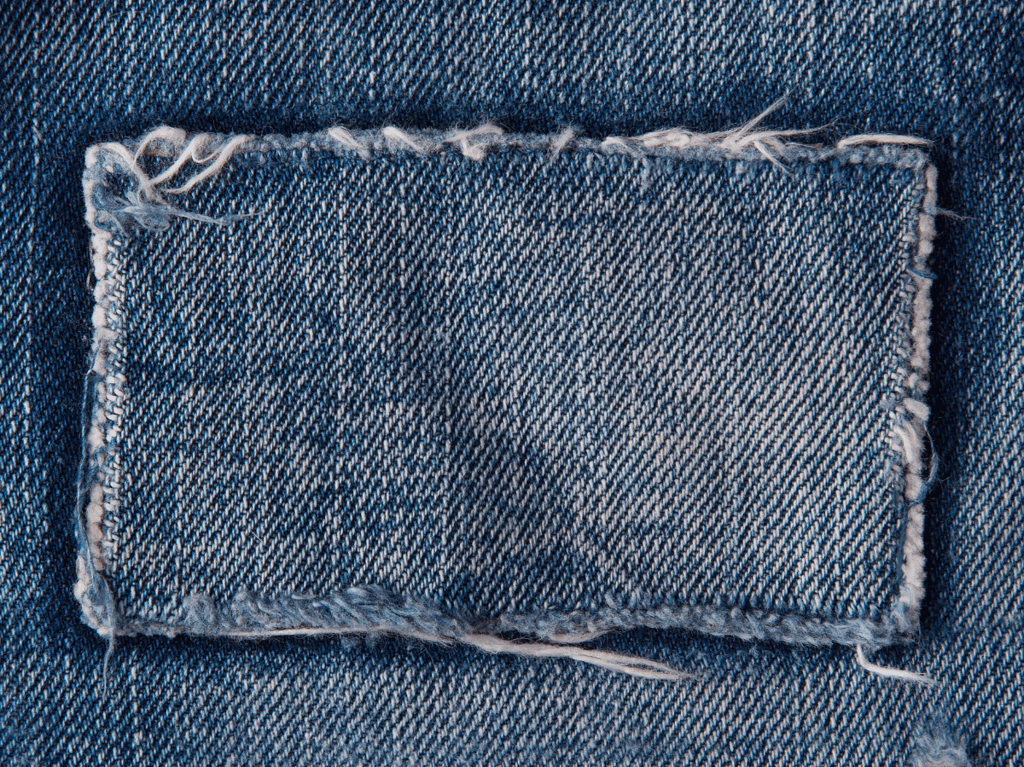
To seamlessly blend the patch with your garment, select a fabric that matches the material, such as applying a denim patch onto a jean jacket. Secure the matching patch over the hole using tiny hand stitches in a running stitch or blanket stitch pattern. This method not only repairs the damage but also adds a touch of charm to your clothing.
Embrace the art of hand-sewn patching to breathe new life into your cherished garments. Whether you prefer a discreet repair or a bold statement, these techniques offer you the freedom to restore and personalize your clothing with skill and creativity.
Darning with Machine
Darning is an artful technique that uses multiple threads to weave together and fill in holes, effectively repairing and transforming damaged clothing. While you can darn by hand, using a sewing machine offers a quick and effortless way to accomplish this.

Decorative darning is an excellent option, particularly if you enjoy the art of hand embroidery. However, with a little practice, a sewing machine can produce nearly invisible repairs, making it an appealing choice.
If your sewing machine has a built-in darning stitch, you’re in luck. Simply select this option and sew a set of darning stitches directly over the hole, ensuring the needle passes through a small section of fusible interfacing on the reverse side. For larger holes, you may need to sew multiple rows of layered darning stitches.
In the event that your machine lacks a specific darning stitch, fear not. Set your machine to a straight stitch and attach a buttonhole foot in place of the presser foot. Begin by stitching a series of vertical lines from above the hole to below it, closely covering the area with vertical stitches.
Then, sew back over the lines at a slight diagonal, creating a second series of diagonal stitches across the hole. By the end, the interfacing should be completely concealed, as your stitches will have diligently covered the void.
Prepare your sewing machine with thread that matches the garment’s color and enhance the repair with a small section of fusible interfacing pressed onto the reverse side of the hole. With the right technique, your machine-darned repairs will seamlessly blend with the fabric, breathing new life into your beloved garments.
How to sew a patch On a Military Uniform, Shirt or Jacket Sleeve
When sewing a patch onto a military uniform, shirt, or jacket sleeve, it’s crucial to exercise extra caution to ensure compliance with all necessary regulations. Follow these guidelines to adhere to the proper procedures:

Begin by identifying the designated placement for the embroidered badge on the uniform. It’s essential to position it accurately according to the specific regulations.
Consider the thread you use for stitching. In most cases, select a thread that closely matches the color of the embroidered edge on the badge. This ensures that your stitches remain inconspicuous.
Choose an unobtrusive stitch for attaching the military badge. If you have access to a sewing machine, opt for a straight stitch or a simple zigzag stitch. These stitches will securely fasten the badge in place. When sewing by hand, employ either a running stitch or a blanket stitch using a matching thread that blends seamlessly.
Attaching an embroidered badge to a military uniform may pose challenges when it comes to hard-to-reach areas, such as sleeves. In such cases, resort to meticulous hand stitching around the edge of the badge. These neat stitches will effectively hold the badge securely in place.
By following these careful steps, you can ensure that your patch is seamlessly and regulation-compliantly attached to your military uniform, shirt, or jacket sleeve.
How to sew a patch on jeans
There are multiple methods you can use to sew a patch onto jeans, as explained in this article. For instance, if you have a hole in the knee of your jeans, an inset patch can create a cool look. Alternatively, for a seamless repair, select a matching blue thread and skillfully darn the hole, making it virtually invisible.
Another captivating method for jeans is called sashiko patching. With this technique, you apply the patch fabric to the inside of the hole, similar to the inset patch approach. However, instead of simply sewing around the patch’s edge, you employ precise, small rows of stitches to create horizontal and vertical lines that cover the entire patch.
This delightful Japanese art form results in a distinct and eye-catching patch on your jeans!
How to sew a patch on a hat

We have an entire post dedicated to step-by-step directions on how to sew a patch on a hat. Check it out for the directions.
How to sew a patch on a backpack
Due to the distinct shape of a backpack, it is often best to attach patches by hand.
If your goal is to conceal a hole in your backpack, you can employ the hand darning technique discussed earlier in this section. Alternatively, you can utilize the inset patch method, but opt for a matching material instead of a contrasting color for the patch.
For attaching an embroidered badge to your backpack, such as a commemorative patch from a concert or event, a simple hand sewing stitch like the blanket stitch can be used to secure the badge in place.
To give your bag a fresh and stylish look, consider adding an applique patch. You have the freedom to choose any shape or color you desire for this decorative addition.
What’s the best way to sew a patch?
The ideal approach to sewing on a patch depends on your desired outcome, whether you prefer a decorative look or an invisible finish, as well as the amount of time you wish to invest in the process.
For a quick and durable method, utilizing a sewing machine is recommended. Neat machine stitches can be employed to attach military patches, Girl Scout Badges, or even to mend a hole in your beloved jeans.
If you’re seeking a more playful style of patch, hand-sewing stitches like the catch stitch can be used to sew on an applique patch, or you can opt for a contrasting color to outline an embroidered badge.
In essence, the best stitch for sewing on a patch depends on the specific patching technique you choose to employ!
Is it Better to Sew or Use Iron-on Patches?
The choice between sewing or ironing on a patch typically depends on the type of patch and the level of permanence required for its attachment.
In most cases, sewing provides a more secure and durable connection. This is particularly important for patches applied to curved surfaces like hats or backpacks, where ironing alone may cause the edges to peel away.
Additionally, it’s important to consider the material of the garment or item. Ironing can potentially damage certain fabrics, so it’s essential to review the care instructions beforehand. Applying high heat without caution may inadvertently result in melting or damaging the jacket, backpack, or other items.
In summary, ironing can serve as a temporary method to hold a patch in place while you sew it more permanently. However, for a reliable and long-lasting attachment, sewing is generally the preferred approach when it comes to attaching patches to clothing or items.
Buy Patches Here
Here are a few of our favorite patches. You can also find some at Joann Fabric or Hobby Lobby.


Fabric Giveaway
Enter our monthly fabric giveaway. Simply complete the tasks daily and you will be entered into the drawing. Winner will be randomly drawn on the first day of the month and notified via email