Easy Fat Quarters Storage Ideas To Keep Your Fabrics Organized
Fat quarters storage can be a bit like corralling colorful butterflies – they’re all over the place if you’re not careful. But don’t worry, getting your quilting materials in order is easier than you might think.
Imagine walking into your crafting space and finding each piece of fabric neatly folded and effortlessly visible, ready for your next project.
That dreamy level of organization isn’t just for show; it makes picking out materials for your next masterpiece quick and straightforward.
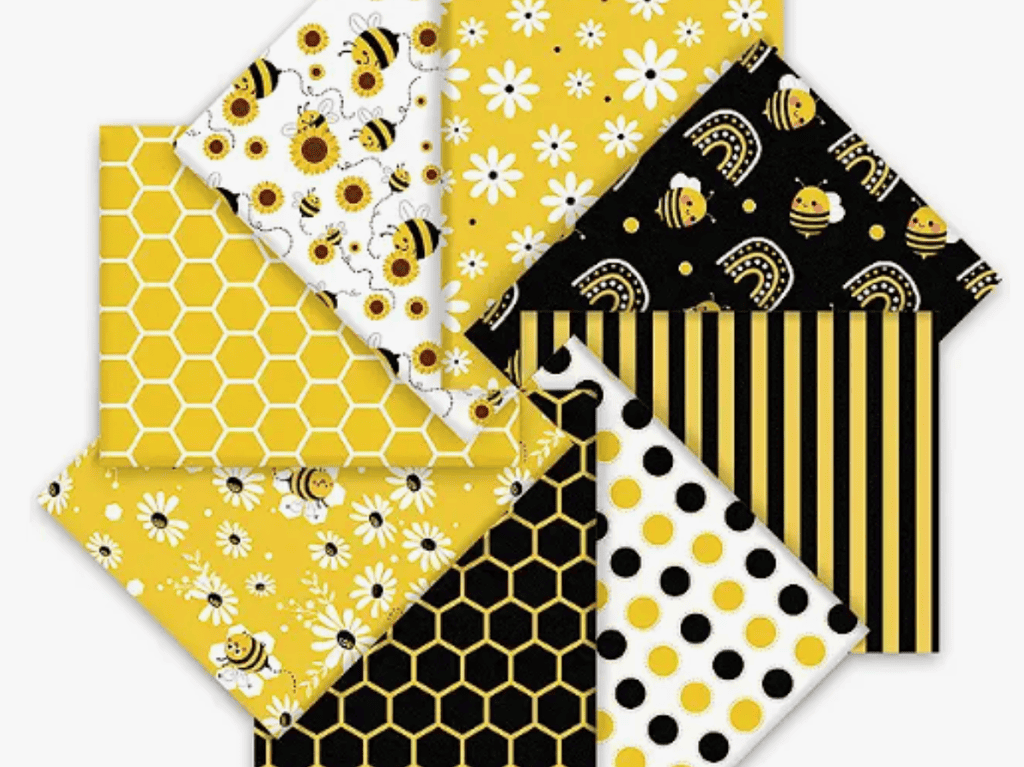
Here’s the thing about fat quarters – they’re the perfect size for so many projects, and since they come in such vibrant and varied patterns, it’s hard to resist picking up a few (or a few dozen) whenever you’re at the quilting store.
But without a solid storage strategy, they can turn your space into a bit of a muddle.
Whether you’re part of a quiltable team or flying solo, keeping your fat quarters tidy not only makes them easier to use but also helps preserve the fabric’s quality.
Understanding Fat Quarters
Before you dive into organizing your sewing room, let’s get clear on what a fat quarter is and its typical dimensions.
Defining a Fat Quarter
A fat quarter is a quarter-yard cut of fabric that is often preferred by quilters and crafters.
Unlike a standard quarter-yard cut which is typically 9 inches by the width of the fabric (usually around 42-44 inches), a fat quarter comes from cutting a half-yard of fabric in half again, but this time lengthwise. This creates a squarer piece of fabric, which is more versatile for certain projects.
Fat Quarter Dimensions
The dimensions of a fat quarter make it ideal for a wide range of small projects. Here’s a quick look at its size:
| Measurement | Size |
|---|---|
| Length | 18 inches |
| Width | 22 inches |
In comparison, a half yard measures 18 inches by the fabric’s full width (about 42-44 inches), giving you a longer, narrower piece.
When you’re building up your fabric stash, remember that fat quarter bundles can offer a variety of patterns and colors, giving you a curated collection to work with for your patchwork or appliqué projects.
Organizing Your Fabric Collection
If you are like me, you’ve got a fabulous array of fat quarters, and now you’re itching to get them in order.
A well-organized fabric collection not only makes your crafting easier, but also saves you money because we see what we have and don’t have to buy material.
Sorting by Color and Pattern
By Color:
- Classify by Hue:
Start by separating your fat quarters into color families: reds, blues, greens, etc. - Shade Variation:
Within each family, arrange from light to dark shades for a smooth gradient.
By Pattern:
- Identify Pattern Type:
Check for solids, florals, geometrics, etc., and group similarly patterned fabrics together. - Mix and Match:
Place contrasting patterns next to each other for easy mix-pairing when planning projects.
Folding Techniques for Fabric
Standard Fold:
- Square It Up:
Lay the fabric flat and fold it into a size that fits your storage space, aiming for a uniform look. - Smooth Edges:
Ensure the folds are crisp, using a ruler or card to press down the edges.
Display Fold:
- Front and Center:
Fold your most attractive fat quarters to showcase the pattern or color, making them the stars of your fabric shelf. - Accessible Fold:
Opt for a folding method that allows you to see and retrieve fabrics easily, especially handy if you’re working out of a perfectly-sized tote bag.
Fat Quarters Storage
When selecting how to store your fat quarters, think about protection and accessibility. You want your fabrics to stay clean and be easy to grab when inspiration strikes.
Types of Storage Containers
Storage containers are vital to keeping your fat quarters organized and dust-free. Consider these options:
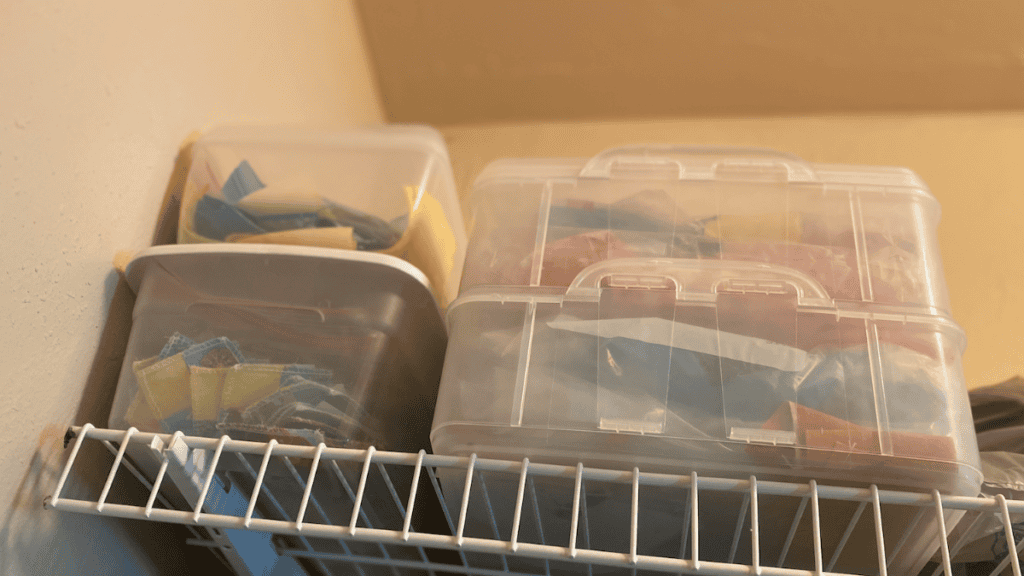
- Plastic Bins with Lids: Keeps fabric protected from moisture. Label them for quick identification.
- Comic Boards: Wrap fabric around these to create mini-bolts, then stand them up in a storage container like mini files for easy browsing.
- Wire Baskets: Great for viewing your fabrics at a glance and adding a chic look to your craft area.
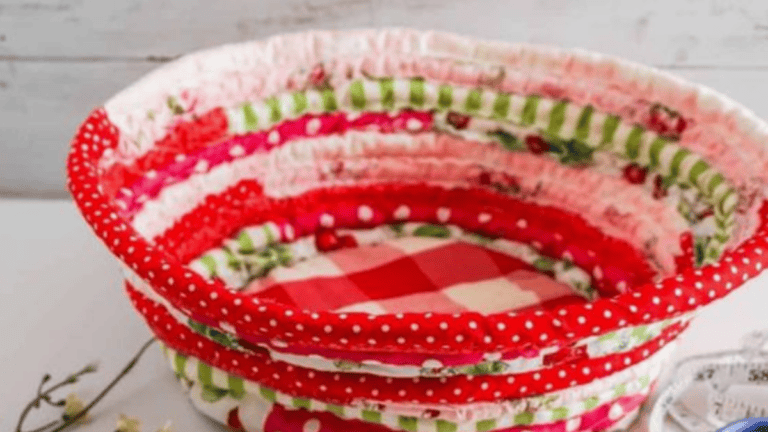
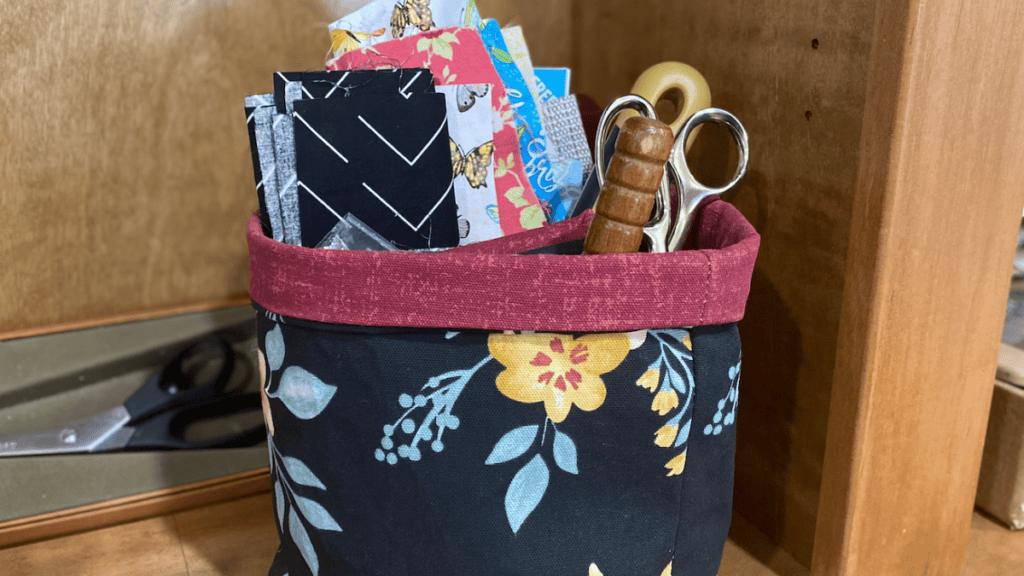
- Fabric Basket: Our fabric basket is a great alternative for fat quarters storage.
Creative Use of Household Items
Sometimes, the best storage solutions are ones you already have. Get creative:
- Salad Bins: Clear and stackable, these can make excellent makeshift drawers for small fabric pieces.
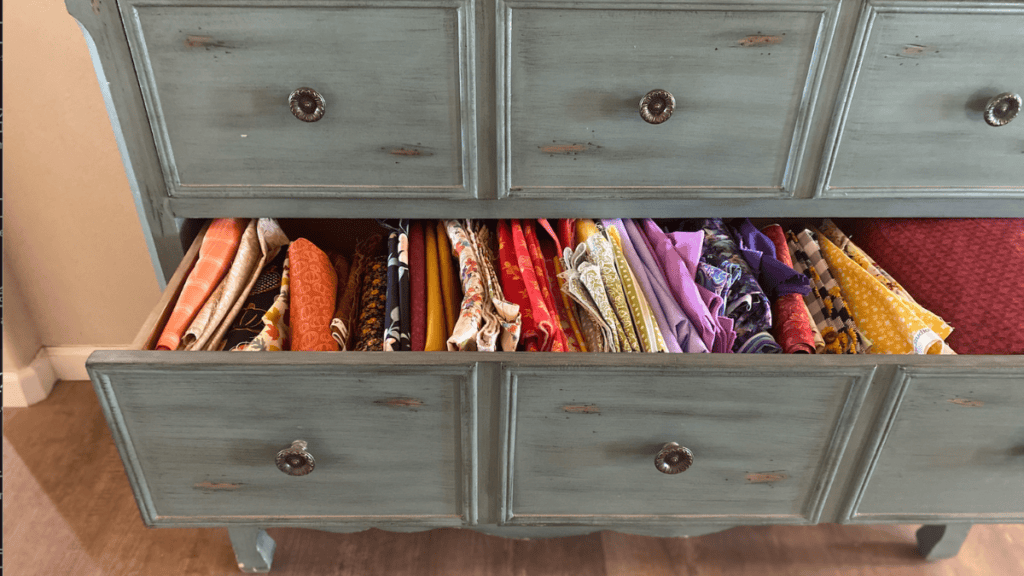
- Dresser Drawers: Your unused dresser can become a dedicated fabric chest, with neatly folded fat quarters in each drawer.
Fat Quarter-Specific Storage Ideas
Keeping your fat quarters organized not only tidies up your workspace but also protects your fabrics and makes them easy to find when inspiration strikes.
Custom Fat Quarter Storage Bags
You’ve probably seen ready-made versions, but making your Custom Fat Quarter Storage Bag allows you to tailor them to the perfect size.
Just grab some transparent vinyl from your local craft store, sew it up with a fabric border that pops, and voilà!
You’ve got a storage solution that not only fits your fat quarters snugly but also displays them clearly. These bags can easily stack or slip into a shelf, turning your fabric stash into a mini pack of visual treats.
Using Fabric Bins and Totes
For something more sturdy, a Fabric Bin and Tote are your go-to.
Here’s a pro tip: invest in ones with dividers to categorize your fat quarters by color, pattern, or project.
You get the perfect size to carry multiple fat quarters, and they’re portable, so you can take your materials with you on the go.
These bins fit neatly on shelves, in closets, or under your crafting table. Plus, they make it a breeze to pull out just what you need without rummaging through a pile.
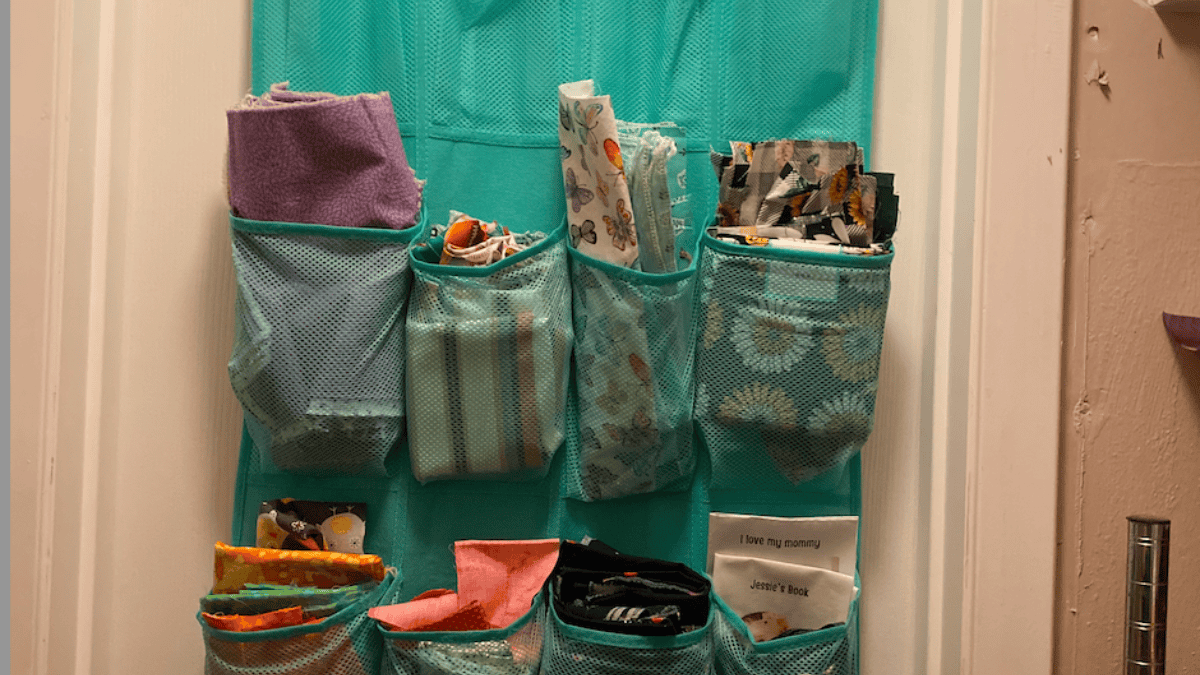
Storing Smaller Fabric Scraps
When you’re scrambling to find the right pattern in your fabric stash, those smaller scraps can be the trickiest. Let’s get your half yard cuts and elusive scraps sorted so you can spot what you need without the rummage.
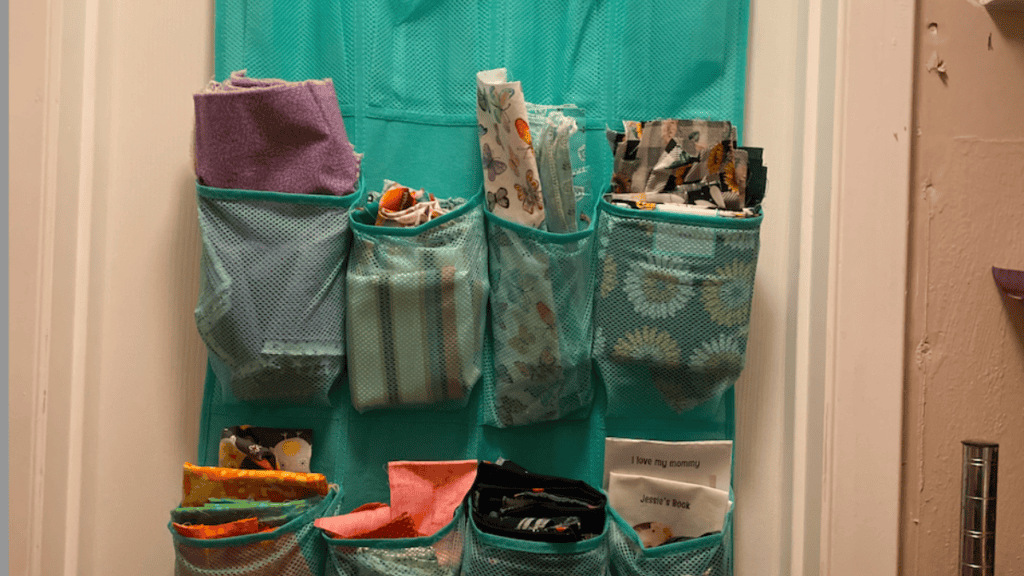
My favorite way to store small scraps is a hanging closet organizer. I organize them by colors and can find smaller pieces easily for projects without taking up a ton of space.
Managing Half Yard Cuts
Half yard cuts are substantial enough to store without folding into tiny pieces but small enough to get lost among larger fabrics.
- Roll and Stand: Roll them up around a cardboard tube and stand them in a box or basket. Arrange them like files so you can see each one.
- Flat Stack: If you prefer them flat, separate your half yard cuts with acid-free paper to prevent creasing and color bleed, stacking them on a dedicated shelf or in a drawer.
Organizing Elusive Scraps
Elusive scraps of fabric can be a creative goldmine but a storage nightmare if not tackled properly.
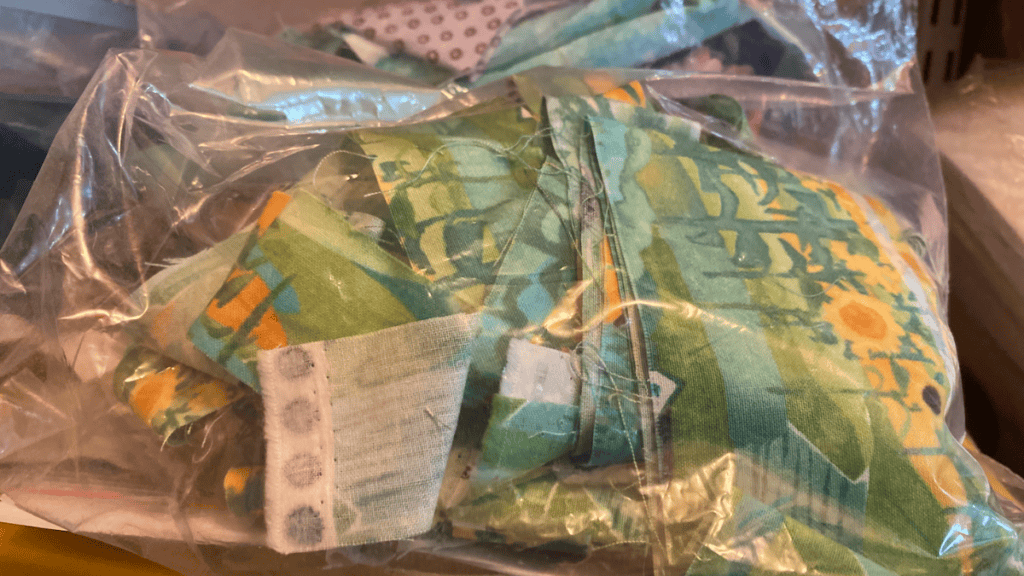
- Sort by Size or Color: Start by sorting scraps into clear ziplock bags, either by size or color. This allows you to see at a glance what’s available.
- Index Card Dividers: Use index card dividers in a storage box to segregate different types of scraps – it’s like a mini filing system.
- Magnetic Boards: Pin the scraps onto magnetic boards if they’re metallic or add a magnet to fabric scraps for quick on-the-wall storage and easy access for your next sewing project.
Using Labels and Tags
To effortlessly pinpoint every piece of fabric, adopt a label and tag system.
Use color-coded tags to categorize by shade, texture, or pattern.
Incorporate tags with clear, bold writing or print labels if your handwriting isn’t as legible.
Attach them directly onto your storage containers or shelves.
Don’t forget to share a snapshot of your well-organized space on social media—your quiltable team and fellow enthusiasts will appreciate the motivation!
Sample label and tag organization:
- Color Group: Reds
- Crimson, Scarlet, Cherry
- Texture Group: Cotton, Denim, Silk
- Pattern Group: Floral, Striped, Polka Dot
- Social Media Tag: #FatQuartersOrganization
Maintenance and Organization Tips
Keeping your fat quarters storage optimized requires consistent maintenance and smart organization strategies.
Let’s get right into how you can avoid a ton of clutter and make your crafting area more efficient.
Regular Cleanup Routines
Create a schedule for tidy-up sessions.
- Weekly Check: Every Sunday, spend a little time to refold and sort any fabrics you used during the week.
- Monthly Audit: Once a month, go through your fat quarters to reassess your stash. Remove pieces you no longer love or need.
- Seasonal Decluttering: Every new season, take an hour or two for a deeper clean. This helps in avoiding the accumulation of unwanted materials.
Avoiding Clutter
To prevent a buildup of clutter, implement a few clever organization methods:
- First In, First Out: Use your oldest fabrics for new projects to keep your collection fresh.
- Clear Storage Containers: Use transparent boxes so you can see exactly what you have and avoid over-purchasing.
- Labeling System: Clearly label each container based on color, theme, or another system that makes sense for you.
Organizing your fat quarters effectively will save you time in the long run and make your crafting more enjoyable.
Final Thoughts on Fabric Storage
You’ve built up a pretty impressive lot of fat quarters, and now they’re neatly tucked away, ready for when inspiration strikes. Whether you’ve opted for color-coded bins, transparent drawers, or custom shelving, your fabric is now as much a part of your decor as it is a functional stash for your sewing projects.
Additional Resources
Recommended Reading
- Quilt It with Love: The Project Linus Story
- Learn how to efficiently organize fabric and give back through quilting projects.
Online Communities
- Quiltable Team Forums
- Engage with the quilting community for exclusive tips and discussions on fat quarter storage.
- Reddit: r/quilting
- Browse through threads related to fabric storage or ask for advice on organizing your fat quarters.
Fabric Giveaway
Enter our monthly fabric giveaway. Simply complete the tasks daily and you will be entered into the drawing. Winner will be randomly drawn on the first day of the month and notified via email