Easy Microwave Potato Bag in 30 minutes-free PDF Pattern
A microwave potato bag is so easy to make and makes potatoes or sweet potatoes so delicious in just a few minutes.
For a fraction of the cost and about 15 minutes of your time on your sewing machine, you can create a potato bag that will cook up to 4 potatoes or sweet potatoes or even steam veggies.
We have the free tutorial in our sewing library and a guide on how long to cook potatoes in the microwave, and other veggies you can steam in your microwave potato bag.
Supplies you need for our Microwave potato bag
- Sewing machine
- Scissors
- Rotary cutter
- Fabric Cutting Mat
- Quilt ruler
- 1 piece of cotton fabric for outside main fabric 10×22″
- 1 piece of cotton fabric for lining, 10×22″
- 1 piece of cotton batting 10×22″
- Cotton thread due to the heat
- Sewing pins
- Sewing Clips
- Fabric Marking Pens
- Bone folder
- Walking foot
- Iron
- Ironing Board
- Tailors chalk
Video tutorial for Microwave Potato bag
Here’s the video tutorial.
Directions for Microwave potato bag
Start by carefully lay the batting on top of the wrong side of the lining fabric. Make sure that the edges of the batting are aligned with the edges of the fabric. Smooth out any wrinkles or bubbles in the batting to ensure that it lies flat against the fabric
To do this, you want to place your outside fabric and lining fabric right sides together, with your batting on the bottom.
This means that the right sides of both fabrics will be facing each other, while the wrong side of the lining fabric and the batting will be facing up.
It’s important to note that the right side of a fabric is typically the side with the print or pattern, or the smoother and more finished-looking side.
On the other hand, the wrong side of a fabric is usually the side with more texture, less sheen, or less vibrancy.
Once you’ve aligned the edges of your fabrics and batting, you can pin the layers together, taking care to pin through all three layers to keep them from shifting during sewing. When you’re done pinning, you’re ready to sew your project.
You would like to sew around your raw edges using a 1/4″ seam allowance and leave a 1-inch opening on one of your long times, so you can turn your inside pieces after sewing.
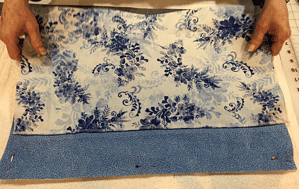
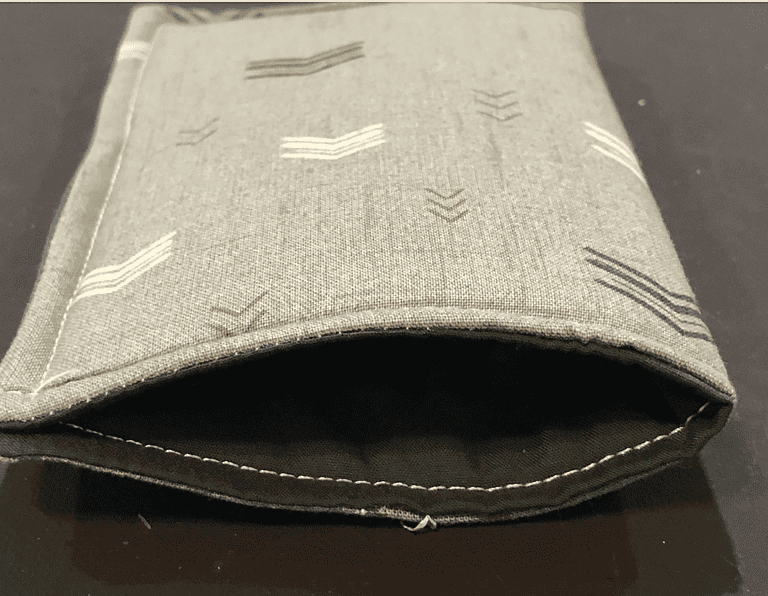
Once you have finished sewing your project, it’s important to give it a finished and polished look by folding up the edges.
The size of the fold can vary depending on the project, but for this specific instruction, the bottom edge should be folded up 5.5 inches while the top edge should be folded up 4.5 inches.
To fold up the edges, start by measuring the appropriate distance from the edge of the fabric and marking it with a fabric pen or tailor’s chalk.
Use a ruler or measuring tape to ensure that the fold is straight and even along the entire edge of the fabric.
Once you have marked the fabric, fold it up along the line that you have created. You may want to use sewing clips or pins to hold the fold in place while you work.
Take care to make sure that the fold is even and straight, and that it covers the raw edge of the fabric.

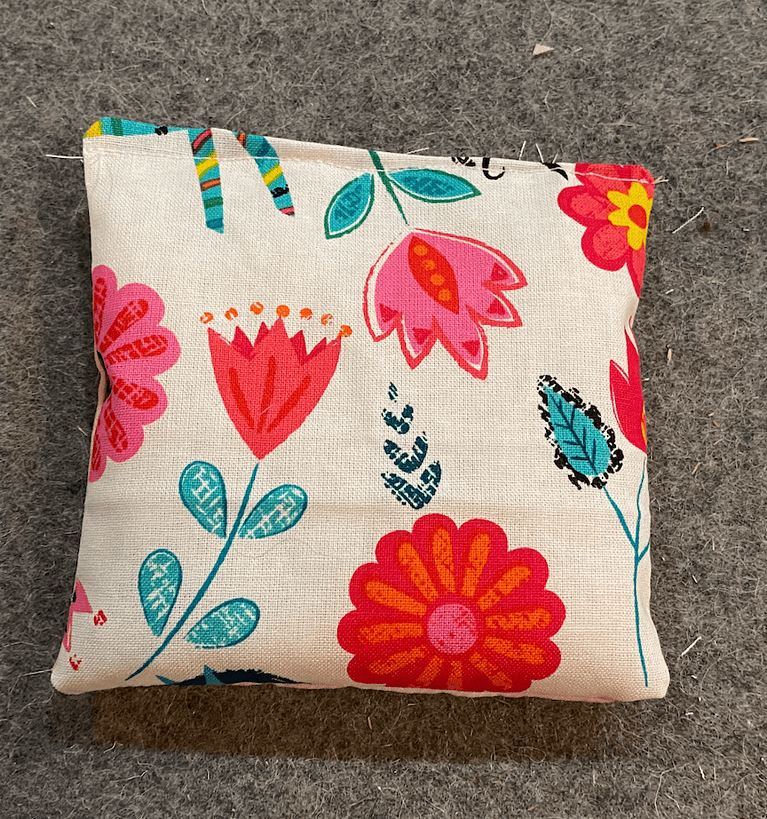
Photo Credit: Nanansewing.com
After you have aligned your fabric pieces and batting, the next step is to clip them in place and sew down the long sides in a straight line using a 1/4″ seam allowance.
Clipping the fabric will help to keep the layers from shifting while you sew, ensuring that you get a straight seam and a clean finished product.
To clip your fabric, use sewing clips or pins to hold the layers in place. Be sure to space your clips evenly along the edge of the fabric, taking care not to clip through the batting layer.
Once you have clipped your fabric, it’s time to sew it together. Sewing through multiple layers of fabric and batting can be challenging, but using the correct foot on your sewing machine can make the process much easier.
In this case, you should use a walking foot, which is designed to help feed bulky or layered fabrics through the machine evenly.
When you’re ready to sew, start at one end of your project and sew down the long side using a 1/4″ seam allowance. Be sure to backstitch at the beginning and end of your seam to secure it in place.
As you sew, take care to keep your seam straight and even, and to sew through all layers of fabric and batting. Depending on the thickness of your project, you may need to go slowly and gently guide the fabric through the machine to avoid jamming or breaking your needle.
If you’re interested in trying out new sewing projects, it’s important to have access to a variety of free pattern and resources.
One great place to find free patterns is our sewing library, which offers a wide range of patterns for different skill levels and project types.
How long do I cook a potato in the microwave?
That depends on the size of your potatoes and the watts of your microwave. We always start with 3–4 minutes and turn the potatoes.
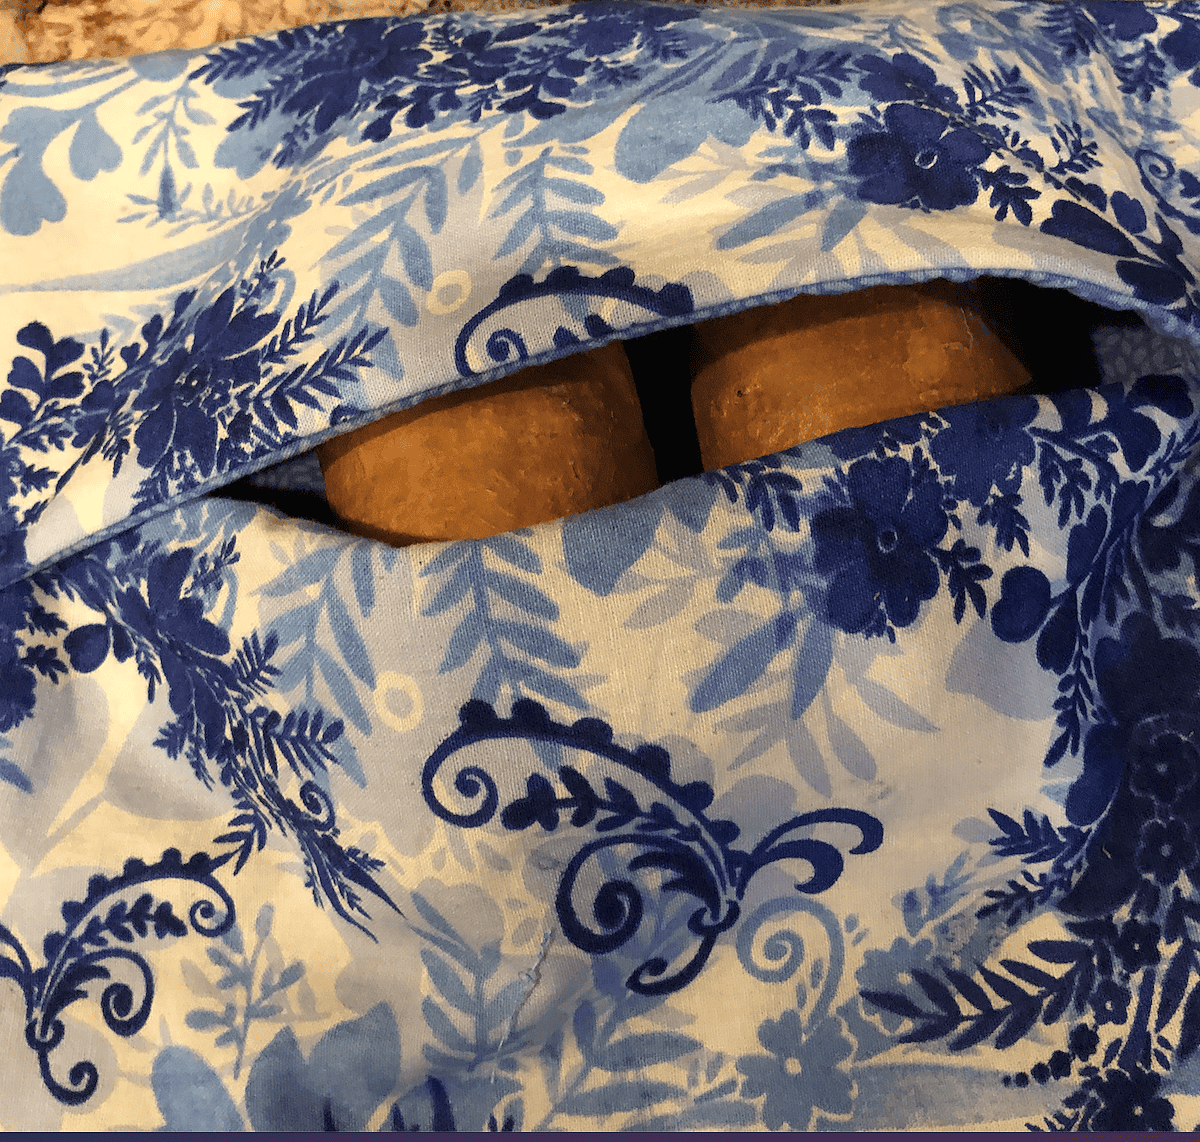
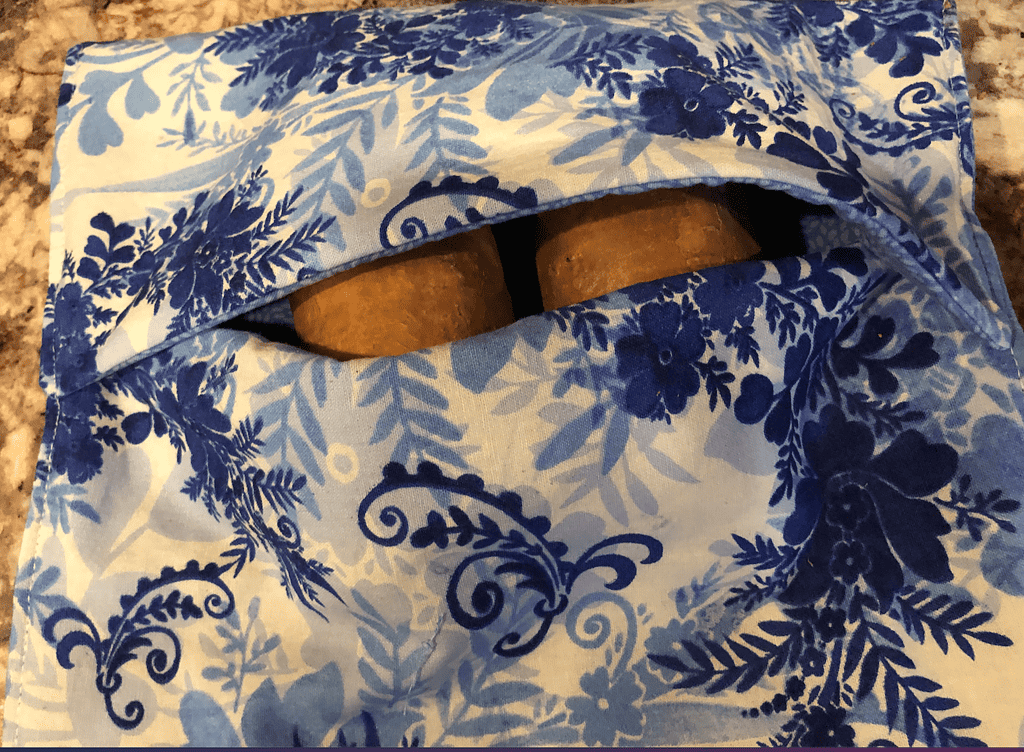
The microwave potato bag will hold 1-4 medium raw potatoes. Simply add your potatoes and put some at the top of the bag and some at the bottom of the bag to even out the cooking. We also recommend that you use a damp paper towel around each potato to help with moistness.
You can also cook sweet potatoes, corn on the cob, asparagus, and even apples in your microwave potato bag. Potatoes are one of our favorites dishes, and we love using our bag to make a wonderful baked potato in a very short cooking time.
Cooking potatoes in the microwave is an easy way to have delicious potatoes in no time
How to care for your Microwave potato bag
You can machine wash your potato bag, You DON’T want to use starch on these cotton materials because it can seep into your food.
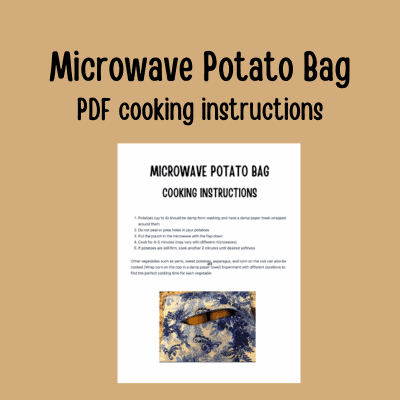
Cooking Instructions with Microwave Potato Bag
We have a printable sheet in our sewing tutorial library you can use for yourself or give to someone if you give it as a gift or sell on Etsy or a craft show.
- Potatoes (up to 4) should be damp from washing and have a damp paper towel wrapped around them
- Do not peel or poke holes in your potatoes
- Put the pouch in the microwave with the flap down
- Cook for 4-5 minutes (may vary with different microwaves)
- If potatoes are still firm, cook another 2 minutes until desired softness
Other vegetables such as yams, sweet potatoes, asparagus, and corn on the cob can also be cooked (Wrap corn on the cop in a damp paper towel) Experiment with different durations to find the perfect cooking time for each vegetable
PS These make a great gift for Christmas, birthdays, and Mother’s Day, and they sell really well at craft shows and on Etsy. It is a great project that is easy to make and practice to use from the first time you make it.
We would love to know if you made the potato bag in the comments, and don’t forget to save the Pinterest pin, so you can find it the next time you are looking for the tutorial.
Easy Sewing Patterns
Here are our top 5 easy sewing patterns
Fabric Giveaway
Enter our monthly fabric giveaway. Simply complete the tasks daily and you will be entered into the drawing. Winner will be randomly drawn on the first day of the month and notified via email


2 Comments