Easy 10-Minute Easter Table Runner Perfect Beginner Sewing
With Easter just around the corner, it’s the perfect time to add a festive touch to your home decor. Today you will find a simple 10-minute Easter table runner.
If you’re a beginner at sewing or simply looking for a quick and easy project, you’re in for a treat.
Today, we’re diving into the world of DIY with a delightful 10-minute Easter table runner that’s perfect for sewers of all skill levels.
Whether you’re a novice or a seasoned pro, this project is a fantastic way to infuse your home with Easter charm.
Plus, you have the option to machine quilt it for a polished look or keep it simple for that charming homemade feel.
So, grab your sewing supplies and get ready to create a beautiful Easter centerpiece for your table in no time!
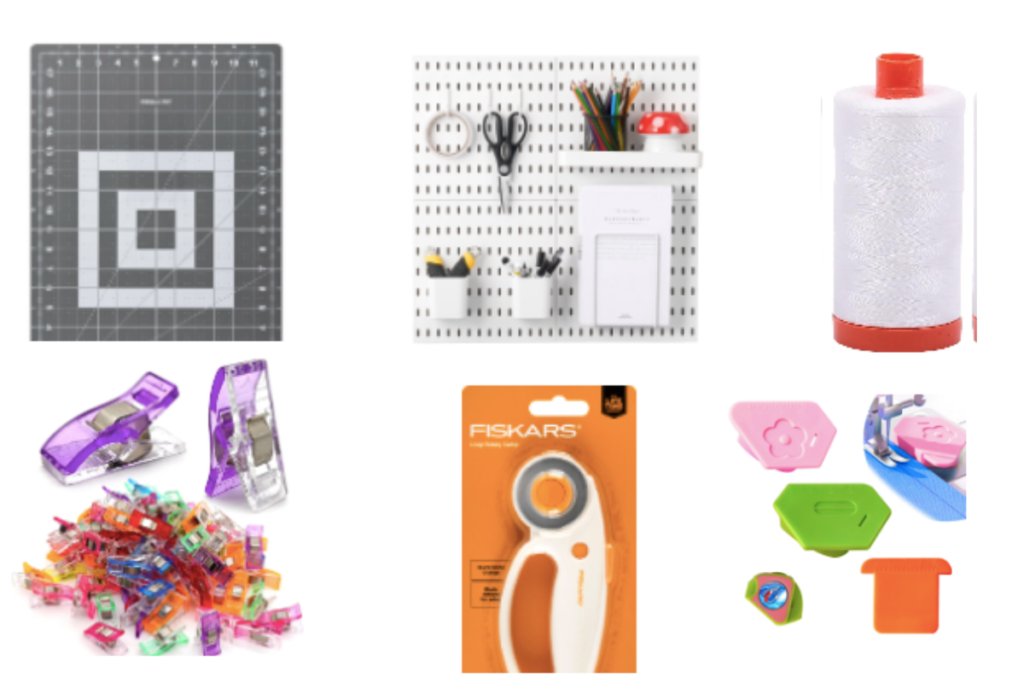
Sewing Supplies:
Cut Out Fabric
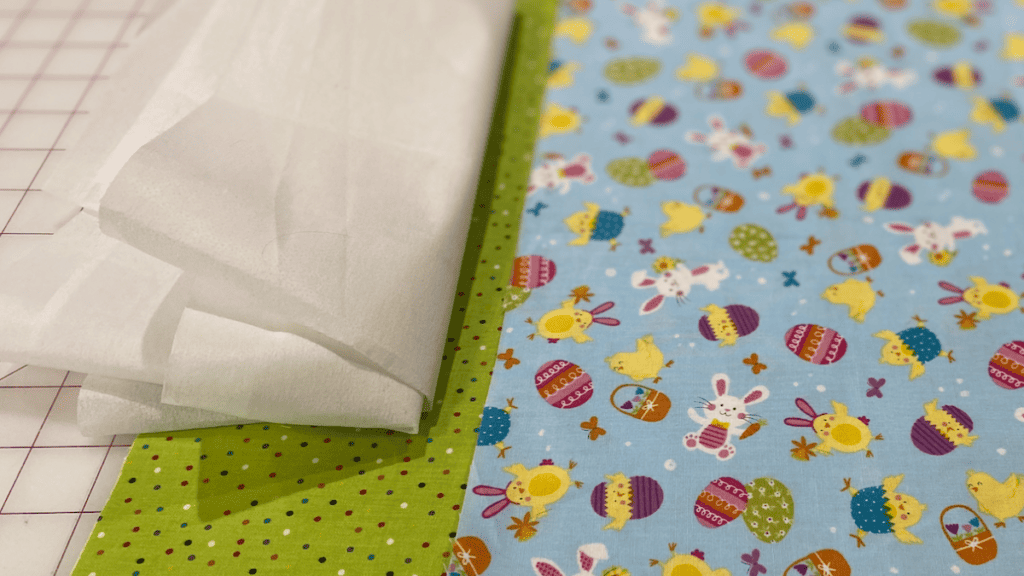
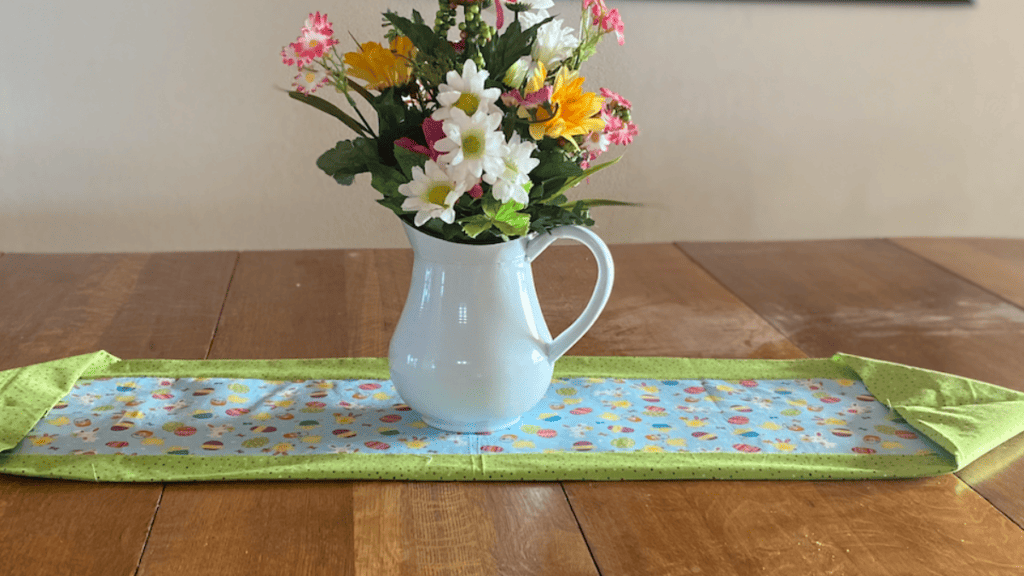
You want to start by cutting your center piece 9″ x 44″ or longer if you have a large dining table.
For your border you need a piece of fabric cut 18″ x 44″ or of course, you can make it longer. Just a note, if you need it longer you will have to sew pieces together or buy longer fabric. Most WOF is 44 or 45″
Next, cut a piece of medium-weight interfacing or quilt batting the same size as your center fabric piece and, following the instructions that came with your interfacing, attach it to your centerpiece.
If using batting, we love using Quilt basting glue to hold it in place, but in this project, we used fusible interfacing.
Sew The First Piece Together
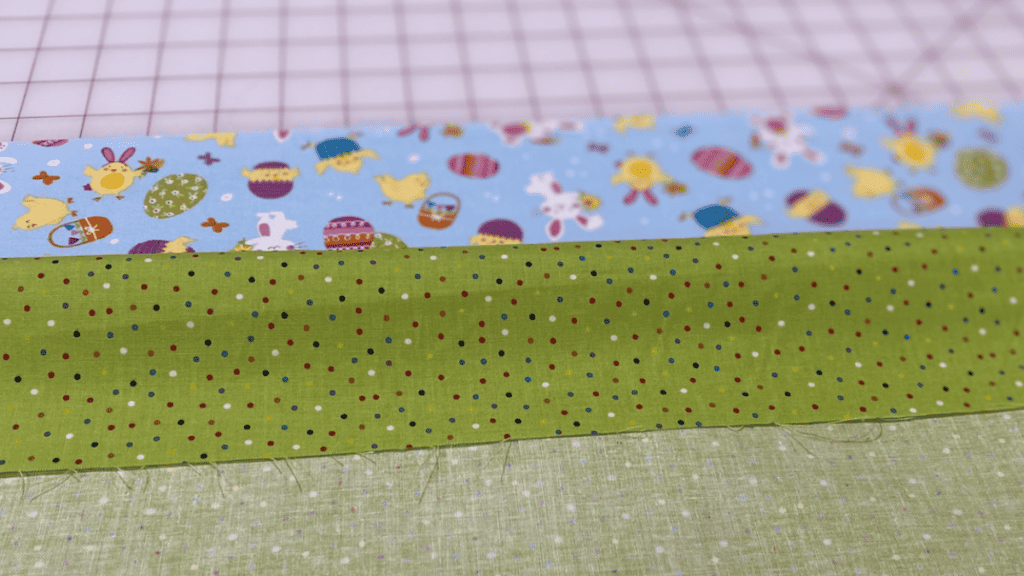
With your fabric right sides together, you want to sew along one of the long sides of your center piece of fabric to one edge of your border using a 1/4″ seam. I always use my magnetic seam guide to keep my seams straight.
When finished sewing, press your seams toward the piece that will become the border (in this case the green fabric).
Create Your Border
Now you want to fold your wider piece of fabric on top of the center making sure you keep right sides together (we are folding the green onto our Easter fabric) .
We are holding it in place with clips, but you could also use sewing pins. Along the longer side, you will want to sew 1/4″ seam allowance.
When finished, head over to your ironing board. Iron all your seams flat so that they will turn easily.
Turn Fabric Right Sides Out
You want an equal amount of fabric on both sides of your centerpiece. This doesn’t have to be perfect, but it needs to look similar.
Use your tape measure to check your measurements. You can either pin and then iron or simply iron while you are measuring.
Clean up your edges by using your rotary cutter and evening out your edges. This will help in the next step.
Create Crisp Points
The points are easy to make. Simply turn your table runner over (should be a solid color and your back). Bring your right sides together. You should see the center pieces on both sides.
Next, sew 1/4″ seam allowance on both ends. Use your scissors and trim the top edge slightly, making sure you don’t snip any threads.
Create the wrong side of your point by turning the fabric inward (you should see your seam). You will want to iron the seam open to help it lie flat.
After you iron your seams, you will want to flip the point again so that the background fabric shows, as you can see below.

You may need to iron the piece down to hold it into place. After that you will want to sew across the bottom of the point to hold it in place.
When you finish sewing both sides then you will want to finish your Easter table runner by either machine quilting, using decorative stitches on your machine, or do a simple stitch in the ditch along the stitch between the centerpiece and border.
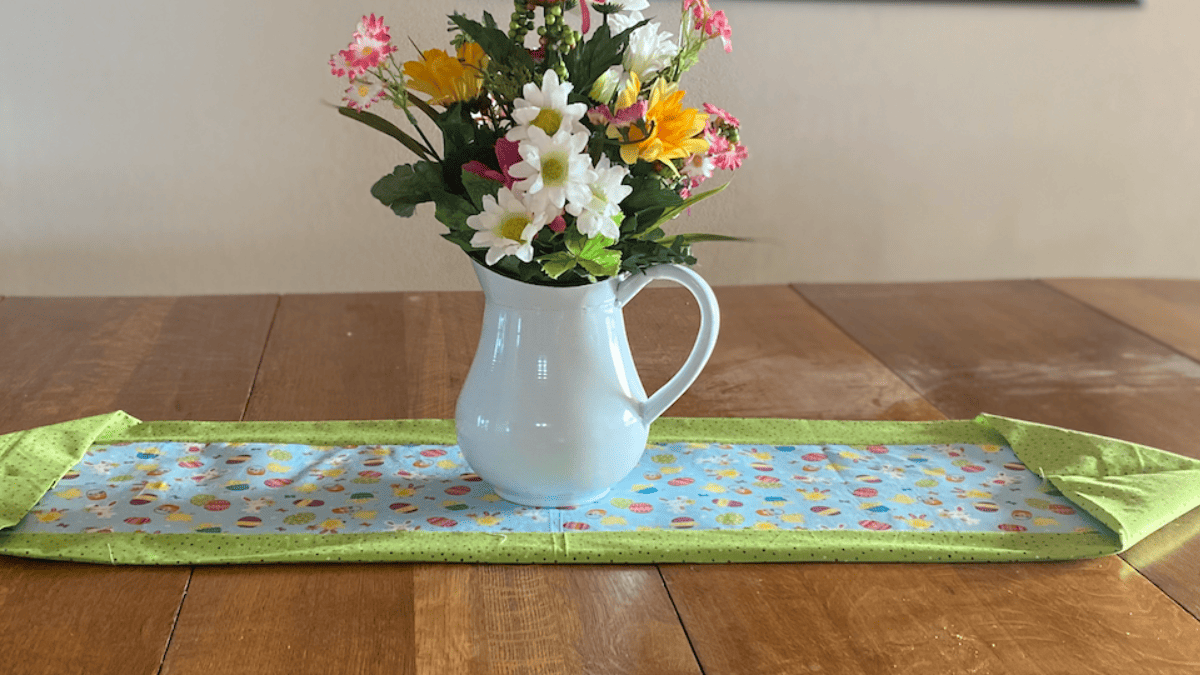
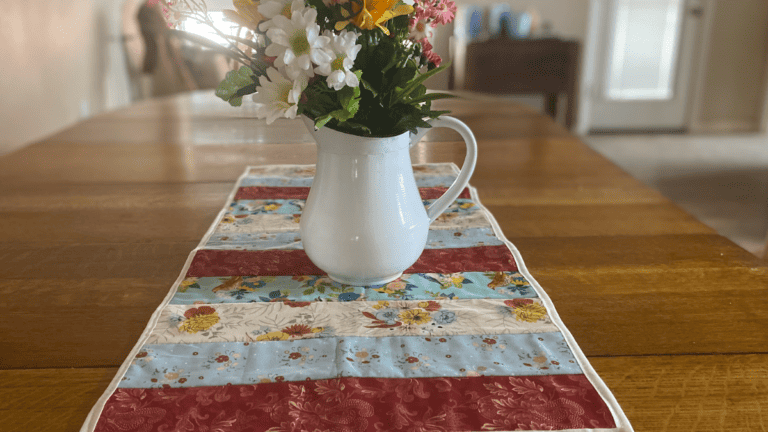
It’s really that simple to make an Easter table runner. Add to your table and add a tiered tray or a pitcher with your favorite spring flowers. I choose to add a pitcher and some flowers to mine.
Easter Sewing Projects
See all Easter Sewing Projects
We have an entire library of Easter sewing projects from baskets to decorations. Easy sewing projects you can finish in a weekend. Here are a few of our favorites:
Fabric Giveaway
Enter our monthly fabric giveaway. Simply complete the tasks daily and you will be entered into the drawing. Winner will be randomly drawn on the first day of the month and notified via email


3 Comments