Easy DIY jar opener gripper
Opening jars can be daunting, especially if you have weak hands, weak grip strength, or arthritic hands. Fortunately, there’s an easy solution to this problem – a DIY jar opener gripper to open your jar of pickles.
In this sewing tutorial, I’ll guide you through the process of creating your very own rubber jar opener gripper using just a few simple materials.
Whether you’re a beginner or an experienced seamstress, this project is sure to be a useful addition to your household, and unlike electric jar, openers fits nicely in a kitchen drawer. So, let’s get started!
Supplies needed for DIY Jar Opener Gripper
- Sewing machine
- Scissors
- Rubber shelf liner (helps you have a good grip)
- Beginner’s sewing kit
- White thread
- Cotton fabric
- Bone folder to make edges crisp
- Sewing Pins
- Sewing Clips
- Rotary cutter
- Fabric Cutting Mat
- Fabric Marking Pens
- Iron
- Ironing Board
Jar opener gripper instructions
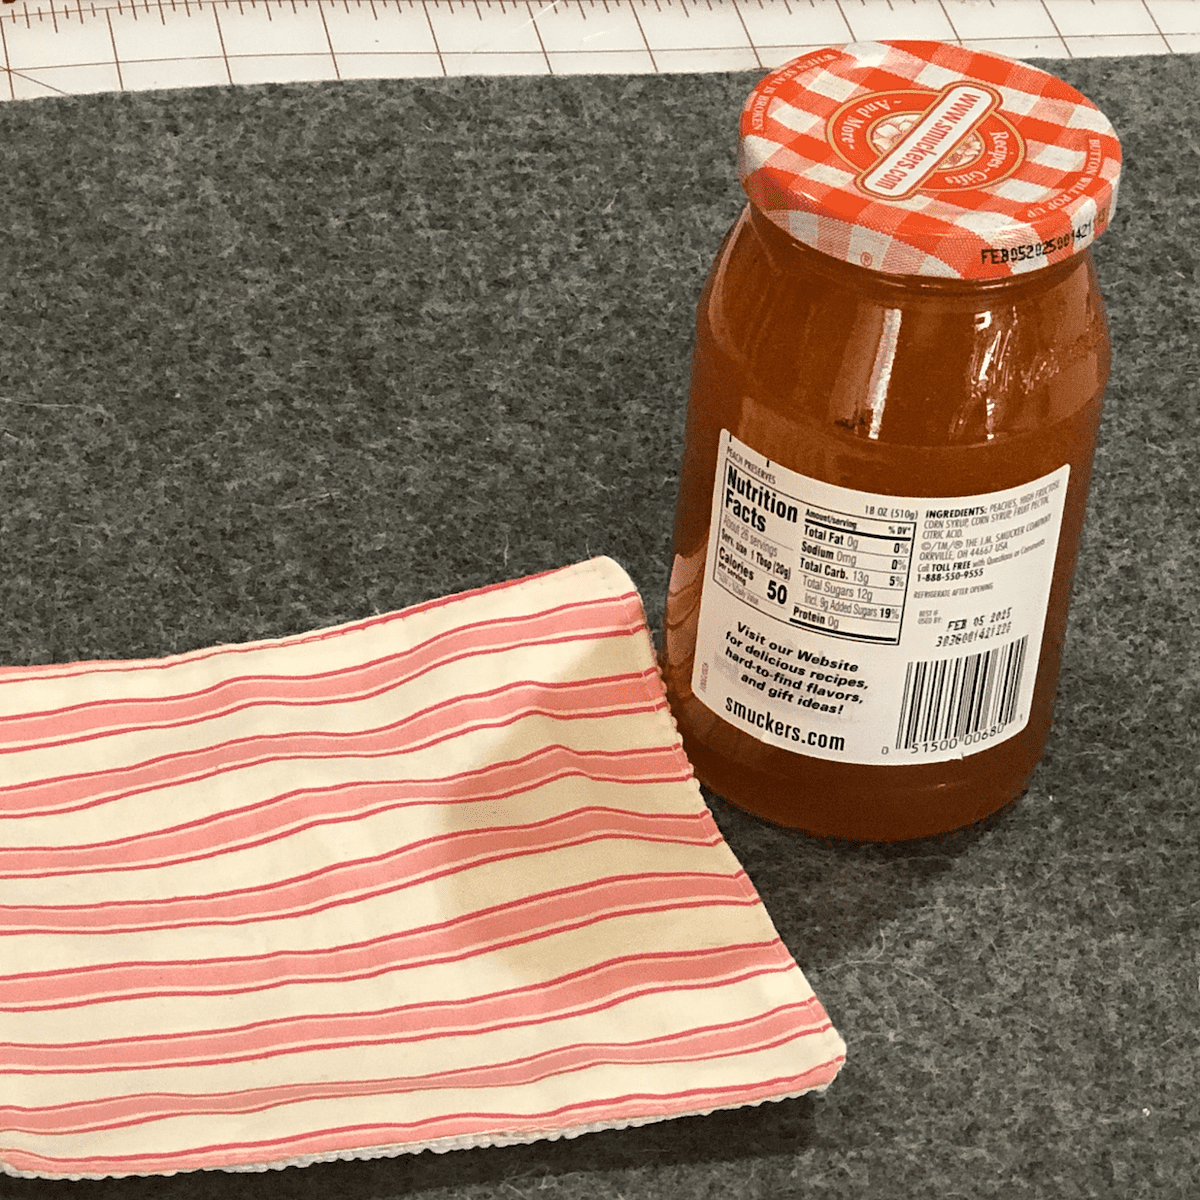
To begin, prepare the materials for the jar opener gripper by cutting three identical squares – two pieces of regular fabric and one piece of a rubber fabric.
I recommend making them 7 x 7 inches in size. If you want different sizes, simply modify the inches. Additionally, cut a fabric strip for the loop (if you want to add a loop), approximately 7 inches long and 1.75 inches wide.
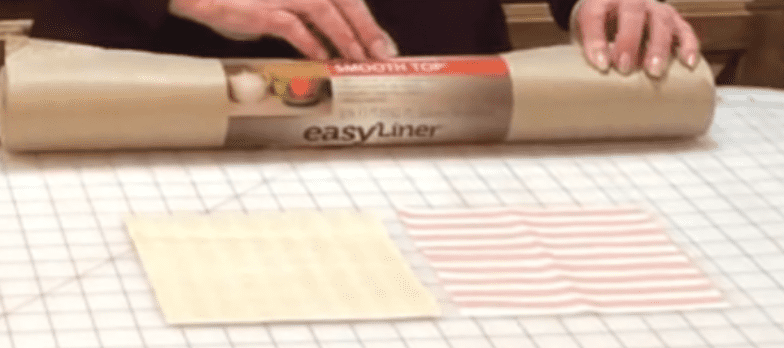
It’s important to note that when cutting the rubber fabric, avoid using your fabric scissors, as it’s a great way for them to become dull. Instead, the best option is to use a pair of scissors that you don’t mind making blunt.
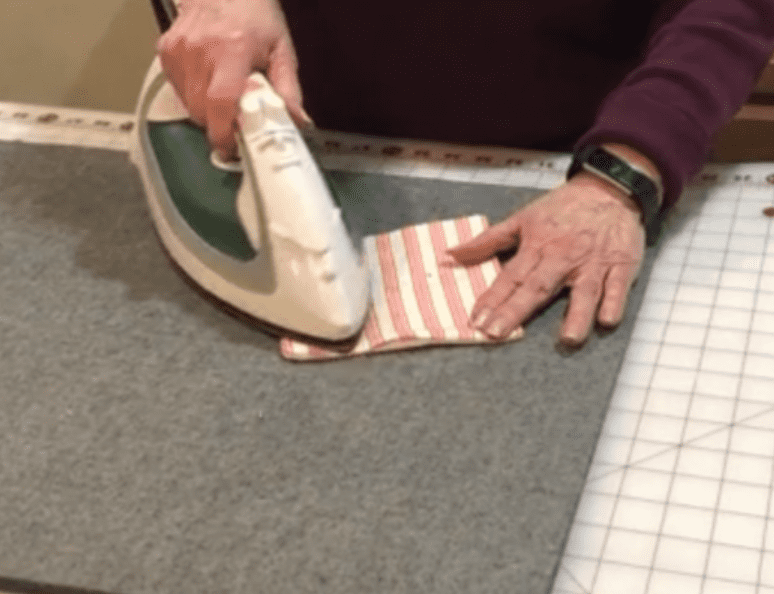
To create the handle, start by folding the fabric strip in half lengthwise and pressing it with an iron. Then, unfold it and fold both edges towards the middle crease you just created.
Press it once again, and fold it in half so that the bottom fold meets the top fold. After giving it one final press, your handle is ready to be stitched. Sew along the long edge to secure the folds in place
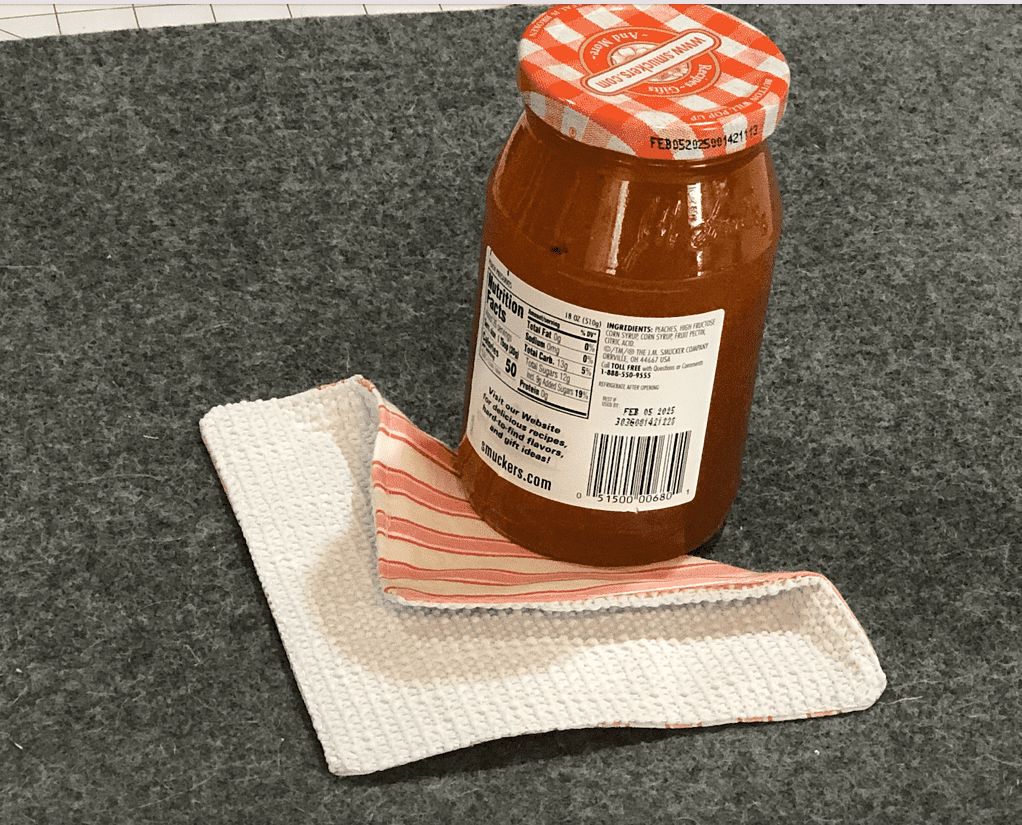
To begin assembling the jar opener gripper, place one piece of fabric on your workspace with right sides facing up. Then, place the rubber piece on top, ensuring that its wrong side faces towards the fabric, and align the edges.
Fold the fabric strip loop in half and position it on a corner so that the folded end faces the inside of the sheet.
Next, place the other piece of fabric on top of everything, making sure its right side faces toward the rubber. You can either pin everything in place or use sewing clips to secure it
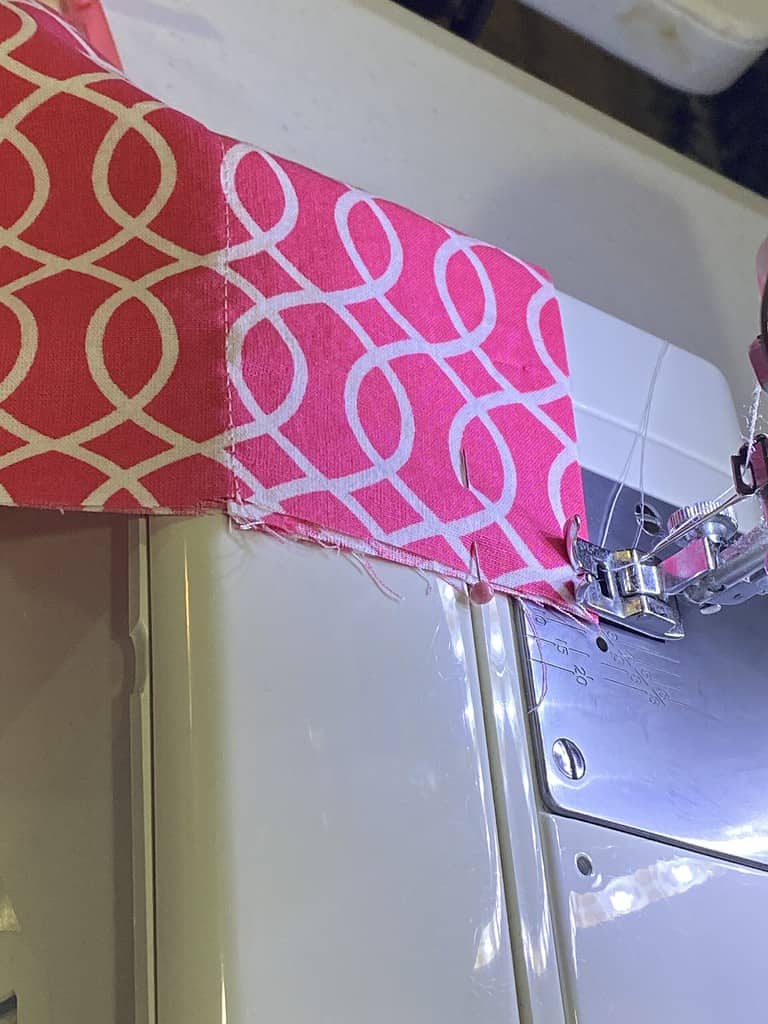
Using a sewing machine, stitch around the edges of the fabrics, pivoting as you reach the corners. I used a quarter-inch seam allowance.
Remember to leave a small opening of approximately two or three inches unstitched. This opening is necessary for turning the jar opener gripper inside out.
Be sure to make the opening wide enough to avoid difficulties pulling the rubber through it. Before you do that, clip all corners and trim the bulk of the seam allowance.
Before proceeding, clip all corners and trim the excess seam allowance to reduce bulk.To turn the jar opener gripper inside out, use the opening that was left earlier.
This can be a bit challenging because there are multiple layers inside but don’t worry. Simply locate the layer where the fabric strip is and pull it out.
Once you have the right layer out, use your bone folder, scissors, a chopstick, or the unsharpened end of a pencil to push the corners out. This will help the jar opener gripper to take shape.
To make the edges of the jar opener gripper lie flat, you can either use your fingers to press them or use an iron. However, when ironing, make sure to only iron over the fabric side and avoid the rubber side. If you want to be extra careful, use a piece of ironing paper to protect the rubber.
Once you’ve ironed all the edges, including the corners, reach the opening, and fold it in a quarter of an inch. Press the fold in place and tuck it in. Finally, use pins to secure it in place.
Before closing the opening, insert the magnet through it and position it in the center of the jar opener gripper. Next, stitch around all edges, making sure to go over the opening as well.
Pivot as you reach the corners and sew at an angle when you get to the corner where the fabric strip is. To reinforce the stitches and provide the jar opener with added durability, use backstitching.
If you used a quarter-inch allowance for your previous stitching, reduce it slightly this time to ensure that all edges, including the folded opening, are caught well.
As you sew, ensure that the magnet is kept away from the machine’s plate to prevent it from sticking and interfering with your work.
Don’t forget to share your DIY jar opener gripper on social media. Would love for you to tag me in your post at Nana Sews.
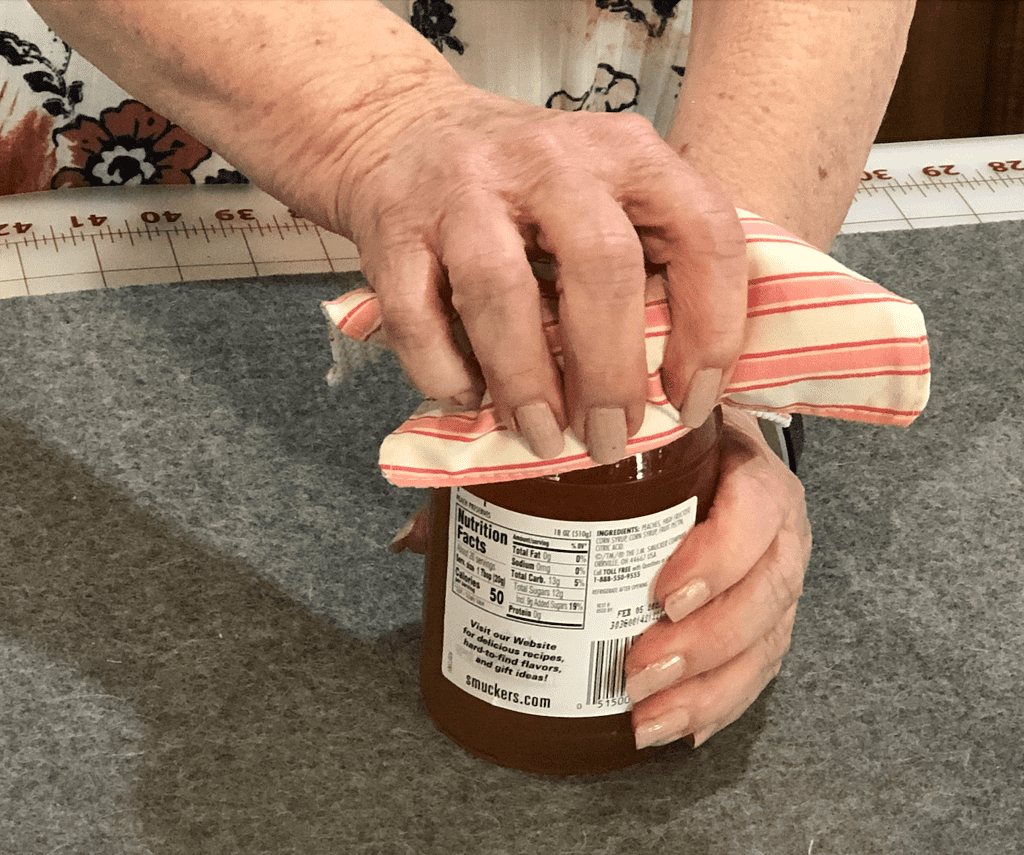
Congrats, you made a handheld jar opener that can be used to open lids on any pesky jar or water bottle. No more manual labor, using a wooden spoon, hot water, or other kitchen aids to open your favorite small jam jars or tomato sauce jar.
This is such a great idea for handmade gifts for anyone who has a hard time opening a simple jar or water bottle using a person’s favorite colors. It’s a handy tool and way less costly than an automatic jar opener.
Time to tell that stubborn jar lid to take a hike. Tight lids will now be a thing of the past.
Other Sewing Resources:
If you are new to sewing, we recommend that you start by learning the basics and starting with a simple project like the potholder.
Start with:
Fabric Giveaway
Enter our monthly fabric giveaway. Simply complete the tasks daily and you will be entered into the drawing. Winner will be randomly drawn on the first day of the month and notified via email


I have a question about something. What is the purpose of the magnet? Just trying to figure that out.
You can put a magnet in it if you want to hang it from the fridge or dishwasher for easy access.
I layered it exactly as you stated but my loop is coming out under the rubber when turned right side out. I’m using 2 pieces of fabric to have one pretty on the outside and 1 plain on the inside in between the rubber and pretty fabric. help please.
I don’t think it will work that way. The rubber part is what actually opens the jars. Can you email me a photo and I can look and see if I can see a solution.